|
[
HOME
]
|
|
Model Information
|
|
|
|
VW Service
|
|
|
|
Winnebago Service
|
|
|
|
Tours & Pictures
|
|
|
|
►
Related
Links
|
| |
NOTE - The following mod was originally submitted to the
Tech Rally group on
Yahoo by Ray Wilkes
in August 2004. PDF (254KB) In function it is very similar to the
Exterior Power Inlet but without
the necessity of cutting a hole in the wall of the vehicle.
Simple Shoreline Conversion
This shoreline conversion, which installs a male and female
connector in the hitch area, provides a simple method of connecting to a campsite
power outlet -- without having to open the rear “outback” door or without pulling
the electric shoreline through the outback floor. This arrangement retains the
original assurance that the campsite power and the generator power will never
both be hooked up at the same time, protecting both the generator and the vehicle
115volt electrical system.
 |
| Click to view full size |
APPROX. MODIFICATION TIME: 2 hours
PARTS LIST:Prices do not include sales tax.
| generator output box |
n/a |
| converter 30 amp Male / 20 amp Female |
$4 |
| extension cord 15 amp. #14/3 wire, 6 ft. |
$5 |
| existing power cord |
n/a |
| 30 amp male with 18”+ pigtail |
$10 |
| 30 amp slice [two] 3 crimp #10 sleeves @.$16 each x 6 wires
|
$3 |
| 30 amp Female with 18” + pigtail |
$10 |
| converter 30 amp Female / 20 amp Male |
$5 |
| misc. tape and ties |
$2 |
| APPROX. TOTAL COST OF PARTS |
$40 |
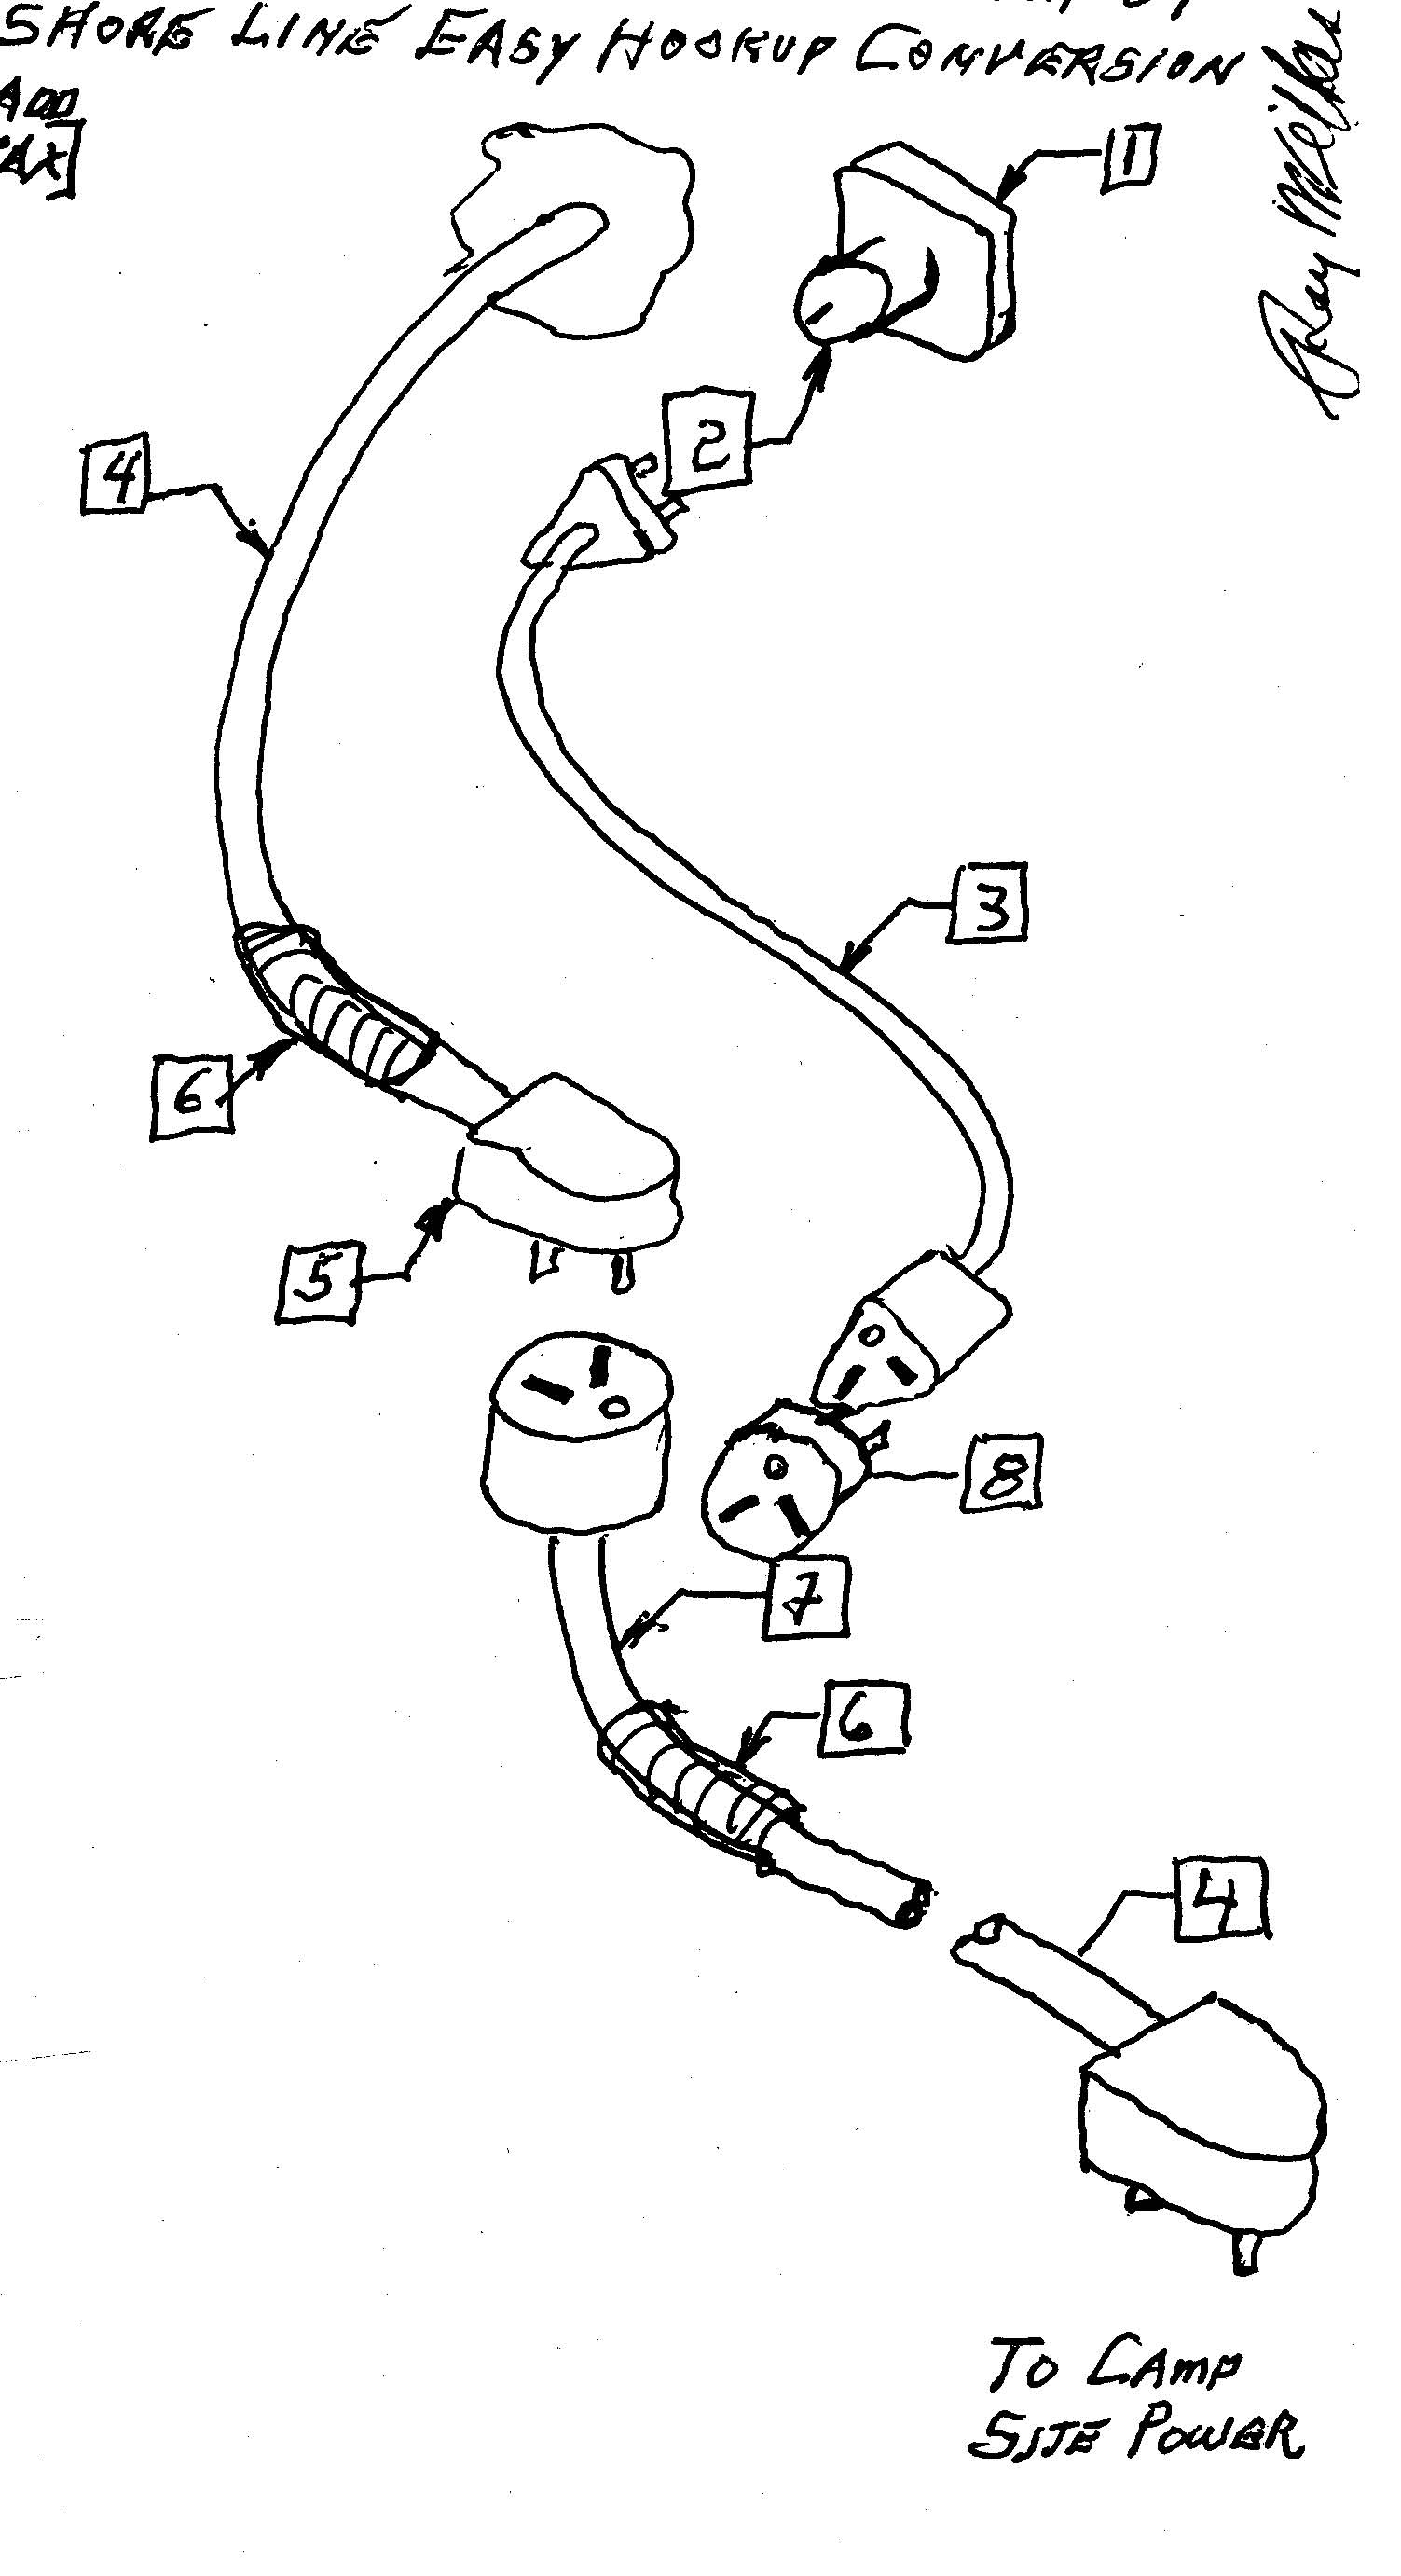
INSTRUCTIONS: (See Part List for diagram numbers.)
 |
| Click to view full size |
-
Pull out the original shore line to maximum length, and
cut it in two at a point 12” beyond the hitch.
-
Splice the Male connection to the original short part of
the shoreline that will stay connected to the vehicle.
-
Splice the female fitting to the cut end of the longer
section of the original shore line.
-
Plug an adapter into the Generator Outlet electrical box.
-
Plug A 6 ft. long extension cord into this adapter and
bring the other end down to the hitch area.
-
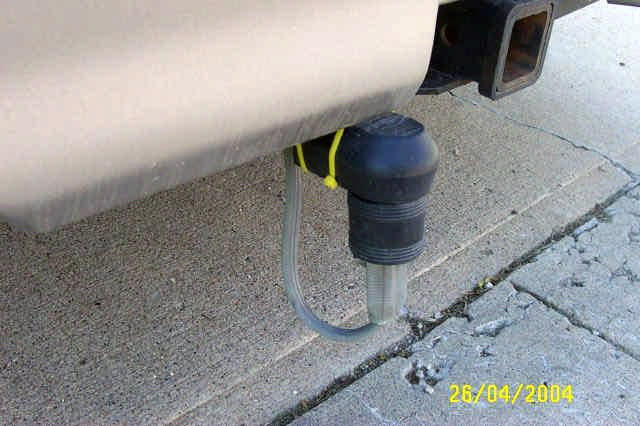
Drill four small holes and secure the male end of the shore
line to the underside of the plastic bumper, using plastic tie straps.
-
Use other plastic tie straps, up under the bumper & frame
to secure the electric lines to prevent them from contacting hot parts, like
the muffler, and keep them from dragging."
 |
| Click to view full size |
Additional Modifications:
|