|
[ HOME ]
|
|
Model Information
|
|
|
|
VW Service
|
|
|
|
Winnebago Service
|
|
|
|
Tours & Pictures
|
|
|
|
►
Related
Links
|
| |
On this page:
Setting the Adaptive Transmission Sequence:
The EuroVan uses an electronically controlled transmission which sets the shift
points based on engine load and rpm information that is tuned to your specific
driving habits. Sometimes this information gets garbled or for whatever reason
may need to be reset to the default patterns so that it can begin to re-learn
from your driving habits. The correct sequence is:
- Turn on ignition without starting engine.
- Turn off ignition.
- Turn on ignition again without starting engine and depress the accelerator
pedal all the way to the floor and hold it there for at least ten seconds.
- Release the accelerator pedal and turn the key to start the engine in the
regular manner.
- Drive away going through all four gears.
(Thanks to Ken Bogert, 95 EVC, for above info.)
[ return to top ]
Replacement Parts for Maintenance
The official VW Recommended Maintenance Schedule for the EuroVan calls for
the ATF to be changed every 40,000 miles. If you talk to any dealer or mechanic
who advises you that the transmission is a "sealed" unit, you need to immediately
find another dealer or mechanic.
The automatic transmission being used on a Rialta motorhome instead of the
much smaller and lighter EuroVan certainly makes this a "severe use" case. Accordingly,
Rialta owners should schedule a change of ATF about every 20,000 miles, or twice
as often as the regular EuroVan. Don't panic at this thought. The total cost is
less than $100 if you do it yourself, and you certainly can because this is a
very easy system upon which to change the ATF and filter. Considering the exorbitant
cost of a new transmission, this is a wise investment and I strongly encourage
all Rialta owners to get this maintenance done every 20,000 miles.
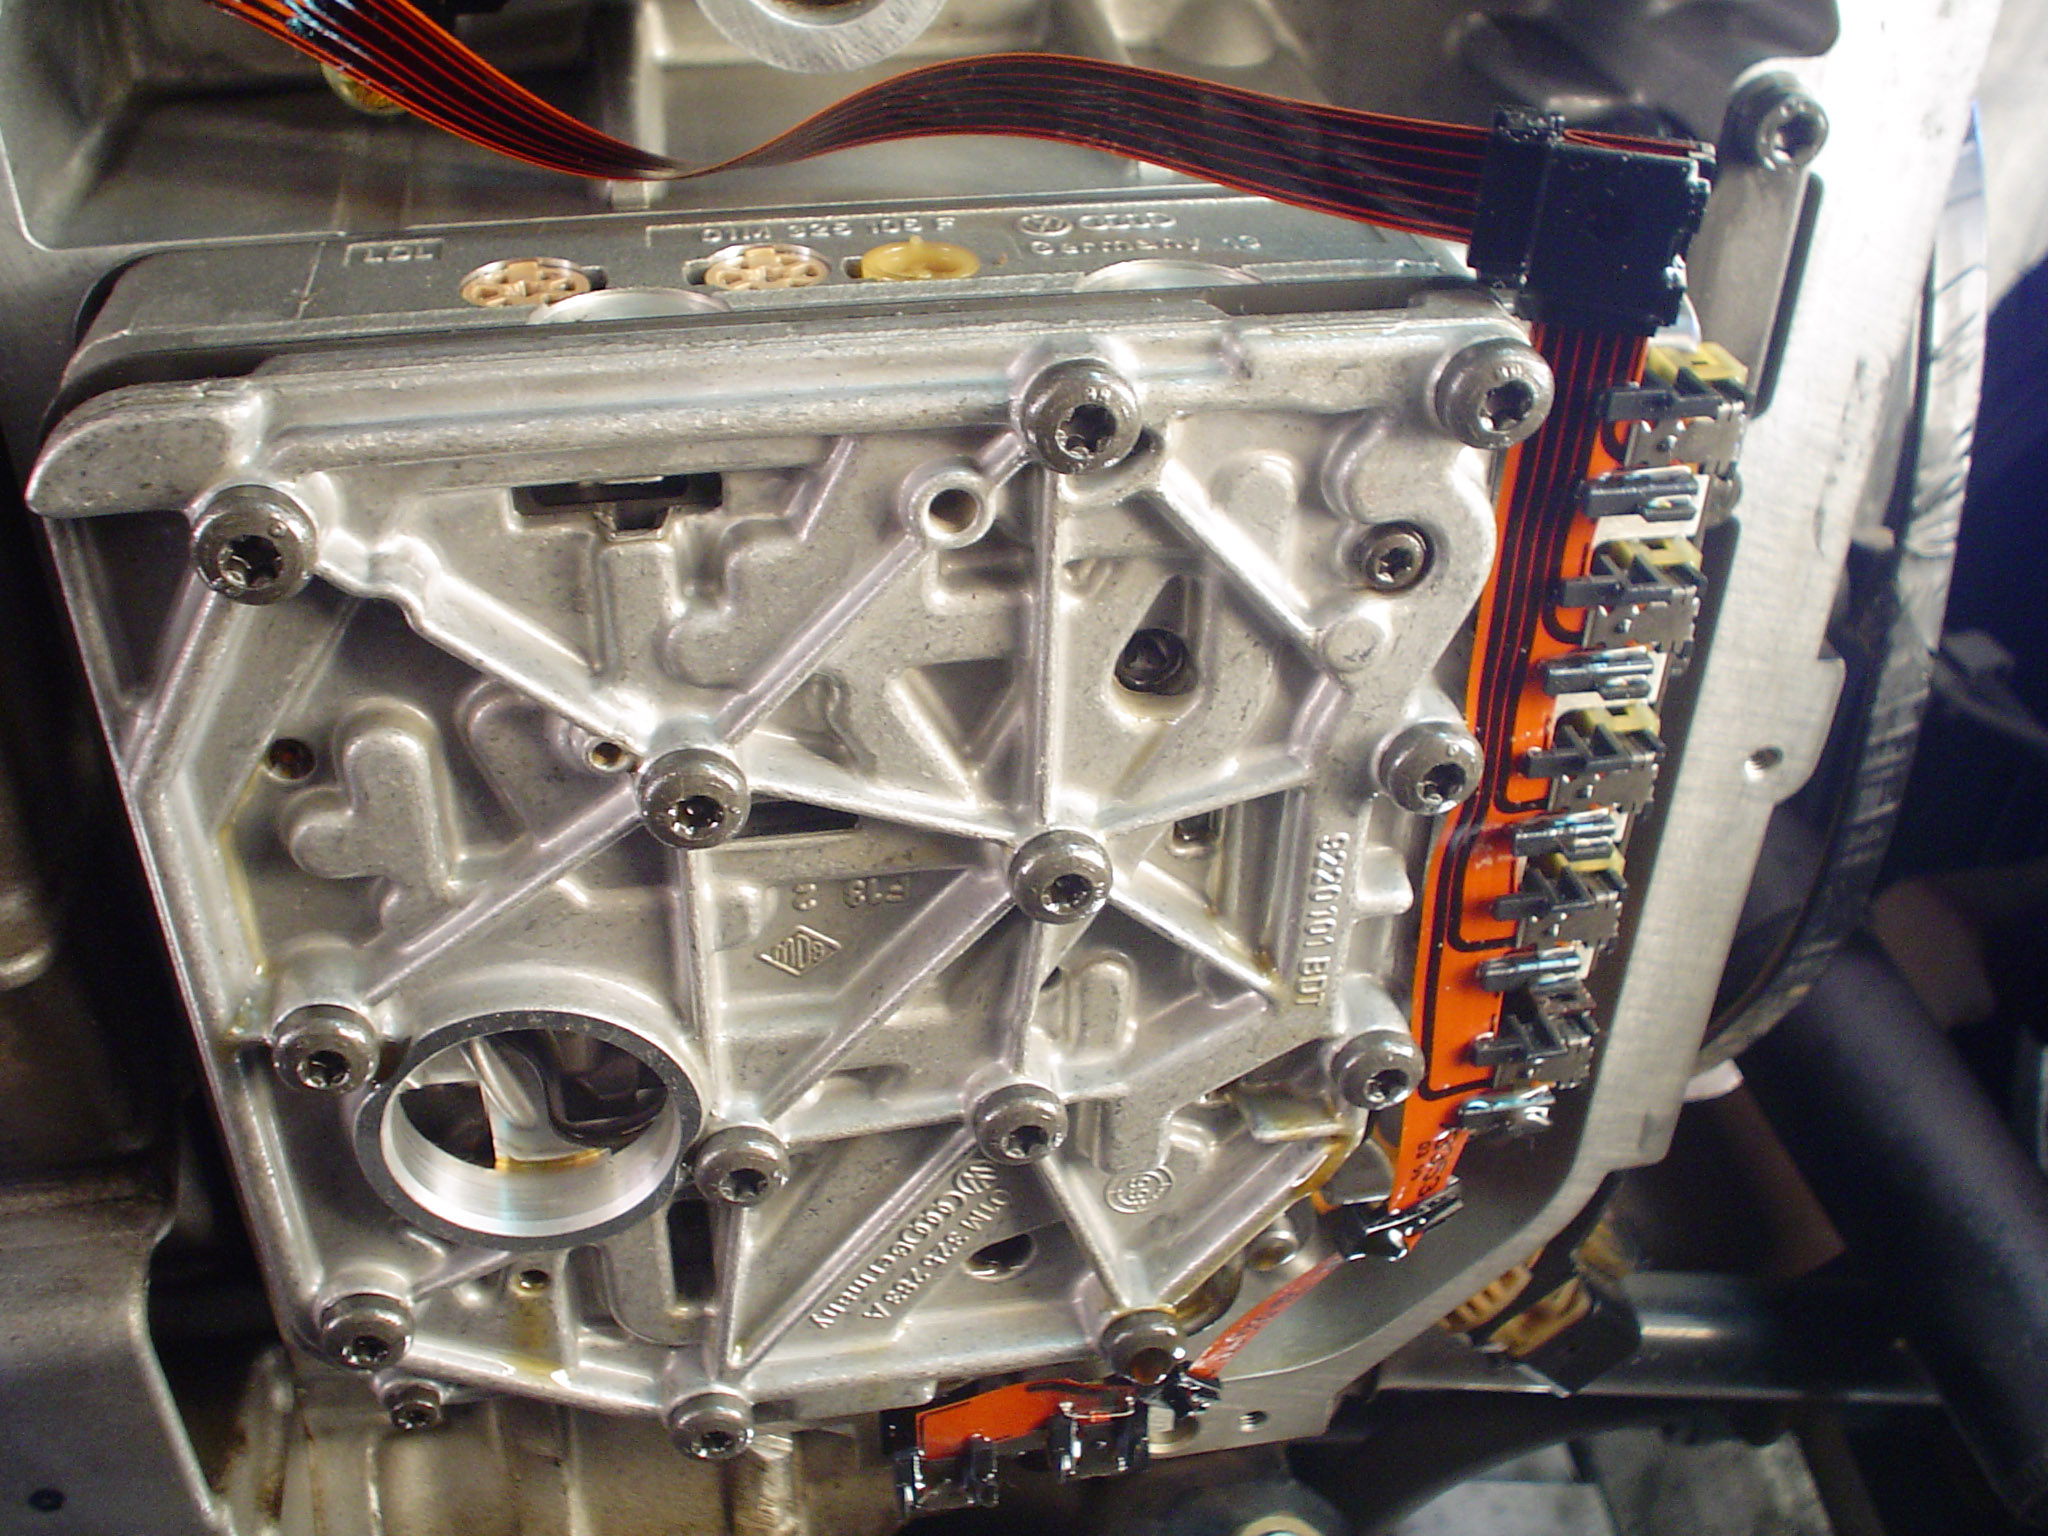
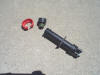
There are a total of four different items needed to change the ATF and filter.
| Filter (Strainer) |
VW # 01M 325
429 |
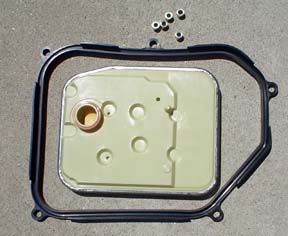 |
 |
Filter Gasket
(installed on
neck of filter
in the picture |
VW # 01M 325 443 |
| Pan Gasket |
VW # 098 321 370 |
| AFT Fluid, 4 liters |
VW # G 052 162 A2 |
Some places may sell all three of the gasket and filter parts as a kit, VW
#098 398 009A. This fits all years of EuroVan 1995-2003 used for the Rialta. An
average price for the complete kit is about $30-$40. If you attempt to buy these
parts from a VW dealership, the price will range from $50 to $125.
The transmission is internally lubricated by a special mineral based semi-synthetic
oil made by Pentosin of Germany and is sometimes referred to only by the VW specification
"TL 52162", or "G52". It is sold in plastic liters bottles and is available at
any VW dealership or from a number of on-line shops. The price is about $15 per
liter. You may use this type of ATF fluid or one of the others meeting the same specification. You will need to buy 4 liters.
[ return to top ]
Changing the Transmission Fluid and Filter:
Here are 2 versions of the procedure that you may want to print out:
The long, detailed version with lots of pictures.
The shorter, concise version mostly copied
from this page. Thanks to Nick Stephens for creating this file.(Updated 10/2/13)
NOTE: This procedure is for the 01P transmission. Some of the very early 5-cylinder Rialtas
used the 098 which doesn't have the drain plug or tube. They can be messy because you have
to dump all the fluid straight from the pan.
As a do-it-yourselfer you will find that this job is quite easy. How and why
some VW dealerships want to charge over $700 for this procedure is just mind-boggling.
This requires no special skills, no special tools and I can only assume that VW
must think you'll never figure out from where to buy the new ATF.
The only tricky part is physically getting the new oil into the transmission
because the stock vehicle was produced without a dipstick and filler tube. You
may wish to consider doing the dip-stick modification and full instructions are
on the "Transmission
Dip-Stick" page. Unfortunately, these are no longer available, so the only source is a junkyard.
However, there are several easy ways to adding new fluid
without having a dip-stick and long filler tube. You may think up your own method
but here is what I think the best:
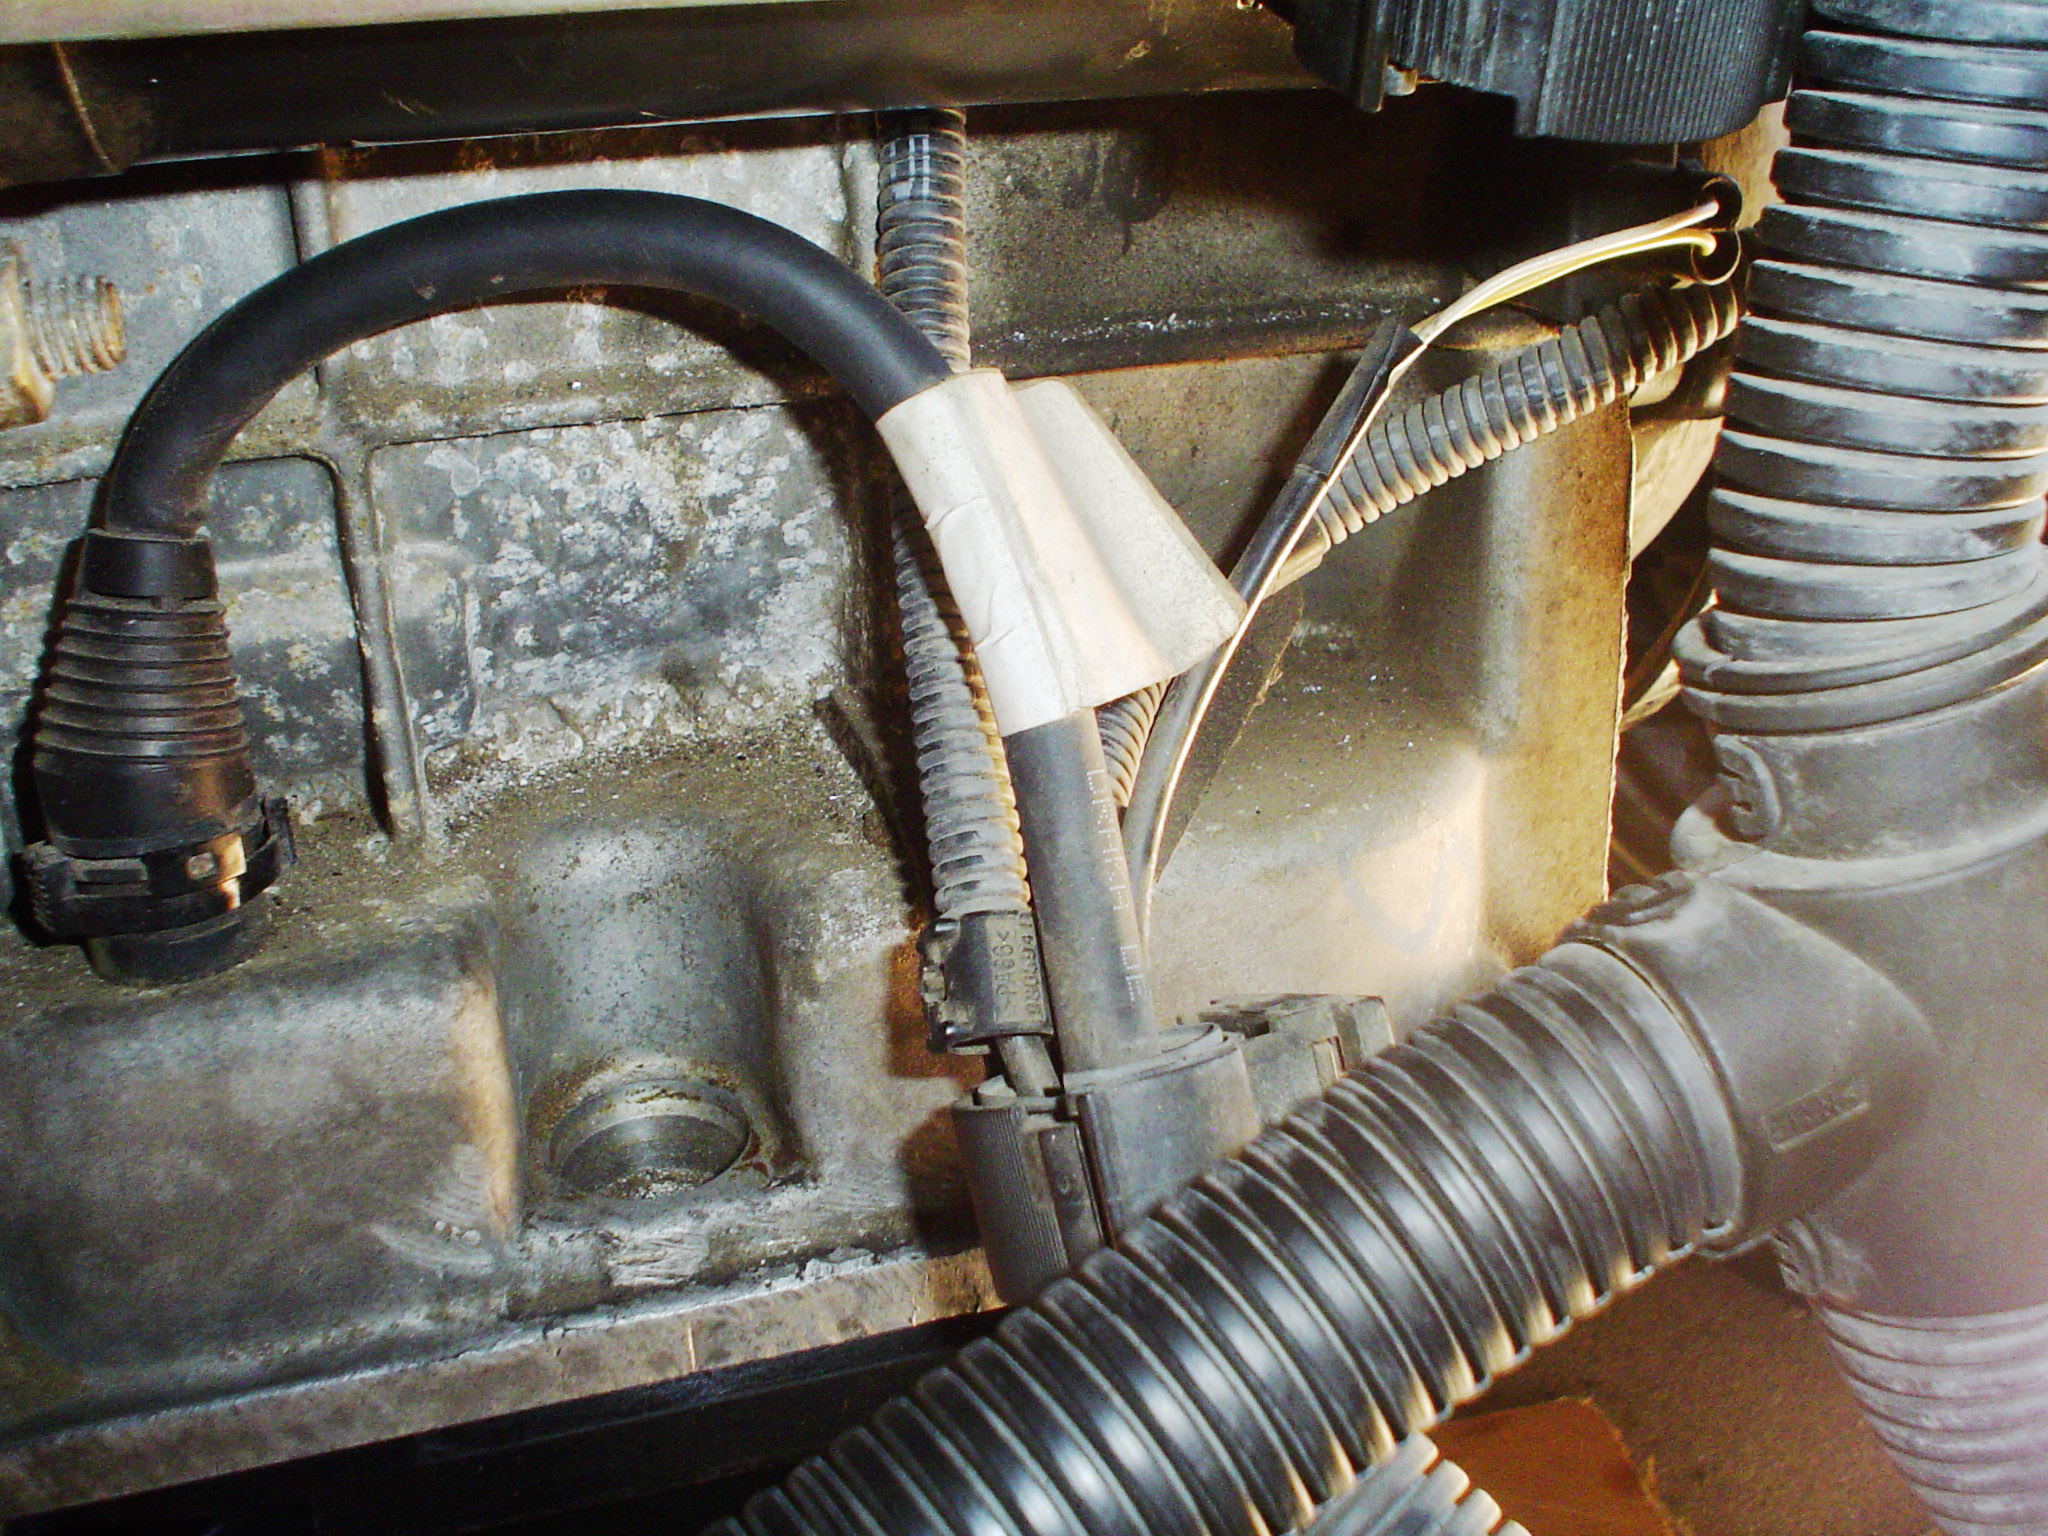
You may need to purchase about 2 feet of 3/4" heater hose or clear vinyl tubing
from your local hardware or auto parts store. This tubing or hose will slip over
the short plastic fill tube and the top end of the tubing or hose will be connected
to a funnel in an easy to reach place just under the hood. This will allow you
to simply pour directly from the open liter bottle of ATF into the funnel where
it will run down and enter the oil pan through the short plastic fill tube.
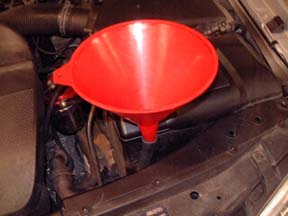
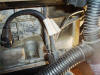
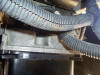
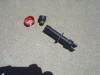
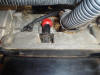
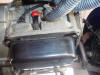
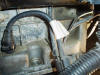
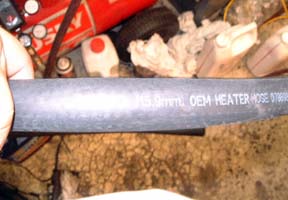 |
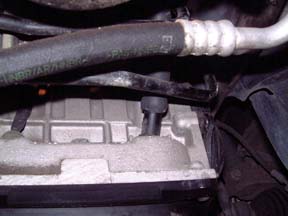 |
|
These pictures show the heater hose slipped
over the fill tube on the transmission case and with a funnel on the top
end of the hose in the engine compartment above.
(Note - this was not a EuroVan
application but the procedure was the same.)
|
 |
Transmission Fluid Change Procedure
- Remove the belly pan and then warm the engine some. (Not too hot or it may be
uncomfortable to work on some of it)
You may wish to consider driving the front wheels up on ramps for better ground
clearance while working on the transmission oil pan, but you'll need to have it
level for checking the fluid level. Once the engine is warm,
turn it off for the time being.
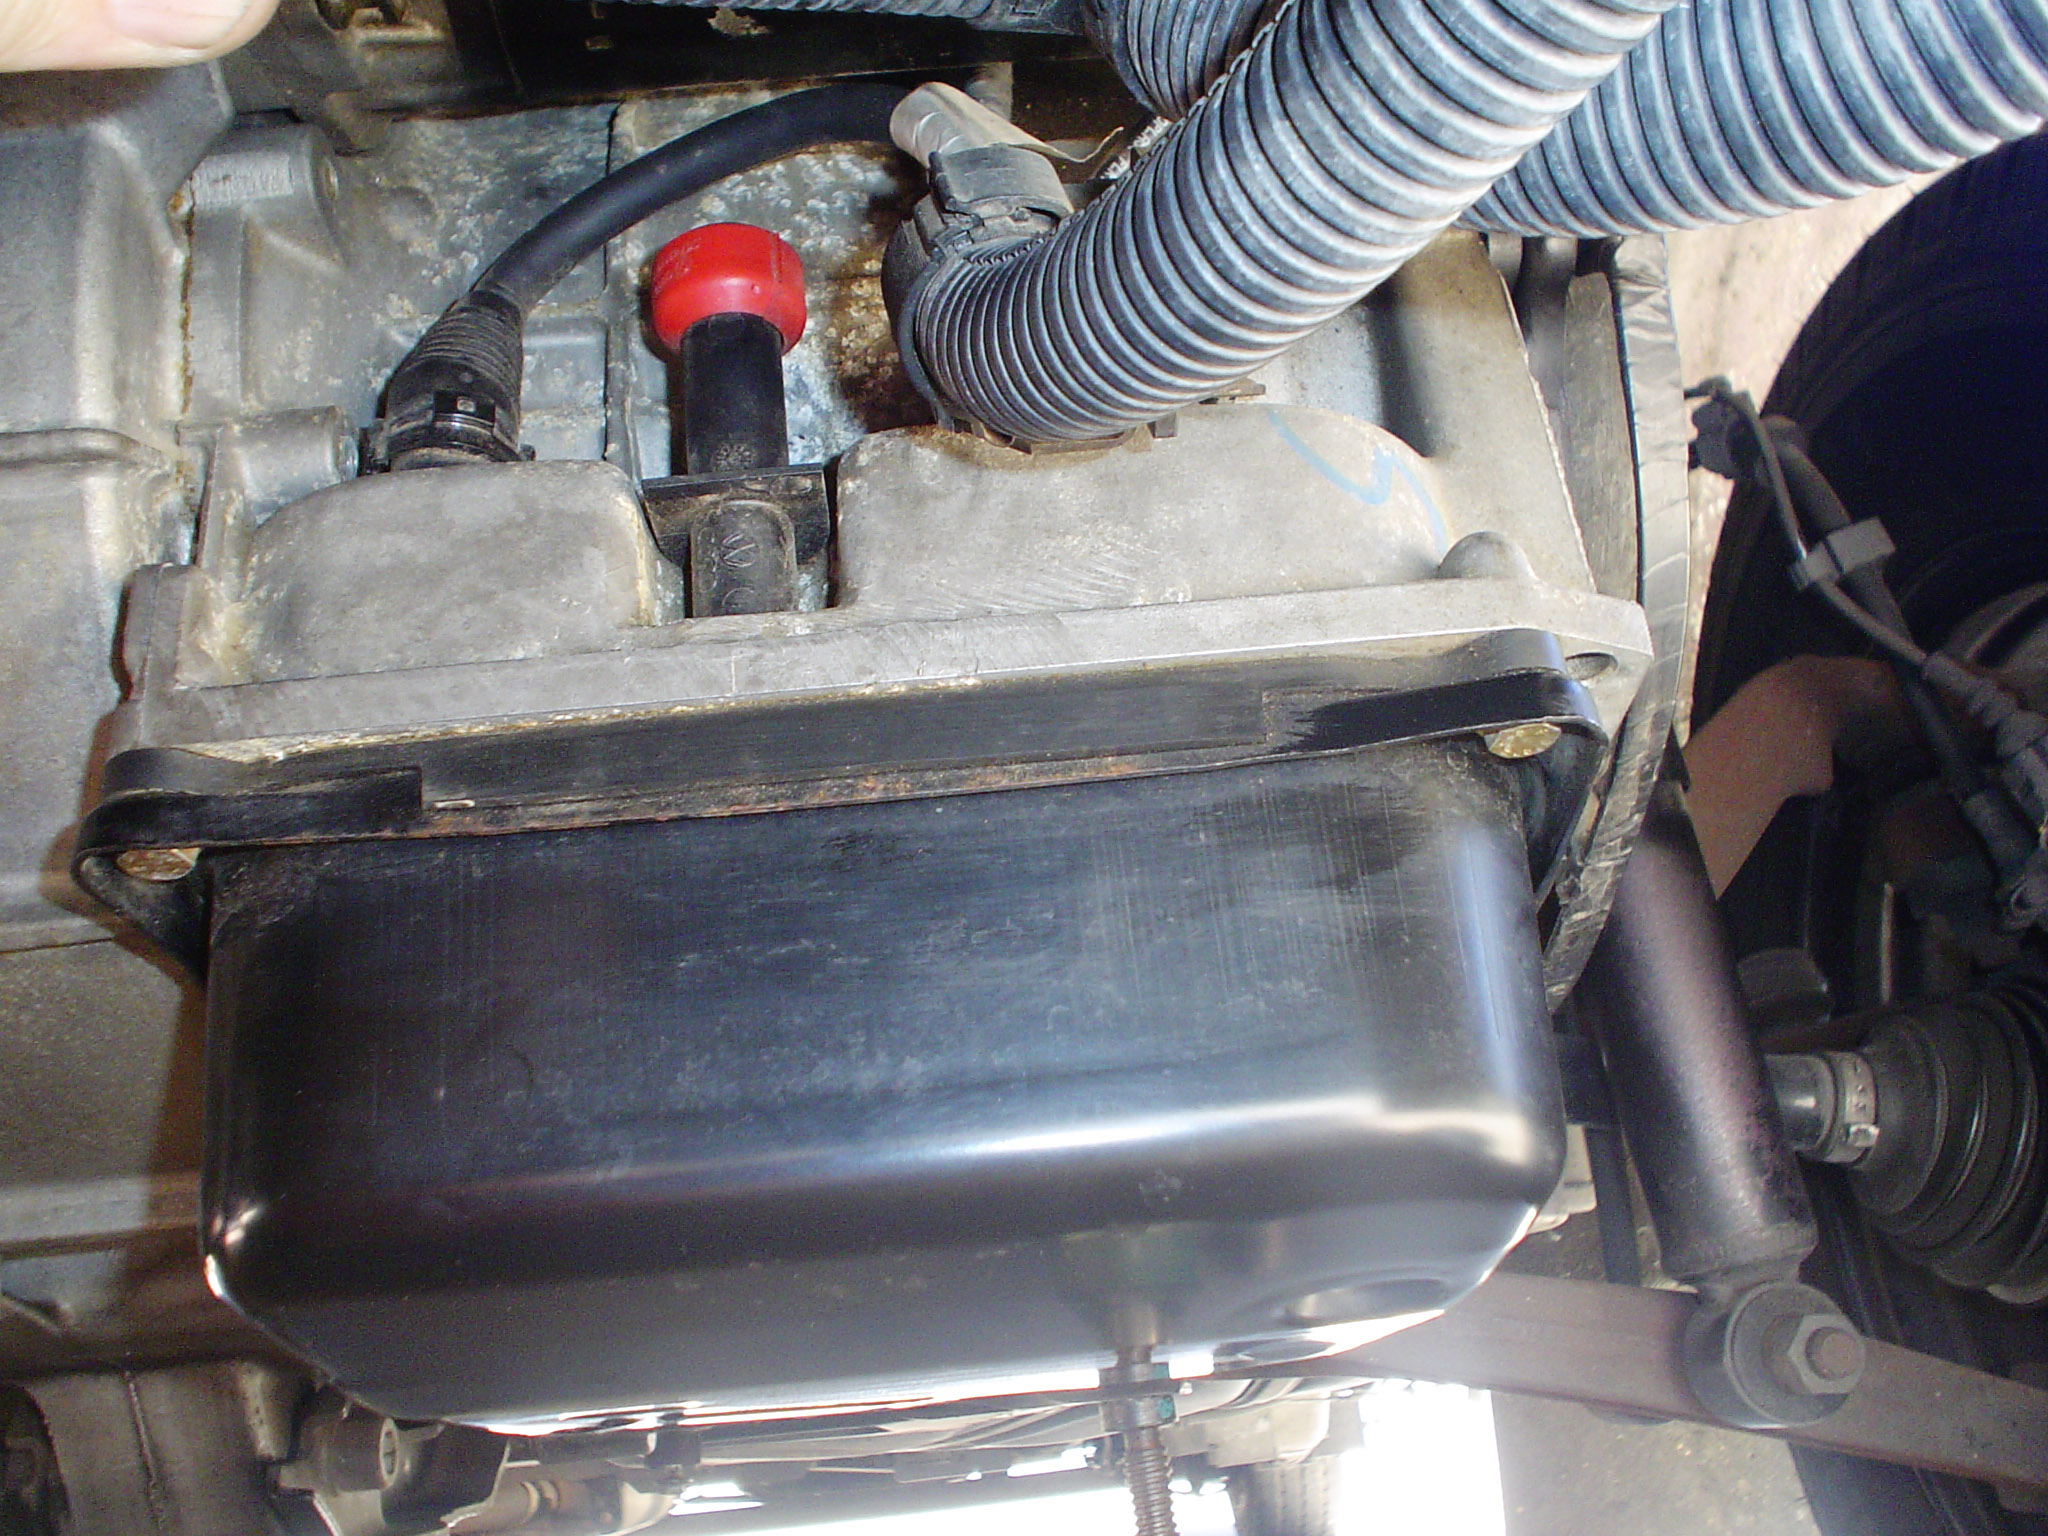
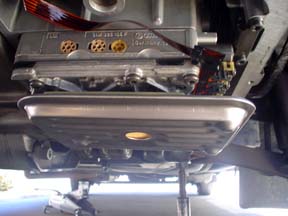
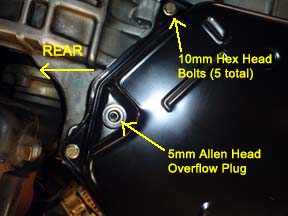
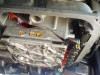
- Position a large drain pan under the transmission. Remove the plug on the
bottom to allow some of the fluid to drain. When it slows down, remove the tube
inside the same drain hole. Once this slows down, remove four of the five
10mm hex head bolts holding the transmission oil pan leaving one bolt in one
corner snugly installed. Be prepared for the pan to break the seal and drop
the hot/warm oil at any moment. You may want to keep a hand against it until
you are ready to catch the fluid. Use a rag if the pan is too hot to the touch.
Tap or slightly pry on one of the free corners and the whole pan should break
free allowing the fluid to drain into the pan. Keep your hands and arms away
from the hot fluid. Once most of the fluid has drained, remove the last bolt
and remove the pan allowing any fluid in the pan to drop into your drain pan. In some
cases, the filter will fall out when the pan is removed. This doesn't mean that the filter
wasn't in place, just that the gasket was a bit loose.
-
 Keep
the drain pan under the transmission and remove the filter and it's gasket by
simple pulling down on the filter. You may need to remove the gasket if it sticks in the
hole. When you remove the filter, additional fluid
will drain into the pan. Allow sufficient time for all the fluid from internal
parts of the transmission and valve body to eventually drain or drip out. Keep
the drain pan under the transmission and remove the filter and it's gasket by
simple pulling down on the filter. You may need to remove the gasket if it sticks in the
hole. When you remove the filter, additional fluid
will drain into the pan. Allow sufficient time for all the fluid from internal
parts of the transmission and valve body to eventually drain or drip out.
TIP - Some people have allowed the transmission to drip overnight thereby removing
the maximum amount of fluid possible. This technique probably gets 1/4-1/2 of
an additional liter. No matter what there still remains fluid in the torque
converter that won't drip out but at least you can get the most out that is
possible.
-
 NOTE
- If you have already completed a modification of adding a dipstick and tube
to the transmission, then you will be refilling the fluid through the top of
the dipstick and you can skip this step. NOTE
- If you have already completed a modification of adding a dipstick and tube
to the transmission, then you will be refilling the fluid through the top of
the dipstick and you can skip this step.
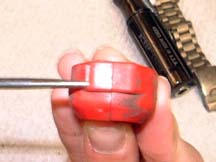
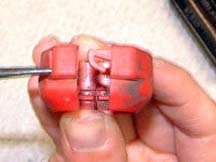
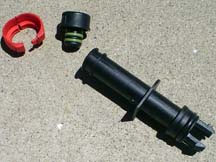
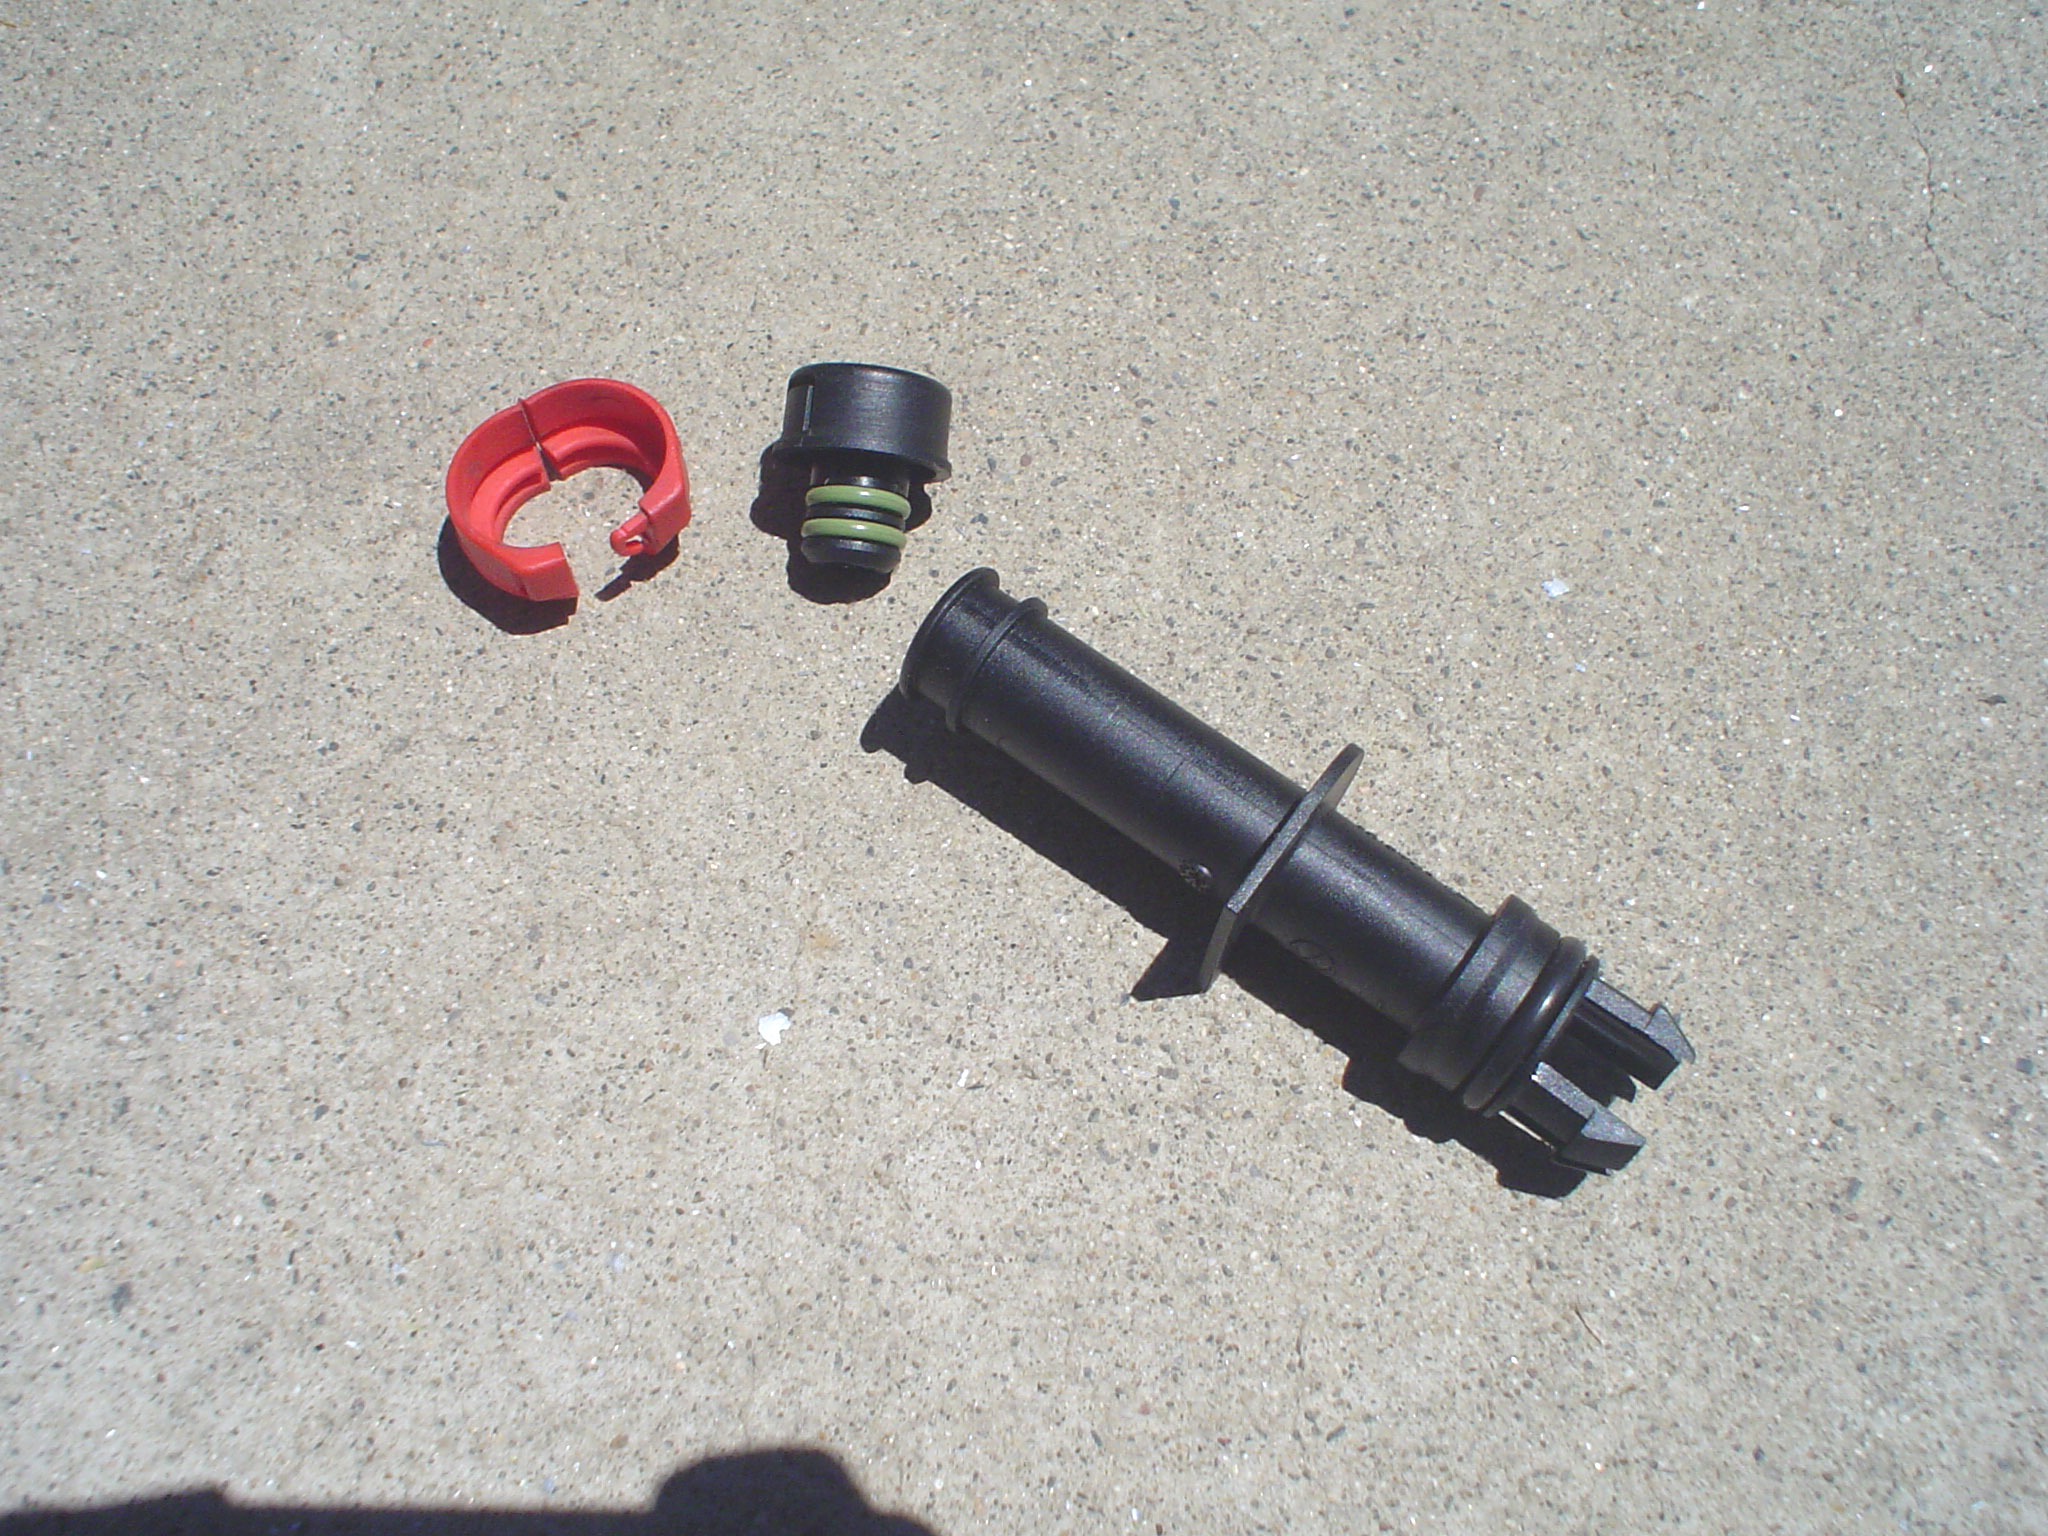
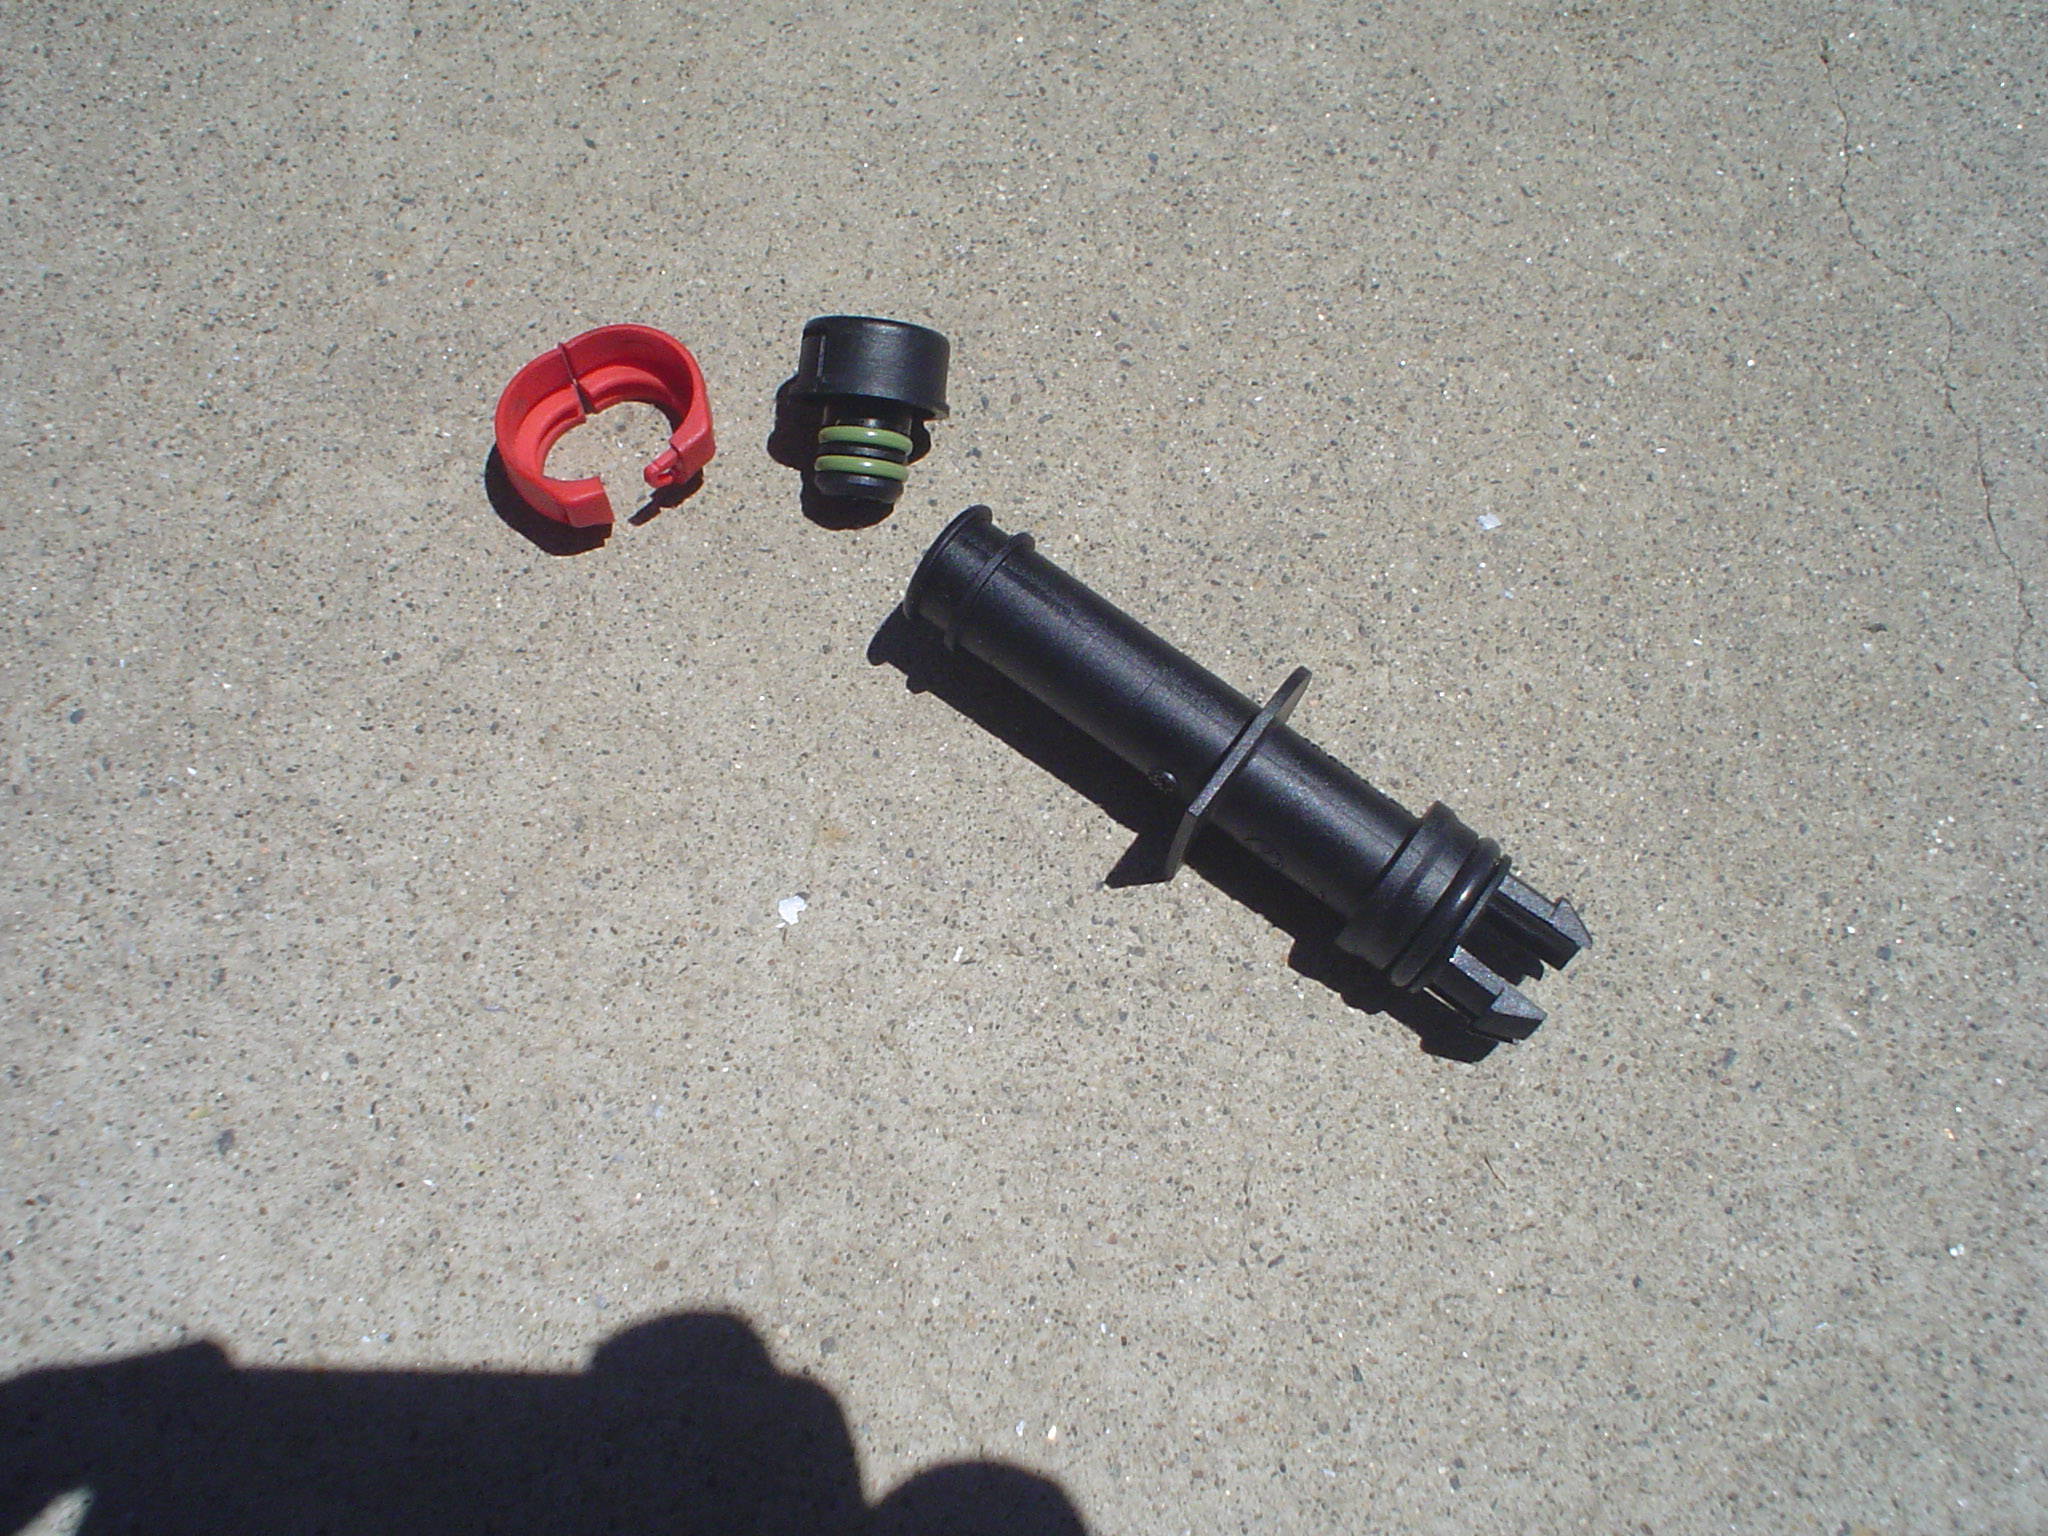
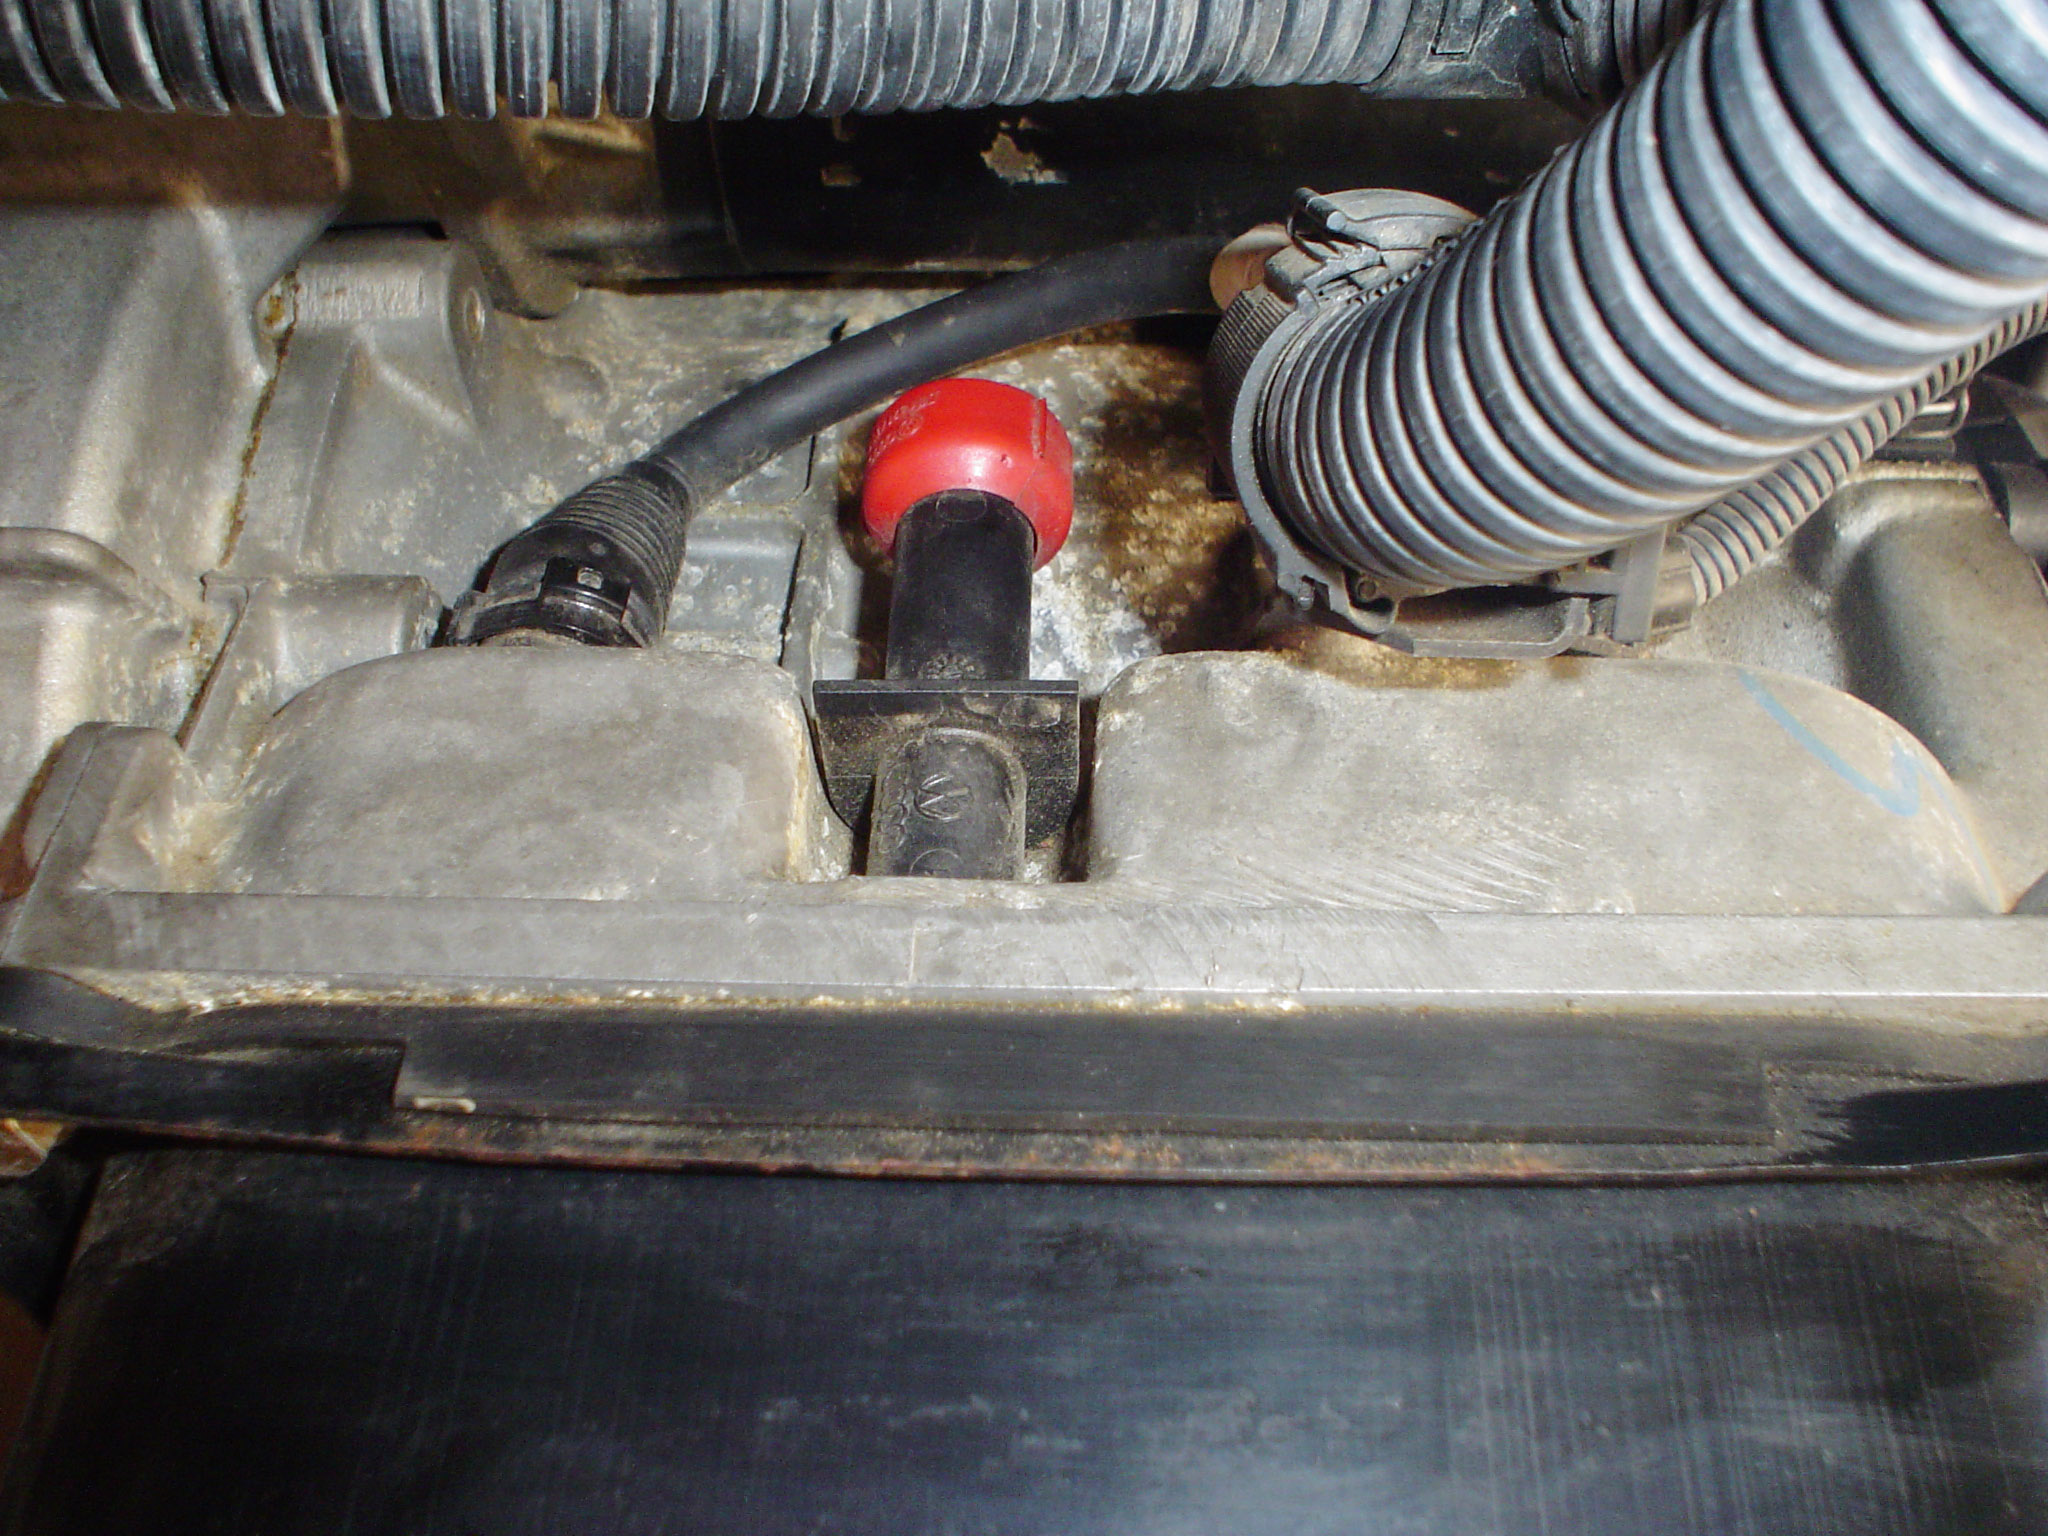
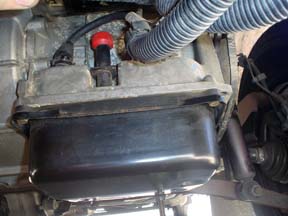
You will need to remove the red plastic seal over the top of the black plastic
fill tube at the front of the transmission. Once you remove the remove the red
seal, you then have to remove the cap. In order to do this, you can either leave
this tube in place and struggle to remove the red plastic seal at the top along
with the cap underneath it. Or you can temporarily remove this entire fill tube
which will make it much easier to remove the seal and cap. Because you've already
removed the pan, it is very easy to remove the entire fill tube assembly. Carefully
depress the exposed ends of the prongs of the fill tube from the underside where
it fits through the hole and while pushing up at the same time, the entire fill
tube will come free. Once you have the entire fill tube assembly out, it is
much easier to remove both the red seal and cap without damaging or breaking
them. You can now remove the red plastic seal by sliding a small flat
screwdriver blade into the slot on its side to release the tab which will allow
the seal to open up and be removed from the fill tube. Underneath of the red
seal you will find a plastic filler cap that is held on with some small detents
that need to be depressed and this cap will come off. They can easily be re-installed
when finished so you needn't purchase replacements.
CAUTION
- If you temporarily remove the entire fill tube, make sure that
you clean the area at the top of the hole in the transmission case where the
tube fits. Make sure dirt or debris doesn't fall through the hole and contaminate
the exposed parts of the valve body. This is a good place were road debris
and sand tend to accumulate so make sure that you don't allow any to fall
through the hole onto the valve body. Assuming that you have the pan already
removed, you can shove a clean rag into the hole
from underneath to prevent any dirt from entering while you clean the area above
where the filler tube will get re-inserted. Once you remove the red seal and
cap, slip the hose or tubing over the open end of the fill tube and re-install
the fill tube into the transmission case to prevent any dirt from falling thought
the hole. The tube assembly has a flat fin at the middle of the tube. One side
of the fin is rounded while the other side is flat. The rounded edge goes against
the transmission case.
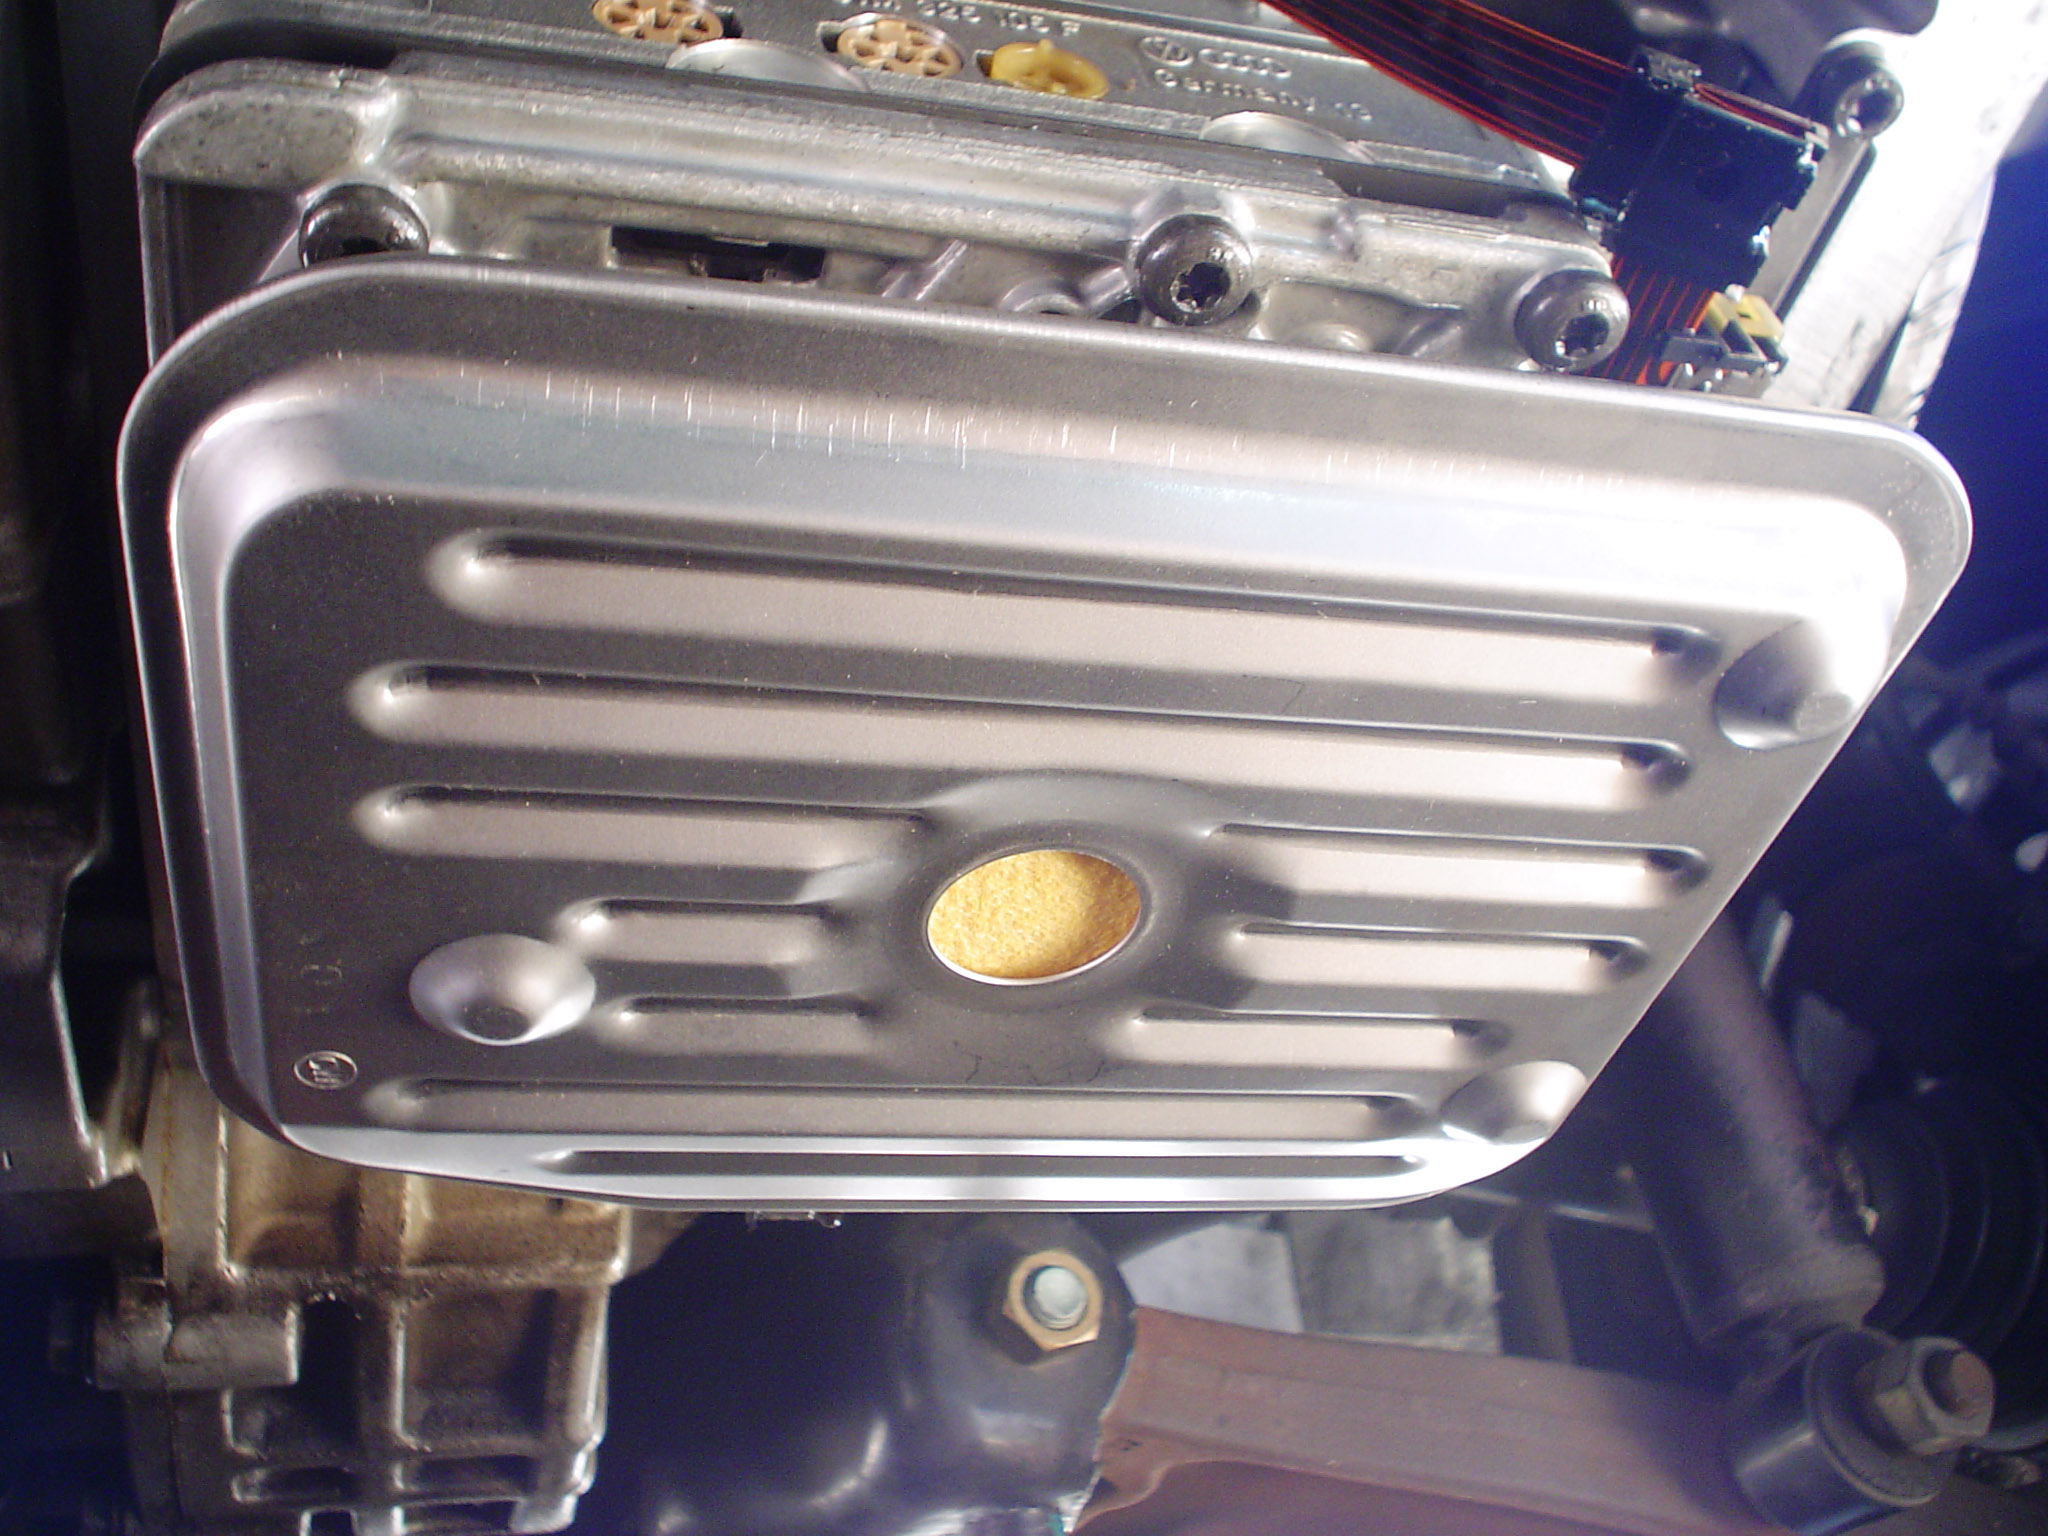
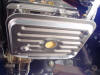
- Wipe out the inside of the transmission oil pan making sure that all debris
and sludge is removed. There is a flat magnet about 1" X 3" attached to the
inside of the pan which should be thoroughly cleaned. It's very strong and may need
some coaxing to get it out. Make sure the edges of
the pan where the gasket mounts are clean. Because VW uses a rubber gasket and
not the cork and sealant mess found on many American cars, the edges should
just wipe clean. Do not scrape or grind on the edges.
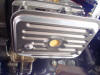
- Install the new gasket onto the pan along with the five steel ferrules into
the gasket at each screw hole if they are not already installed. These ferrules
provide the exact space required when the bolts are tightened down and don't
allow one bolt to become over-tightened and distort the gasket which could lead
to a leak.
-
 Using
a clean cloth, wipe all debris from the mating surface of the transmission to
insure a good seal to the new rubber gasket. Do not scrape the aluminum surface. Using
a clean cloth, wipe all debris from the mating surface of the transmission to
insure a good seal to the new rubber gasket. Do not scrape the aluminum surface.
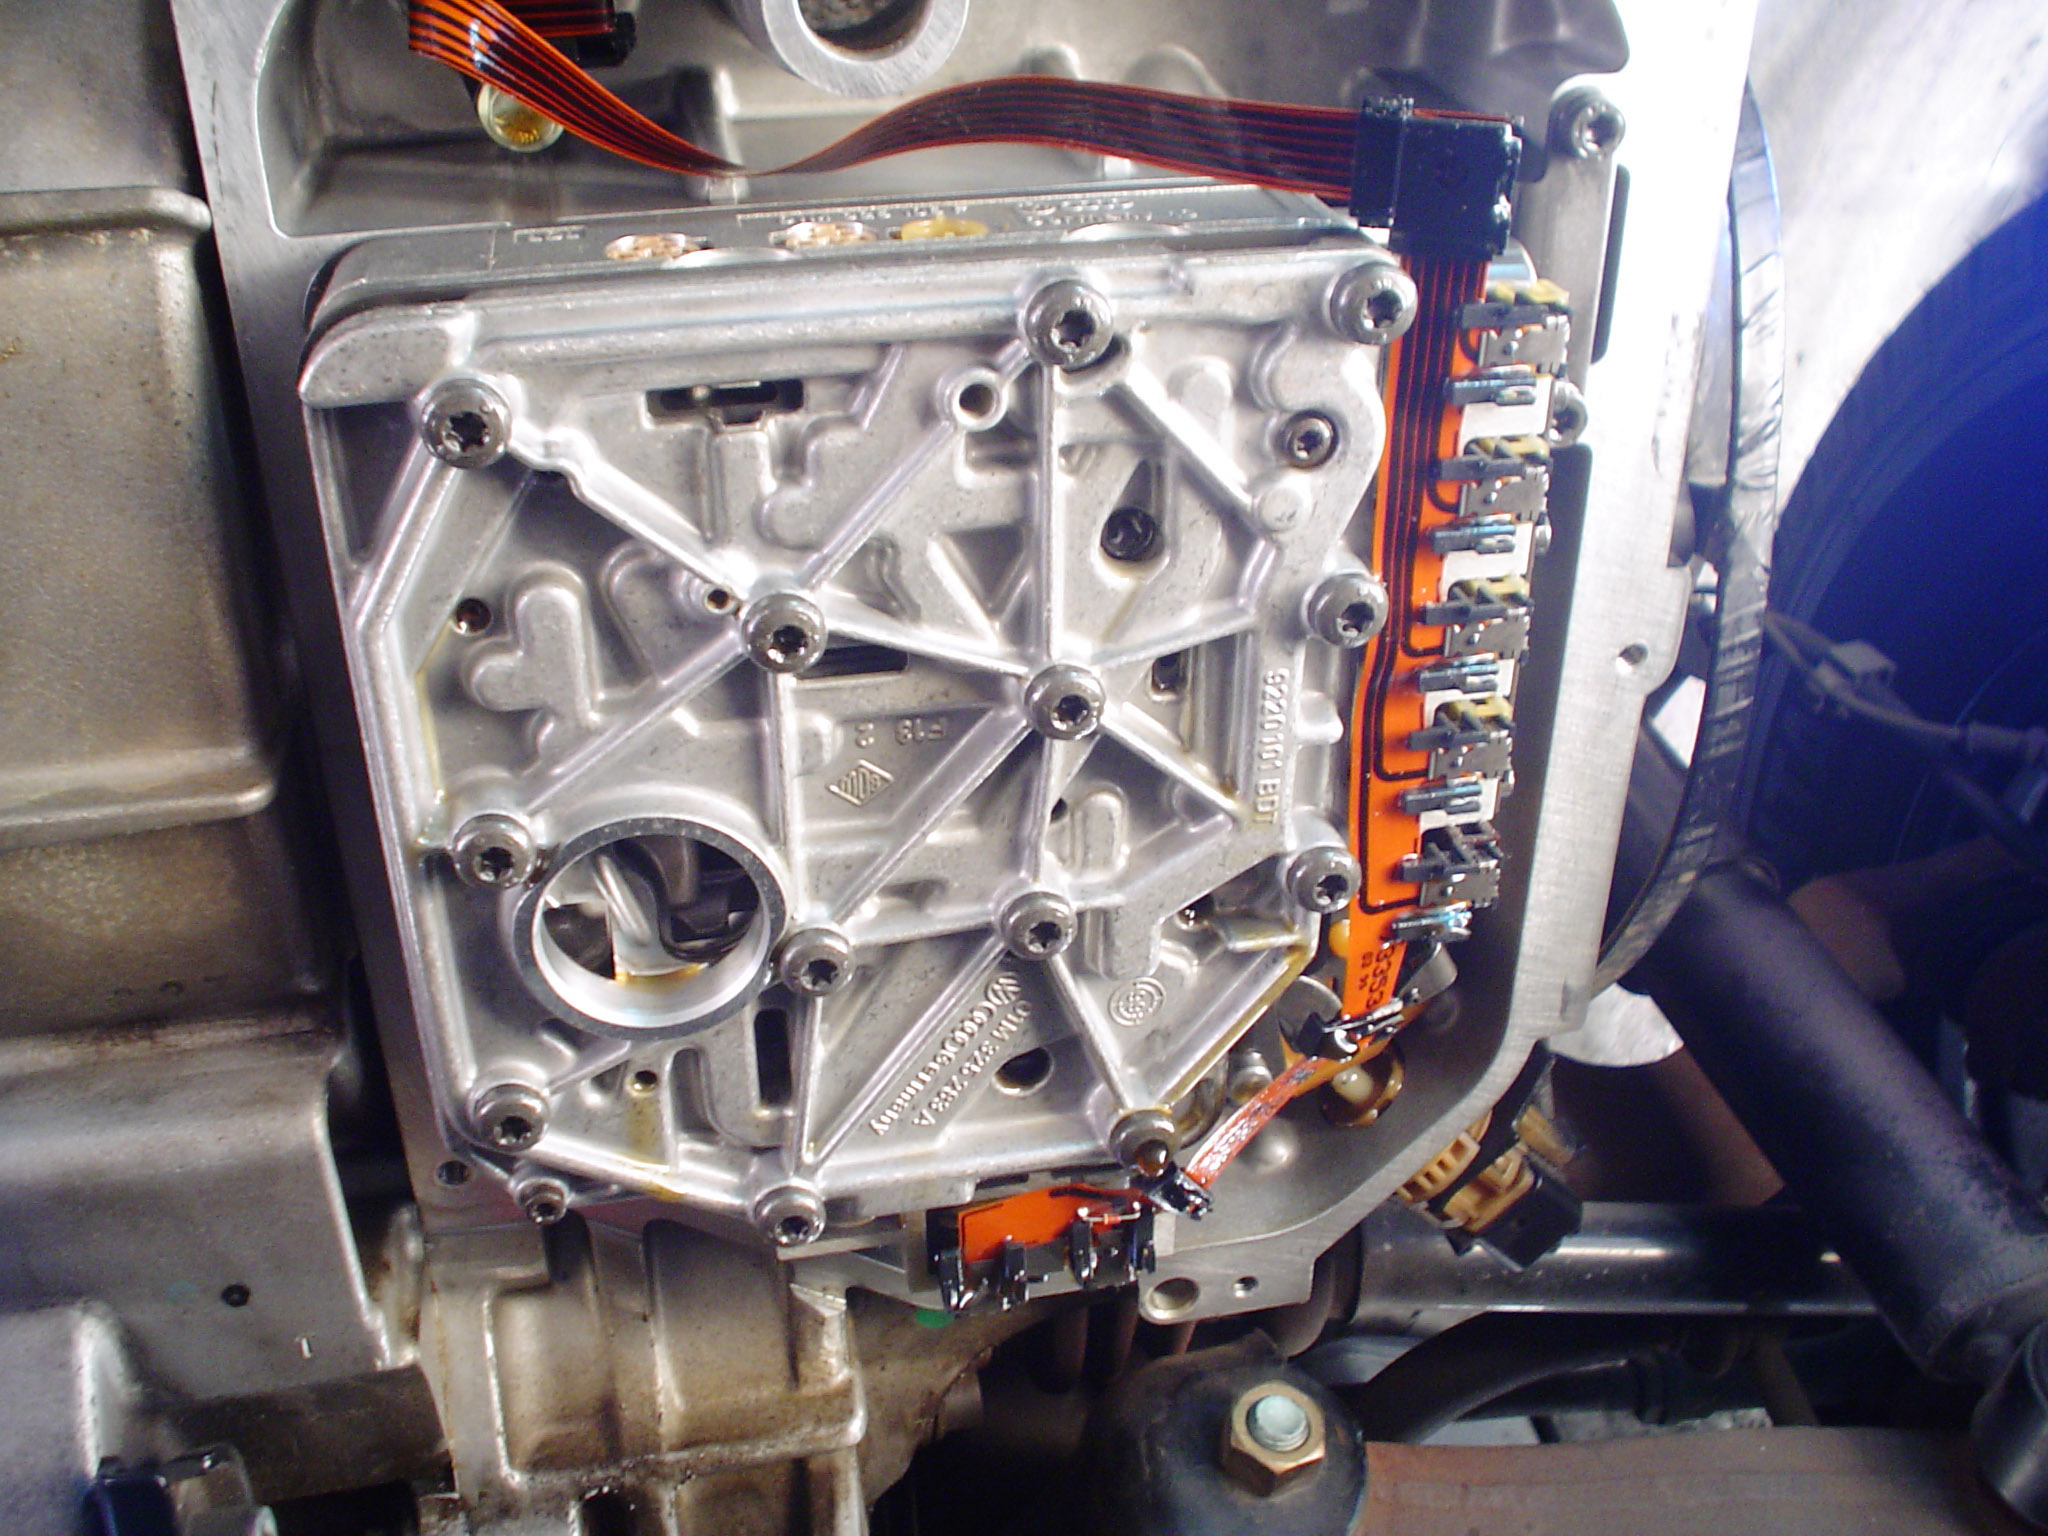
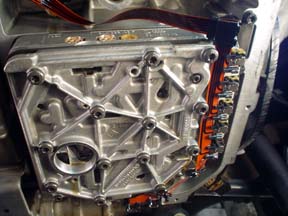
-
Install the new filter and it's gasket (round
seal) to the valve body. Its just a simple push fit. It will tend to hang down
a little bit because of its own weight but once the pan gets installed, it is
impossible for it to fall off.
-
Put the tube and plug back in the pan. You can do this
before or after installing the pan.
-
 Install
the oil pan with the gasket attached. Be sure that you have installed the new
filter before attaching the oil pan. I'd like to collect a nickel from everybody
that has replaced the pan only to find the new filter still sitting on their
workbench. Snug up each of the five 10mm hex head bolts and torque to 106 inch-pounds
(12 Newton-meters) Install
the oil pan with the gasket attached. Be sure that you have installed the new
filter before attaching the oil pan. I'd like to collect a nickel from everybody
that has replaced the pan only to find the new filter still sitting on their
workbench. Snug up each of the five 10mm hex head bolts and torque to 106 inch-pounds
(12 Newton-meters)
-
With the engine still off, add 3.5-4 liters of ATF into the filler
tube at the front of the transmission.
- Start the engine and run the gear selector through all gears. After the engine
and transmission are warmed up (the transmission oil pan should be warm
to the touch as the fluid should be at 95-113 degree temperature) and with the engine
running, remove the plug to drain out the excess fluid. You may want to check before
the fluid is at temperature to verify that there's excess to drain out since it can take some
time to add more and you don't want it too hot or the level will be low.
CAUTION
- While the engine is running, keep your fingers and clothes away from
the serpentine belt. In addition, the pan and fluid will get very hot as will
many of the coolant hoses nearby. It is best to wear a long sleeve shirt to
avoid any burns. Avoid the radiator fans which will come on automatically as
the engine coolant temperature increases.
- Once you are certain that the level is correct, replace the Allen head plug at the back of the transmission
oil pan and use a 5mm hex wrench to tighten securely. You can now shut the engine
off.
- If you have used a hose or tubing to add the new fluid, simply pull or carefully
pry the end off of the black plastic fill tube. Push the cap back down in place
and re-attach the red seal (if you were careful about removing them then this
means you can reuse them now. Otherwise, if you removed them while the fill
tube was still attached to the transmission, you may have damaged them because
of the restricted work area).
CAUTION
- The transmission case will be hot while you attempt to replace the
fill tube cap and seal. You may wish to consider allowing it to cool somewhat
before proceeding.
- Use a clean cloth and wipe any traces of ATF from the external surfaces
of the pan, overflow plug, and all around the rubber gasket where it meets the
transmission case. Start the engine and allow it to run for several minutes
and then recheck for any leaks.
- Replace the belly pan. Properly dispose of the used fluids either through
a local store recycling program such as Auto-Zone's or a recycling service through
your municipal trash collection service. Now pat yourself on the back because
you just save $200-$700 depending upon how outrageous your local VW dealer wanted
to do the job.
[ return to top ]
Transmission Rebuilds
There are many horror stories of Rialta and EuroVan owners having to pay upwards
of $8,000 for a new transmission from the VW dealership and these transmissions
are not truly new but rather factory rebuilt units. There are other alternatives
such as obtaining one from one of the few specialized transmission rebuilders
around the country at a significant savings in cost. They can ship the rebuilt
unit to you or your mechanic where you are still faced with the cost of installation.
The current recommendations for sending off your transmission for a rebuild are:
Import Performance Transmissions in Hawthorne NJ
or
German Transaxle in Bend OR
Based on replies to emails I sent to each, my choice would be IPT.
[ return to top ]
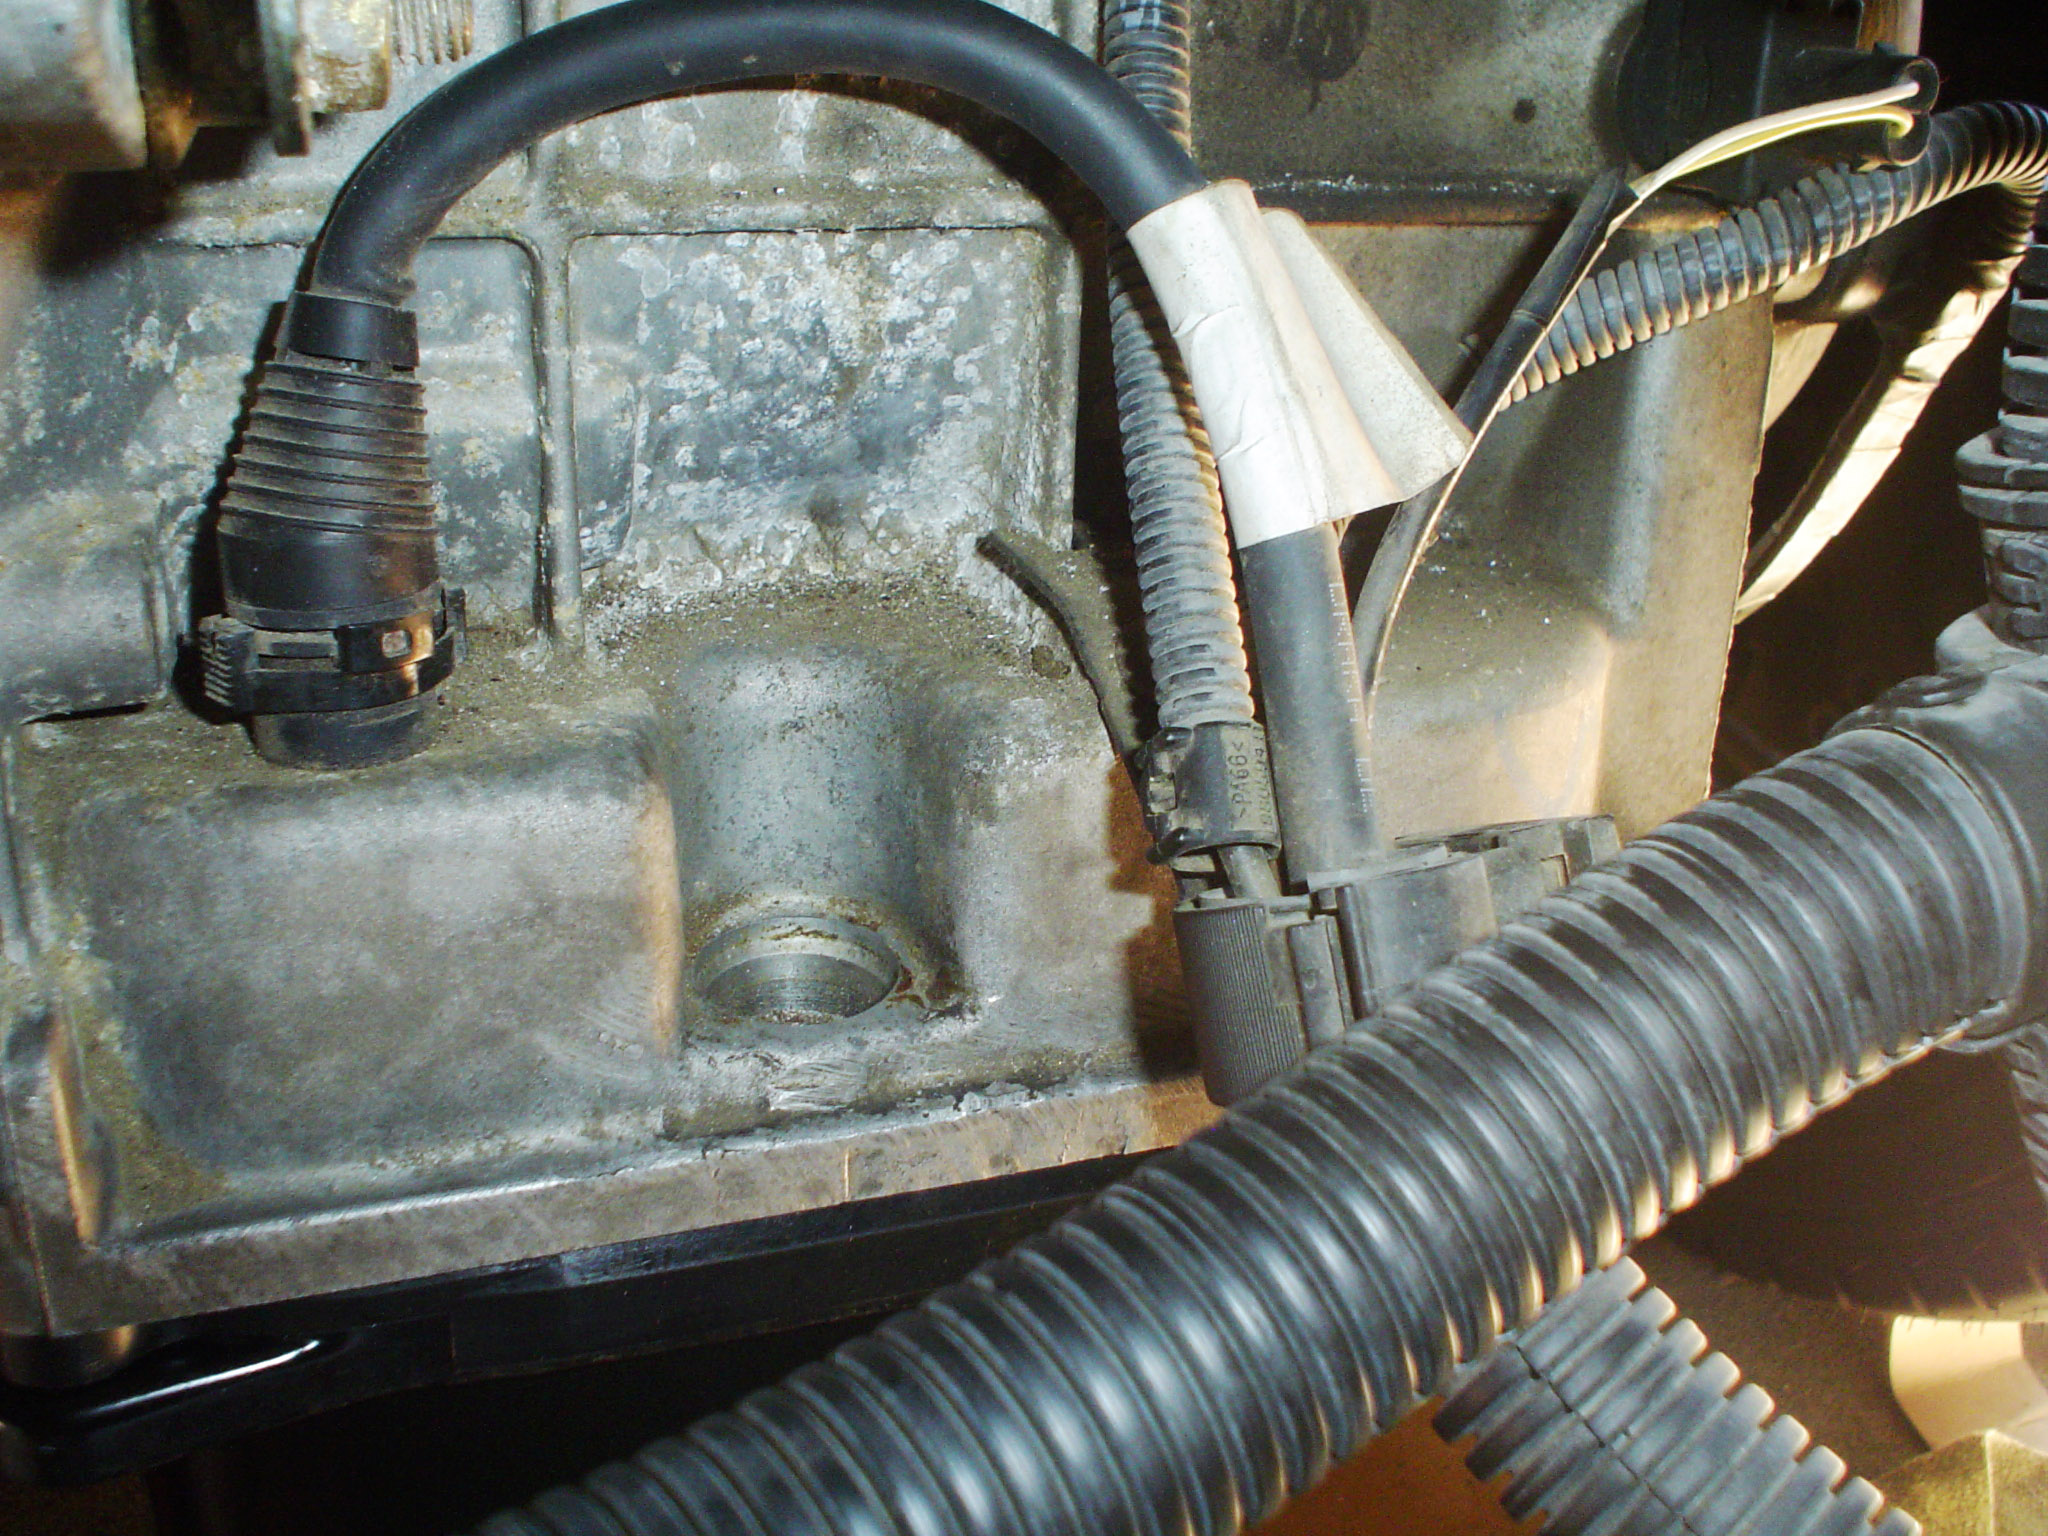
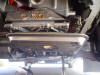
Additional Photos
Note- All of the following photos depict certain actions while changing the
automatic transmission fluid and filter. Some are taken only to provide documentation
of the layout of parts so that re-assembly can be done without guesswork. All
photos are in high resolution which means your web browser may automatically resize
the image so that it fits your screen resolution. If it does resize the photo,
you can click the resize gadget in the lower right of the photo to instruct your
browser to view it in full resolution.


[ return to top ]
Cooler Installation Information
The first link is to a file that lists the needed parts and recommended suppliers. The second
is a pdf that shows an installation on a 24 valve engine (AXK). I have removed the files needed
to make a DVD of an installation. If you'd like a copy on DVD, please contact me. The last 8 are direct links to
the video on YouTube.
Notes: I've made some small changes to the installation procedure I use
that are not included in the file or video, but are cosmetic in nature.
Please don't order the kit from Rialta Heaven as mentioned in the video. They get them from the same places we can,
then mark them up about 50%. They were kind enough to make the video, but I'm a little upset with them
adding advertisements to it after I'd proof-viewed it.
Transmission Cooler Parts List Text file
Transmission Cooler Installation File (619KB)
YouTube video Part 1
YouTube video Part 2
YouTube video Part 3
YouTube video Part 4
YouTube video Part 5
YouTube video Part 6
YouTube video Part 7
YouTube video Part 8
[ return to top ]
|