|
[
HOME
]
|
|
Model Information
|
|
|
|
VW Service
|
|
|
|
Winnebago Service
|
|
|
|
Tours & Pictures
|
|
|
|
►
Related
Links
|
| |
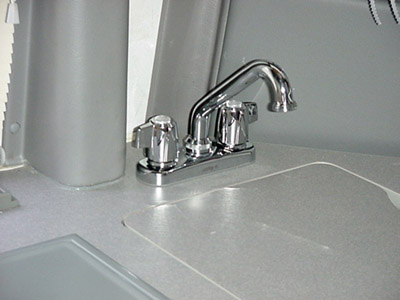
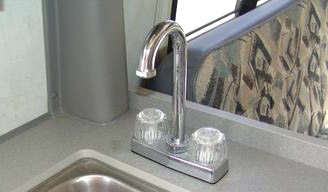
Only the 2003 and newer Rialtas finally incorporated the tall head water faucet
over the galley sink. Previously owners had to struggle to wash pots and pans in
this small sink with a water faucet whose outlet was low, almost level with the
top of the sink. That meant that large plates and pans could not be fully inserted
under the stream of water without constantly rotating the item being cleaned. And
even then the water stream would only hit the outermost portions of the item. The
solution for those owners was to retrofit a newer modern faucet with the long extended
neck and whose outlet was significantly higher than before.
Installation of this item is quite simple. PDF (52KB) The hose connections under the sink
utilize all plastic fittings and usually are nothing more than finger tight. Once
those hoses are disconnected, then the mounting bolts for the old faucet are removed
and the new faucet takes the place of the old one. All of the mounting dimensions
and hardware are a plumbing standard so you can choose from a multitude of types
and styles. Expect to pay anywhere from $25 to $100 depending upon just how elaborate
your tastes may run.
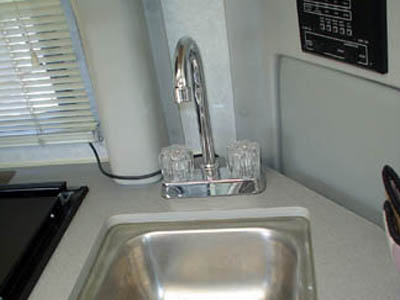
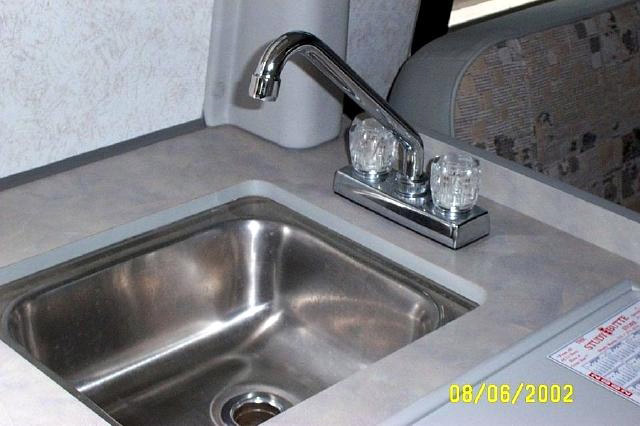
Here are pictures of two different styles:
NOTE - The following mod was originally submitted to the
Tech Rally group on
Yahoo by Bob Lutz and
Ray Wilkes in September 2004.
Sink Faucet Replacement
Make it easier to wash hands, fill pots, and add a faucet water filter, by
replacing the sink faucet with an extended faucet.
APPROX. MODIFICATION TIME: .5 hours
PARTS LIST:
All prices are pre tax.
The new faucet is the only part for this modification.
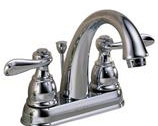
Be sure to purchase a faucet with a spout that delivers the water at least
1-2 inches further away from the base, and preferably higher too, compared
to the original equipment. Not all "bar" faucets deliver water further out,
just higher, so be sure to measure the extension length, from the centerline
of the faucet, before you buy.
Pic
Above |
R.V. 4" Deck Faucet with 8" spout from the United States Hardware Inc,
order #RV-035B (photo above) (Ray Wilkes) |
< $30 |
 |
Peerless Two Handle Lavatory Faucet Item #: 100484 Model: P99696, a
bathroom sink faucet with a 2" longer and 3" higher spout delivery point
(Bob Lutz) |
$48.00 |
 |
“Bar” faucet |
$25 |
TOOLS:For QD you will need a Phillips screwdriver to remove the grill at
the rear of the sink. You may also want to use pliers to work with the plumbing
fittings.
INSTRUCTIONS:
NOTE #1: In additions to the following instructions, be sure
to follow the instructions that come with the new faucet.
NOTE #2: Instructions for Rialta HD and FD models are the same. For QD models,
first remove the vent on the back side of the galley sink for easy and visual
access to the faucet. Replace when finished installing the new faucet.
-
Turn off the water pump and open the faucet, draining any water and relieving
system pressure.
-
Reach under the sink and "find" the cold water hose. Twist by hand counterclockwise
to loosen, and then disconnect the hose from the faucet fitting. Leave the
hose "standing up" to minimize any water dripping behind the sink, although
a little water leakage will just evaporate away after a while, so don't worry.
-
Now, find the hot water hose and do the same, leaving it upright. I propped
mine against the sink drain plumbing to keep it upright.
-
Now, "find" the plastic nuts on the two faucet threads and loosen them.
The faucet should then be loose to the counter top. Unscrew these completely
and the faucet will lift out.
-
Discard the old faucet and rubber/plastic seal piece.
-
Wipe down and clean the area.
-
Slip the rubber/plastic seal in place on the new faucet and set the new
faucet in place, with the two threaded connections inserted through the two
countertop holes.
-
Use the new plastic or metal nuts to tighten the faucet in place from
below.
-
Reattach and hand tighten the hot and cold water plastic "pipes."
-
Proof test your work by turning on the water pump and feeling for any
water leakage.
-
Open the faucet, both hot and cold and blow out the air until a smooth
stream of water flows.
Additional Modifications:
|
