|
On this page:
Coach Battery Specification
 The
original Rialtas built from 1995-2000 came with only one coach battery as standard
equipment. But by 1999, most dealers were ordering their coaches from Winnebago
with the second optional battery already installed. Winnebago saw the handwriting
on the wall and in 2001, the second battery became standard equipment. Also at
some point in time, Winnebago changed the source of the battery that they were
purchasing from Interstate to the Trojan Battery. The Trojan battery is a well-known
and respectable name in RV and marine batteries and I suspect that the price of
the Trojan was significantly higher that the Interstate. I believe that Winnebago
made a wise decision no doubt influenced by feedback from their customers. The
original Rialtas built from 1995-2000 came with only one coach battery as standard
equipment. But by 1999, most dealers were ordering their coaches from Winnebago
with the second optional battery already installed. Winnebago saw the handwriting
on the wall and in 2001, the second battery became standard equipment. Also at
some point in time, Winnebago changed the source of the battery that they were
purchasing from Interstate to the Trojan Battery. The Trojan battery is a well-known
and respectable name in RV and marine batteries and I suspect that the price of
the Trojan was significantly higher that the Interstate. I believe that Winnebago
made a wise decision no doubt influenced by feedback from their customers.
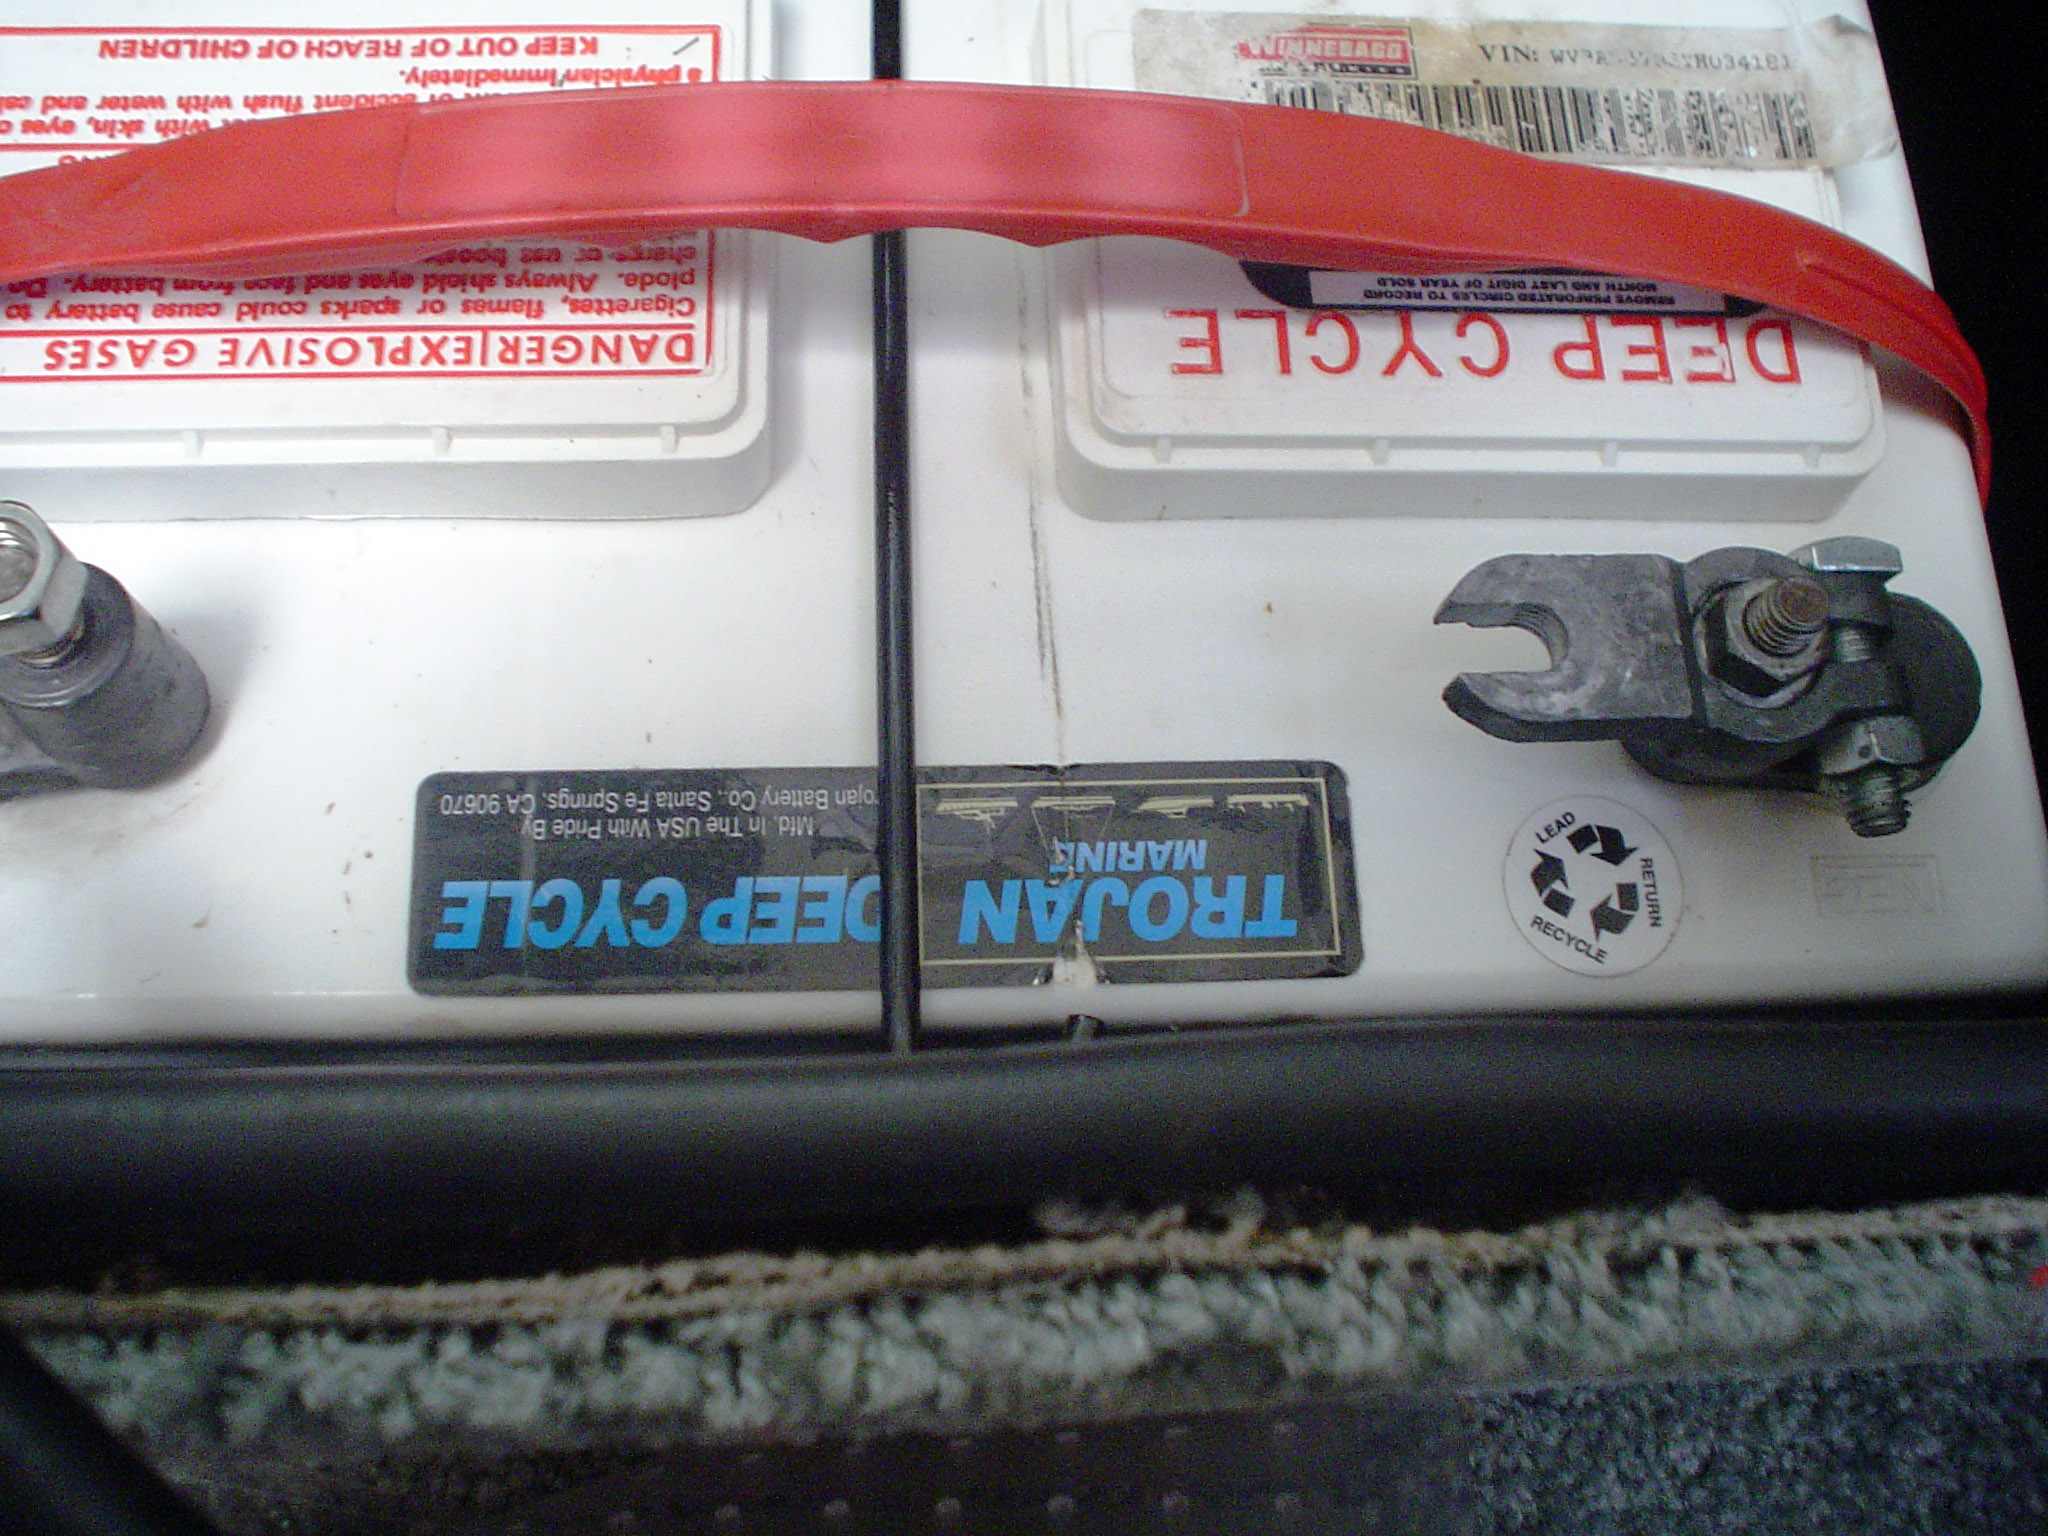
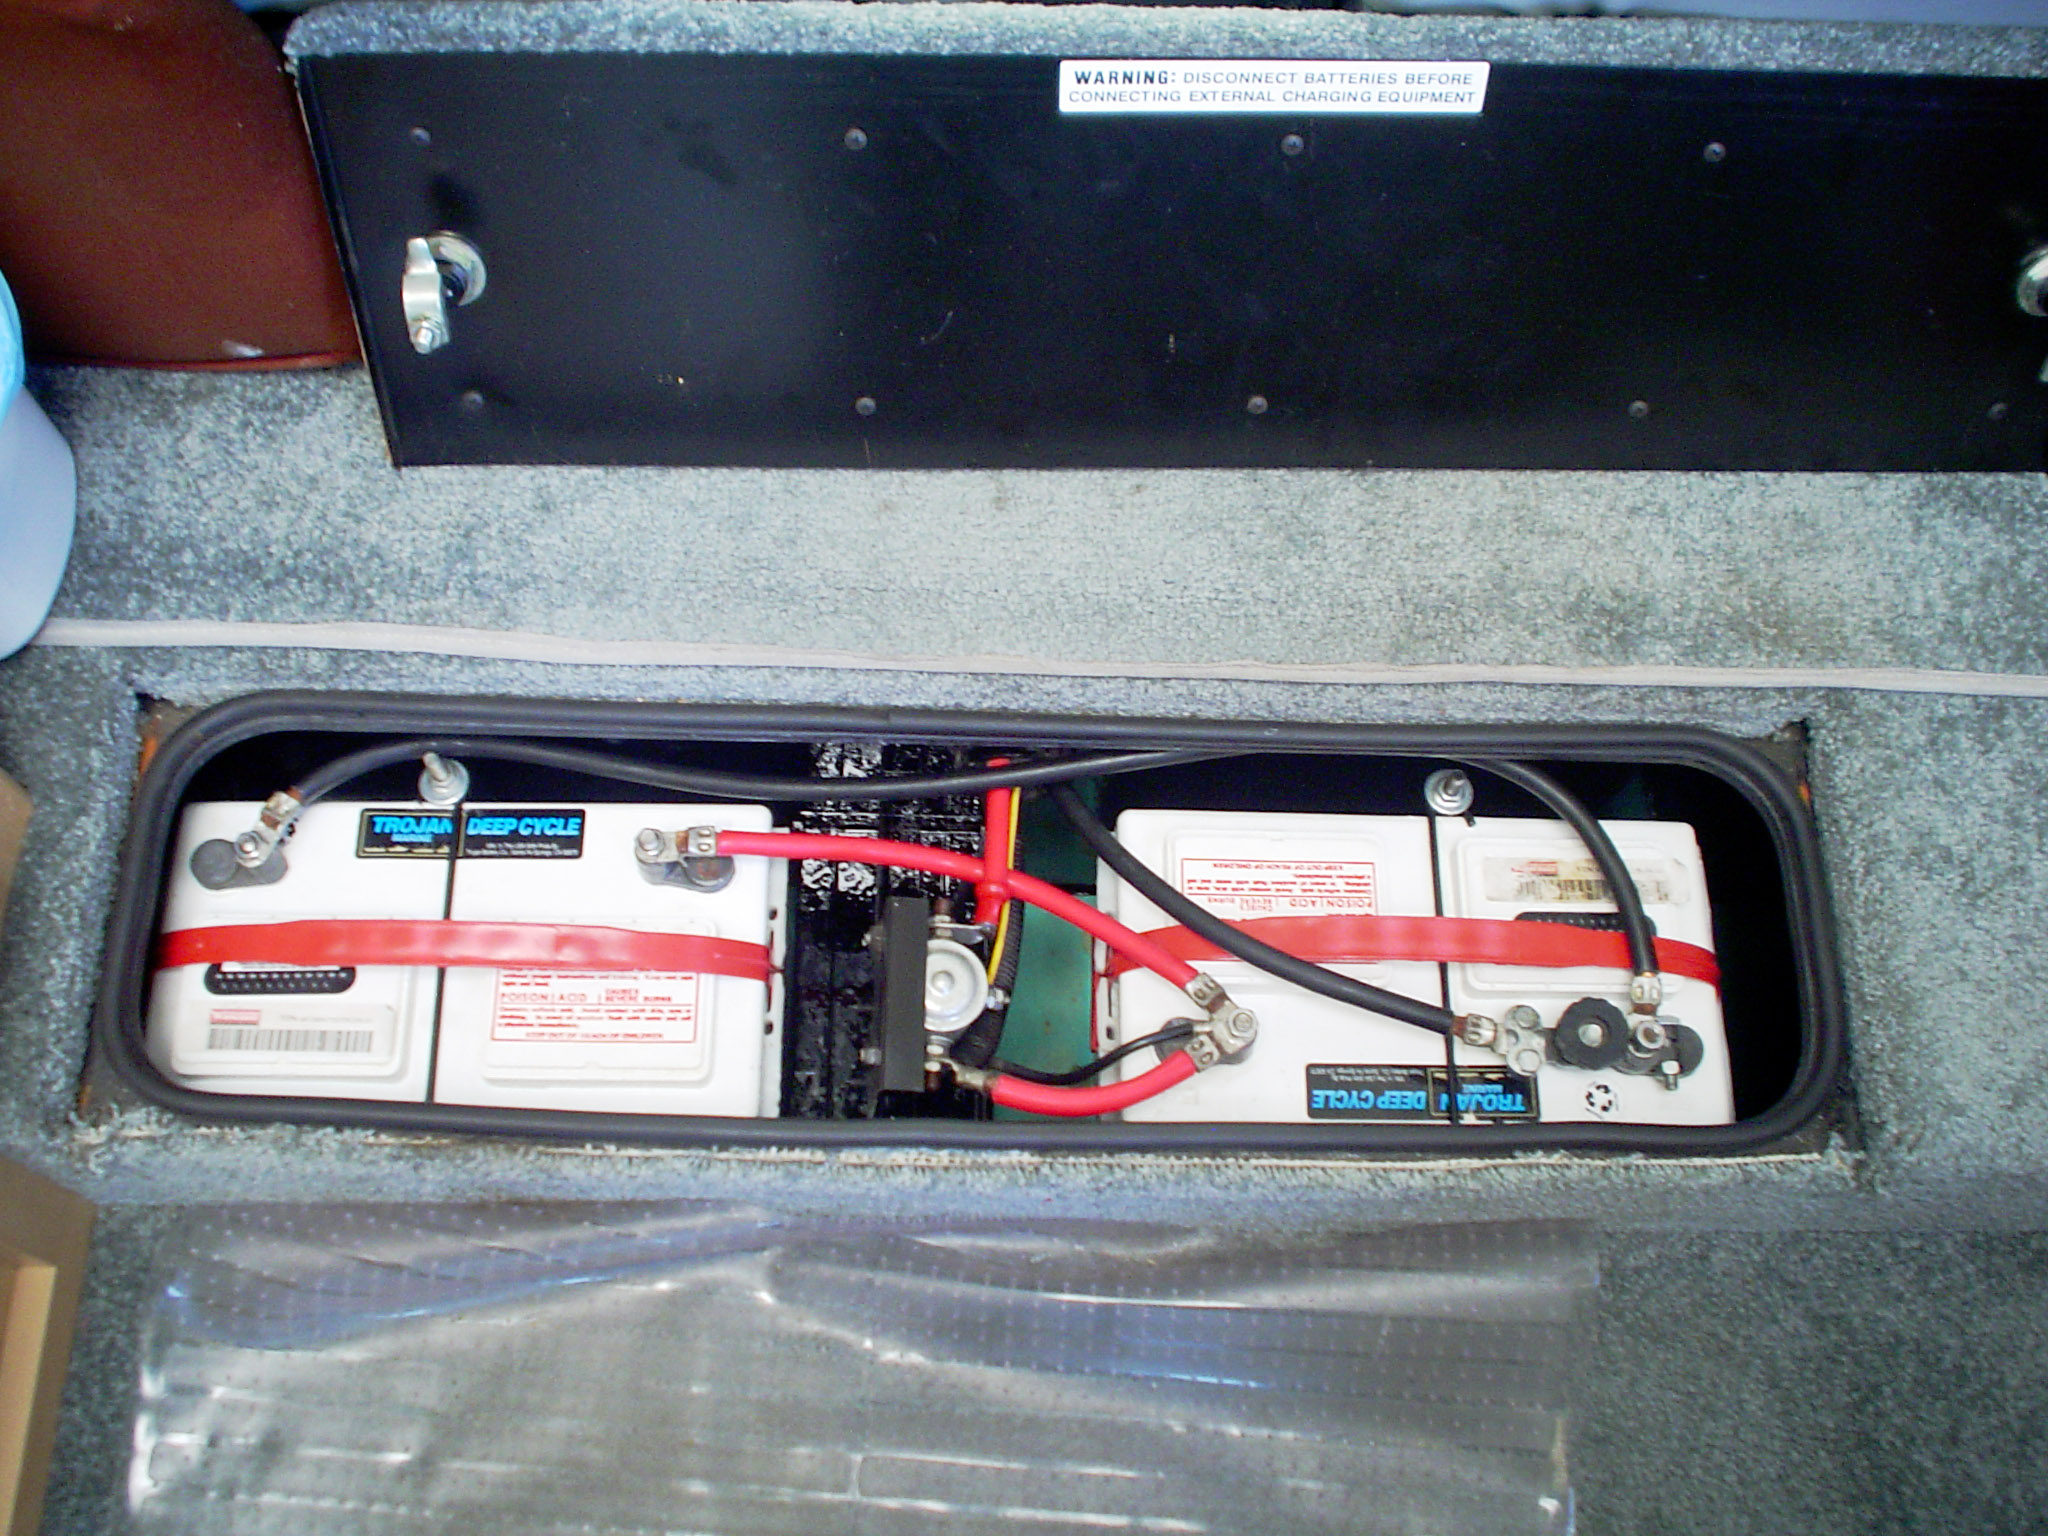
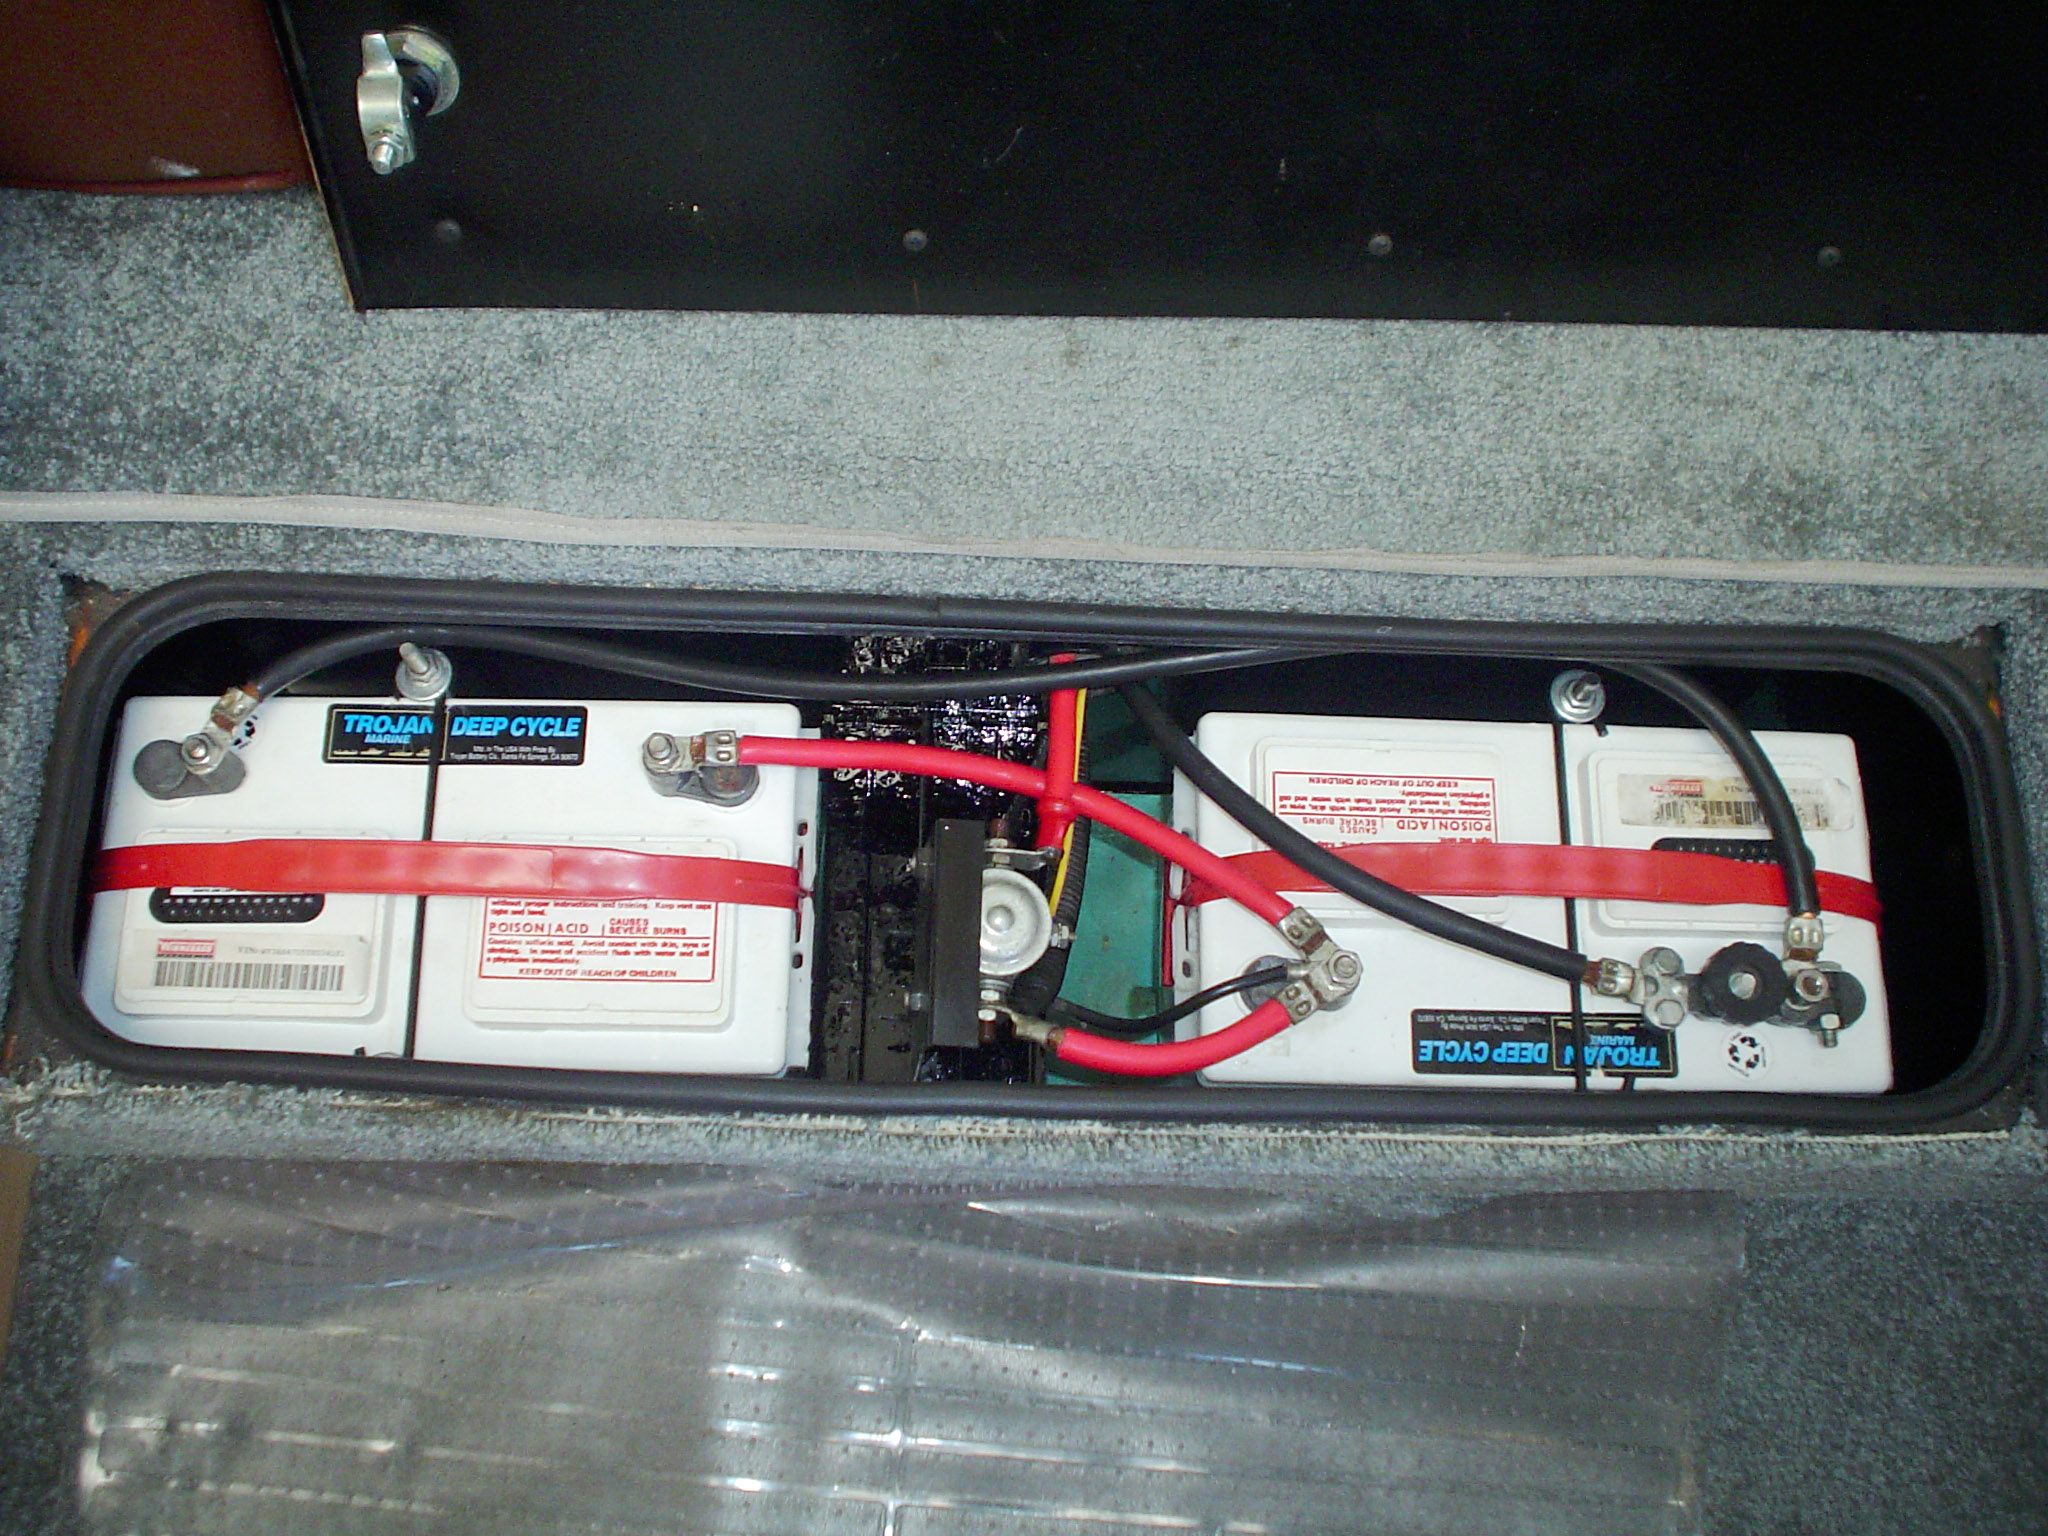
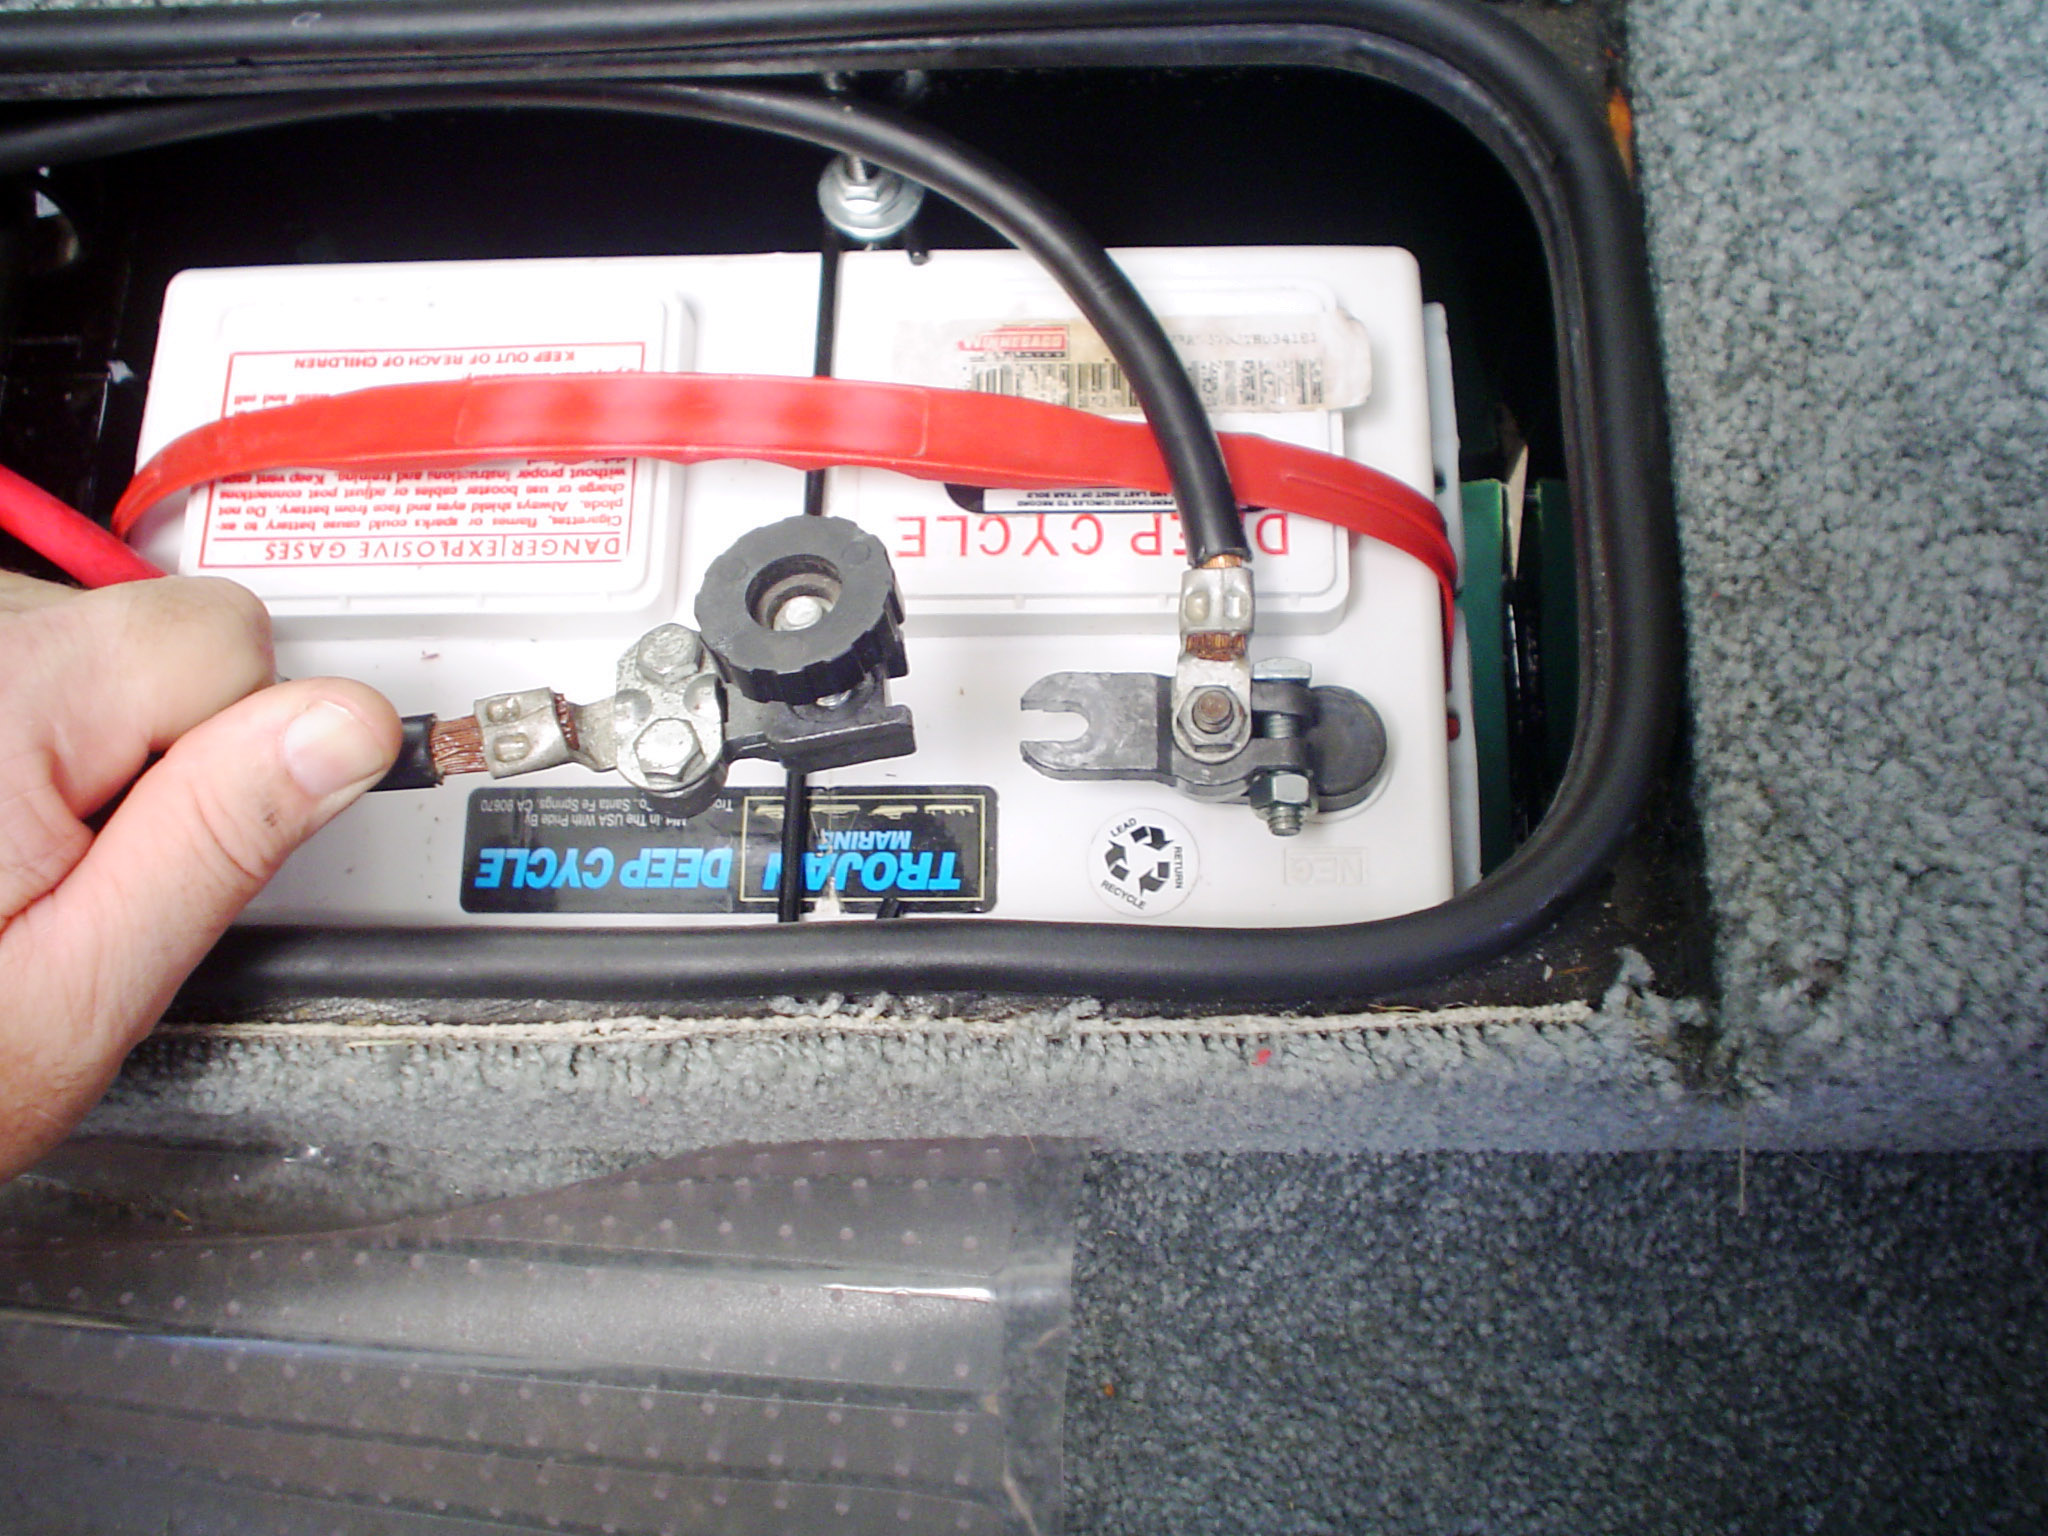
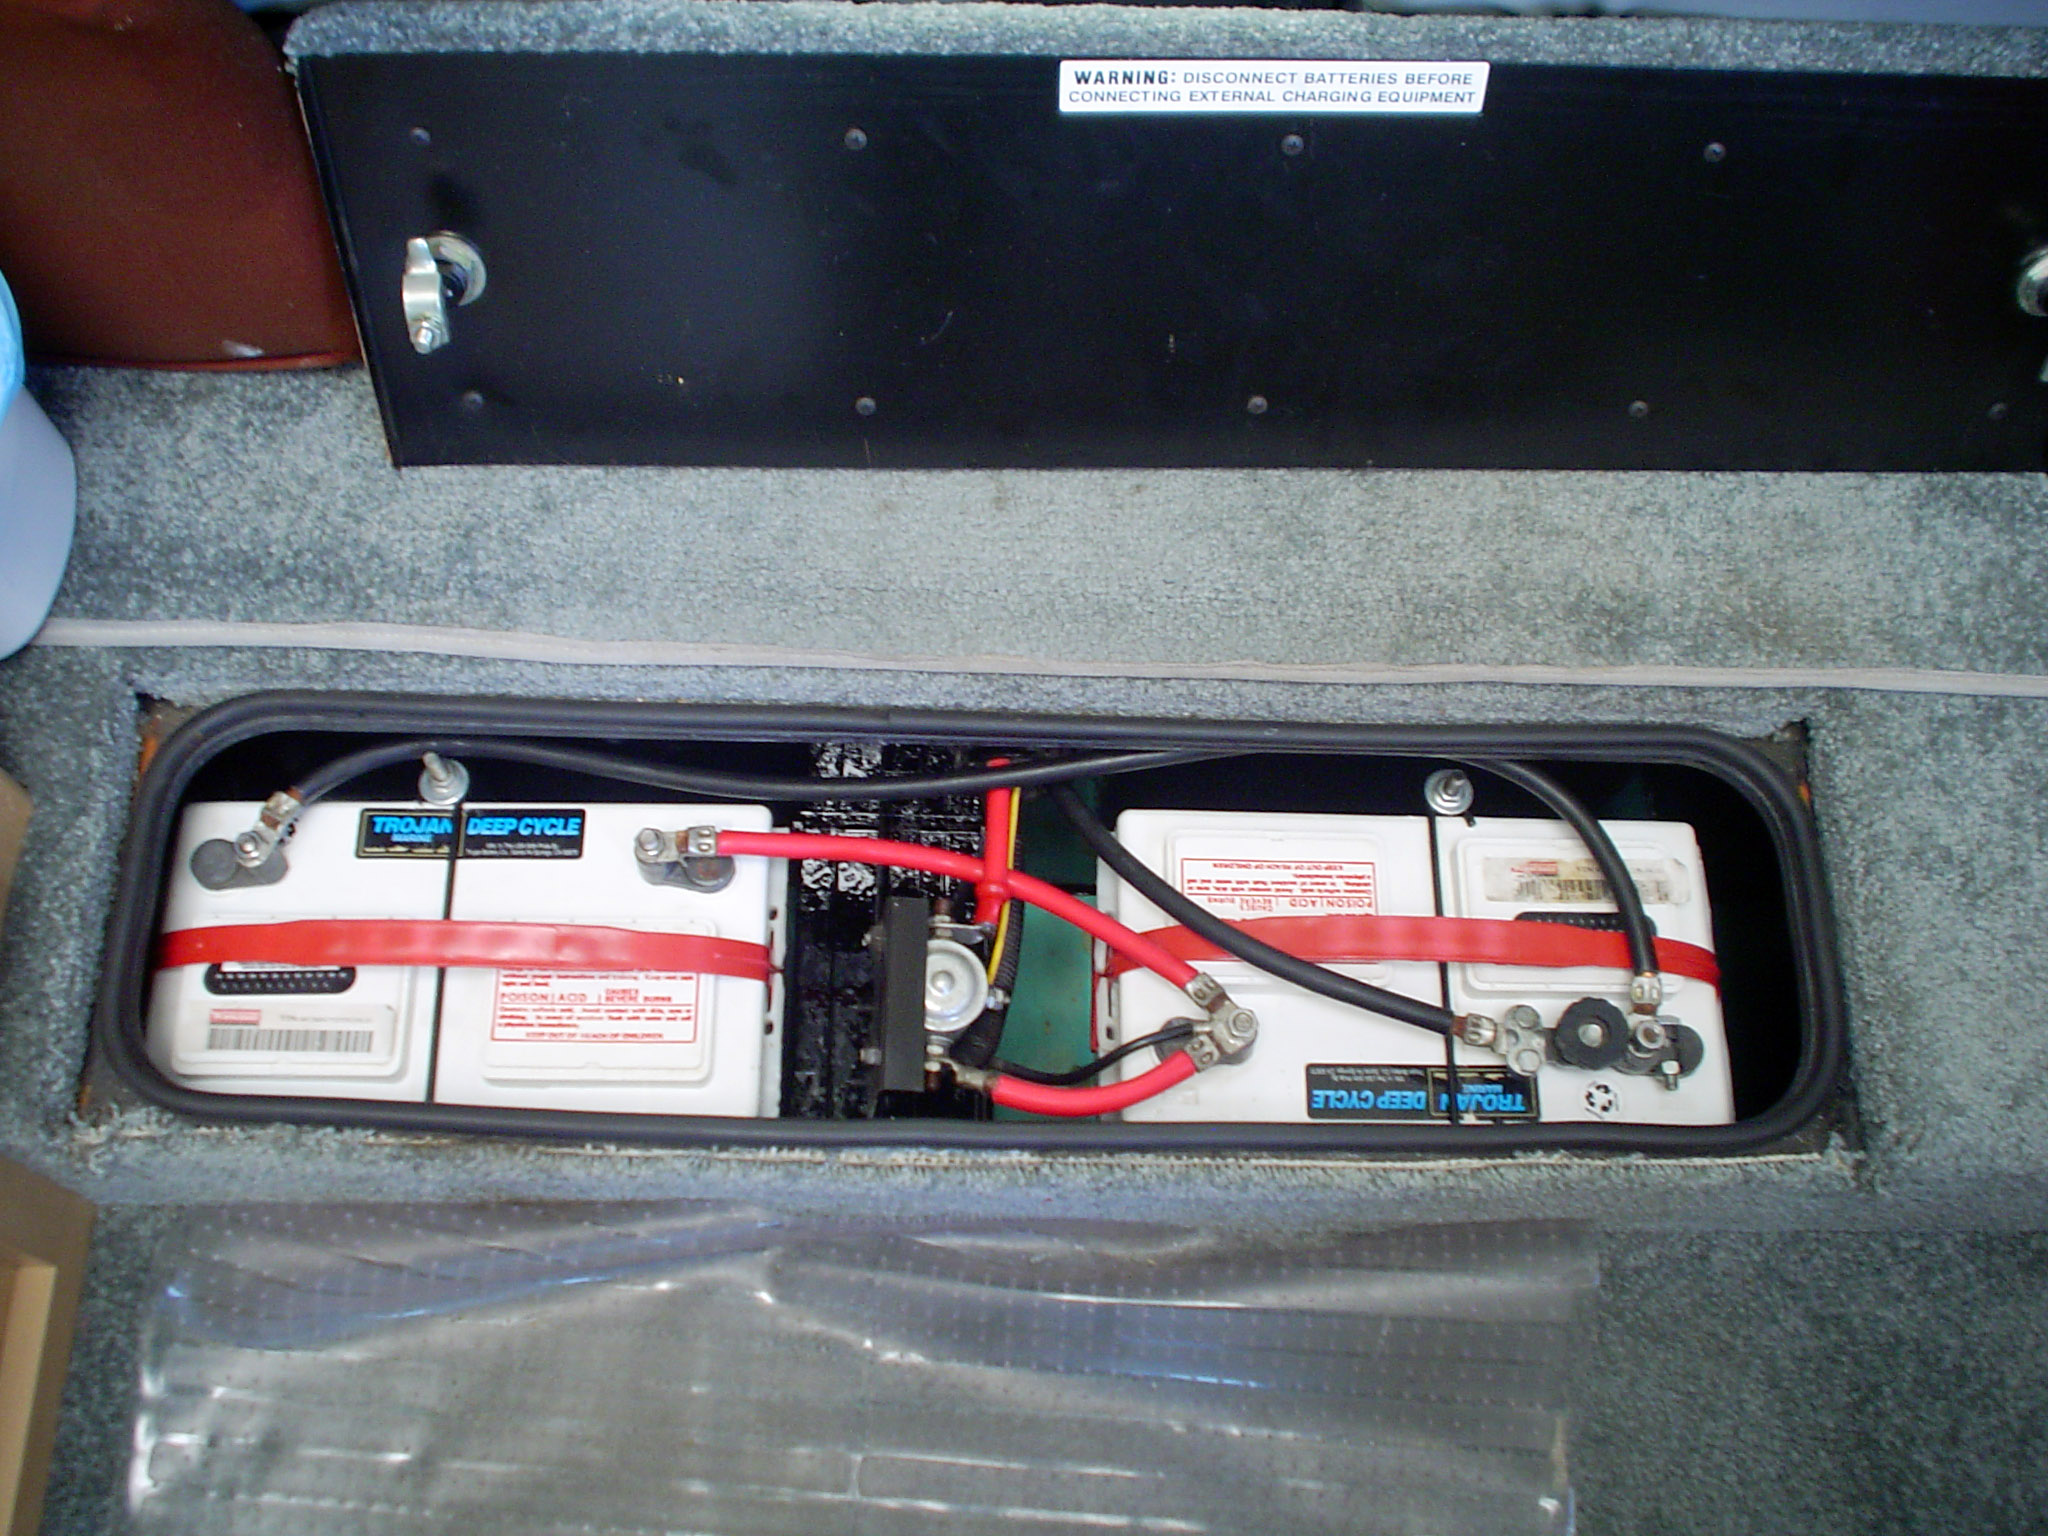
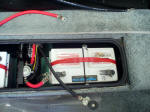
One thing to remember if you ever disconnect the cables is
that these batteries are wired in parallel and not in series. Positive goes to
positive and negative goes to negative. Two or more 12V batteries wired in parallel
will always give 12V but a lot more amps. Two or more 12V batteries wired in series
will give 24V.
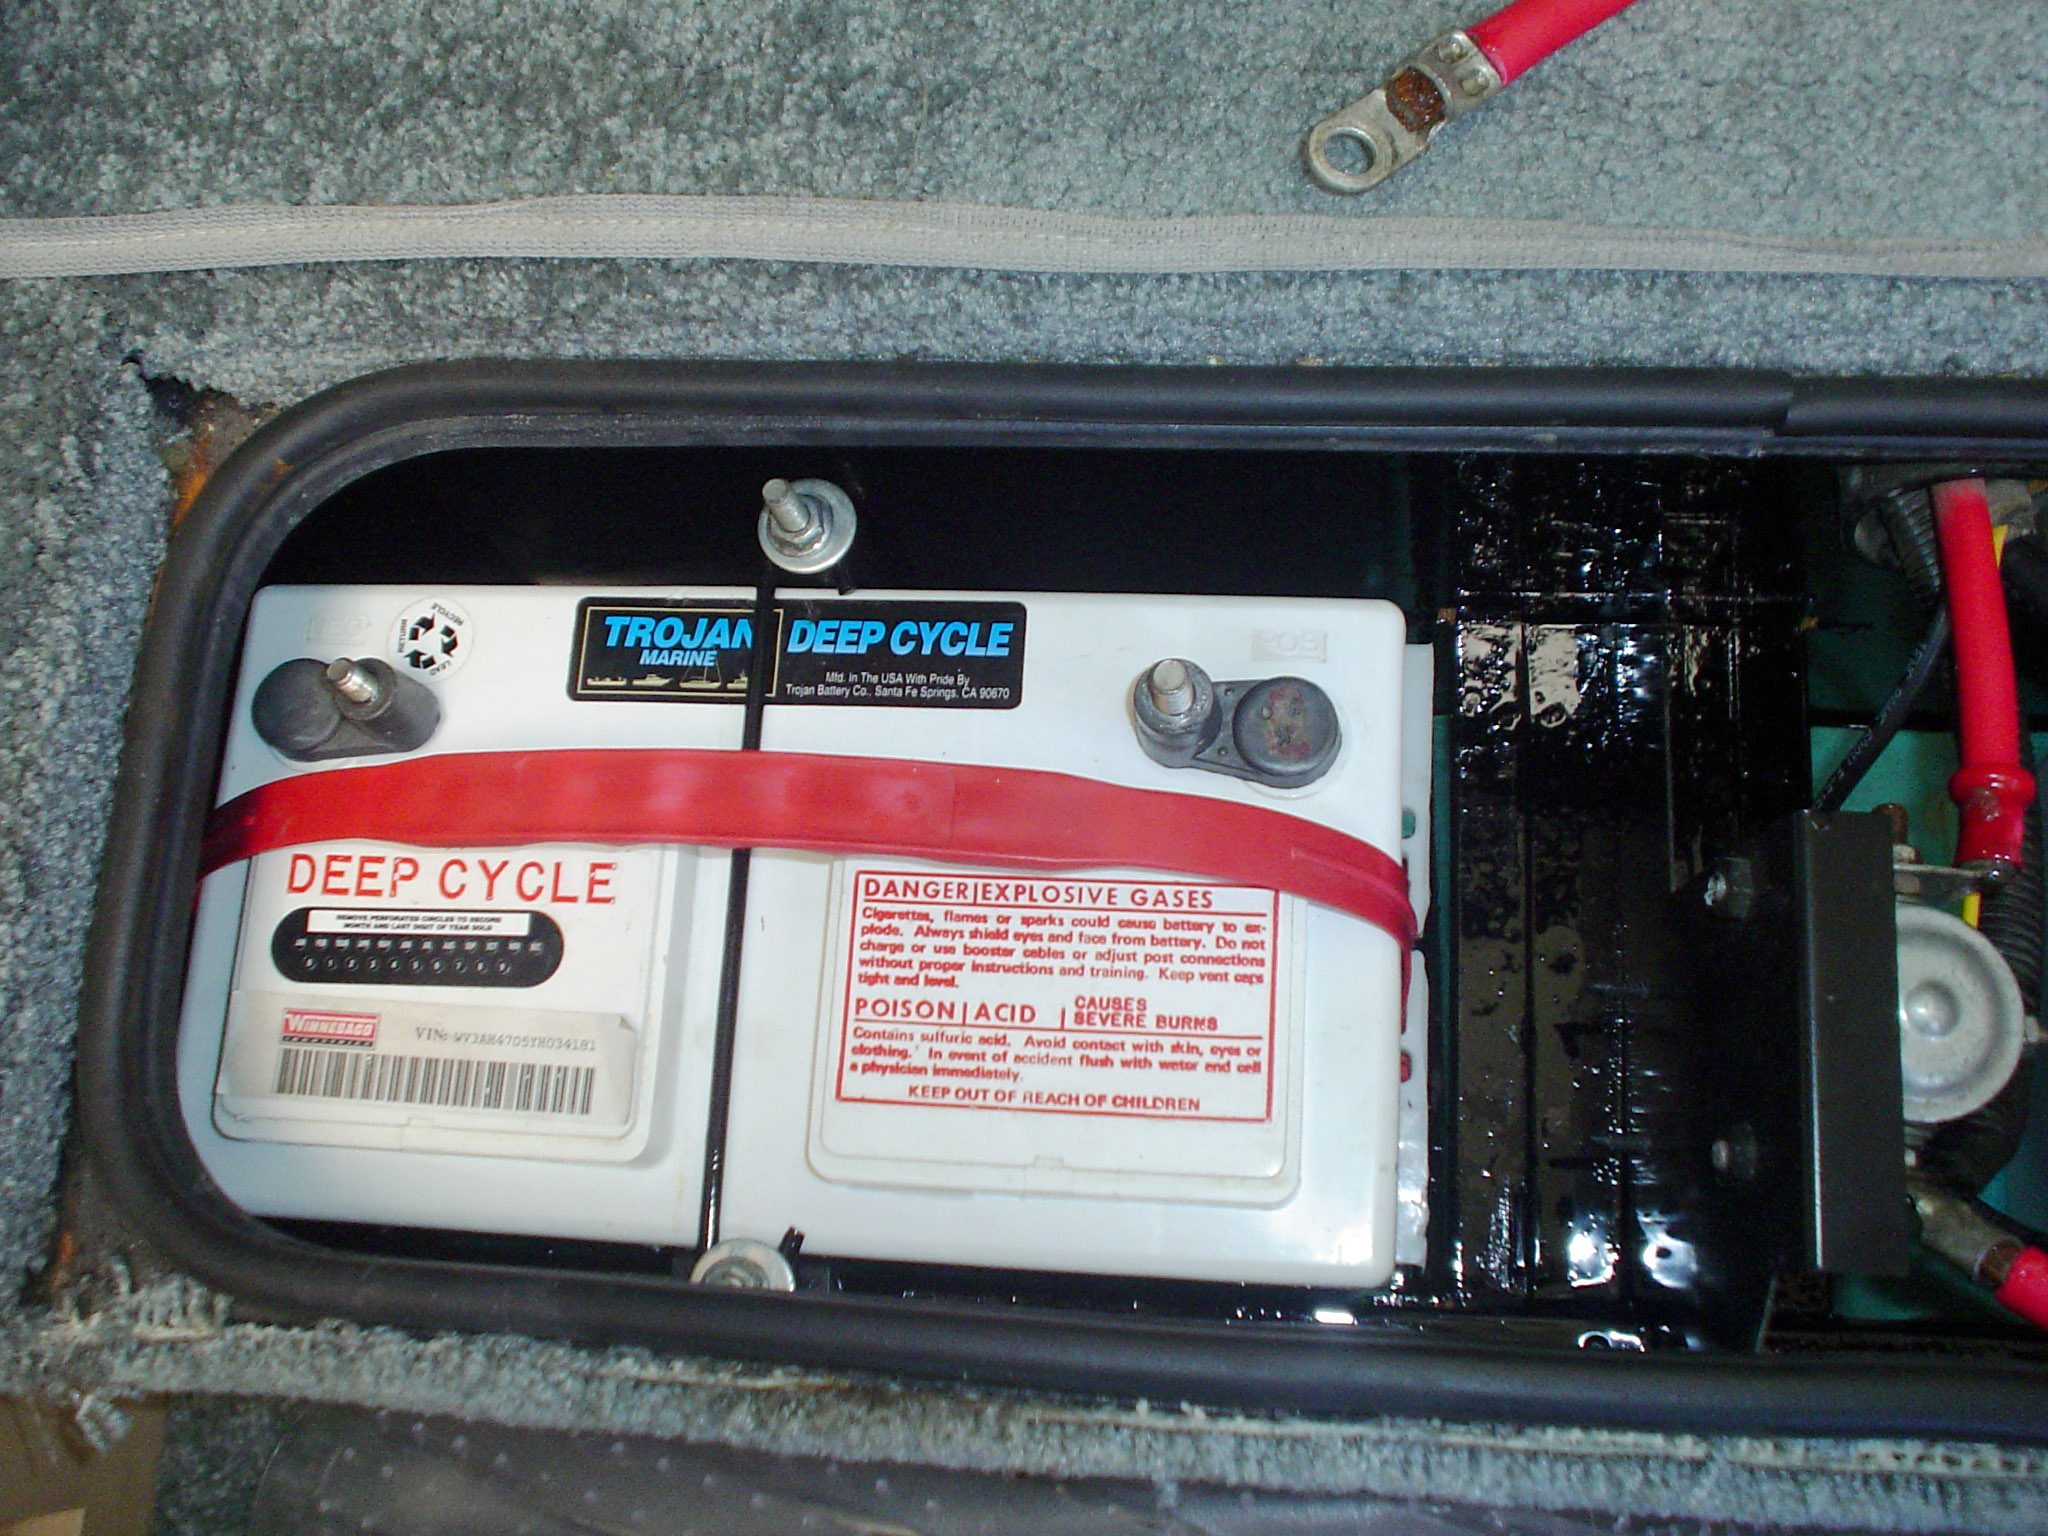
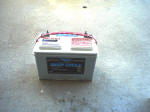
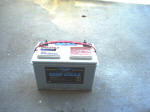
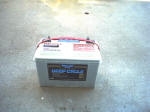
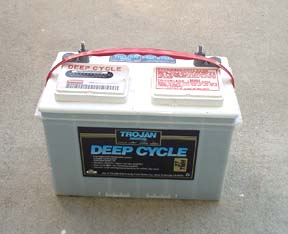 The
standard battery found in a Rialta is a 12 volt, Deep Cycle, BCI Group 27,
Trojan Number 27TMH. Trojan's specifications for this battery are: The
standard battery found in a Rialta is a 12 volt, Deep Cycle, BCI Group 27,
Trojan Number 27TMH. Trojan's specifications for this battery are:
Reserve Capacity at 25 Amps = 200 minutes
Reserve Capacity at 75 Amps = 51 minutes
Cold Cranking Amps @ 0°F = 620 Amps
Cranking Amps @ 32°F = 760 Amps
5 Hour Rate in Amp-Hours = 95 AH
20 Hour Rate in Amp-Hours = 115 AH
Size = 12- 3/4" Length X 6-3/4" Width X 9-3/4" Height
Weight = 59 lbs. each (Yes, that's a total of 118 pounds of batteries you've been
hauling around!)
A little bit of information about the specs is appropriate.
The "Cranking Amps" of this battery is meaningless because this battery is not
designed to start the engine but rather supply power for various devices in the
coach area. Therefore, the important factor to consider is the "Reserve Capacity"
which tells you how long the battery will last when you are pulling power out
of it. This is where a "Deep Cycle" battery will differ greatly from a normal
"starting" battery. If you check various competing brands of this Group 27 battery,
you'll find that nearly all of them fail to meet the performance of the Trojan.
This doesn't mean that you can't or shouldn't use other brands but you must make
a value decision based on the purchase price and the performance loss. If you
seldom do much dry camping or run the furnace all night long in cold climate areas
without a shore line power source, then lower performing batteries may be right
for you, especially considering that the Trojan battery tends to be somewhat pricey.
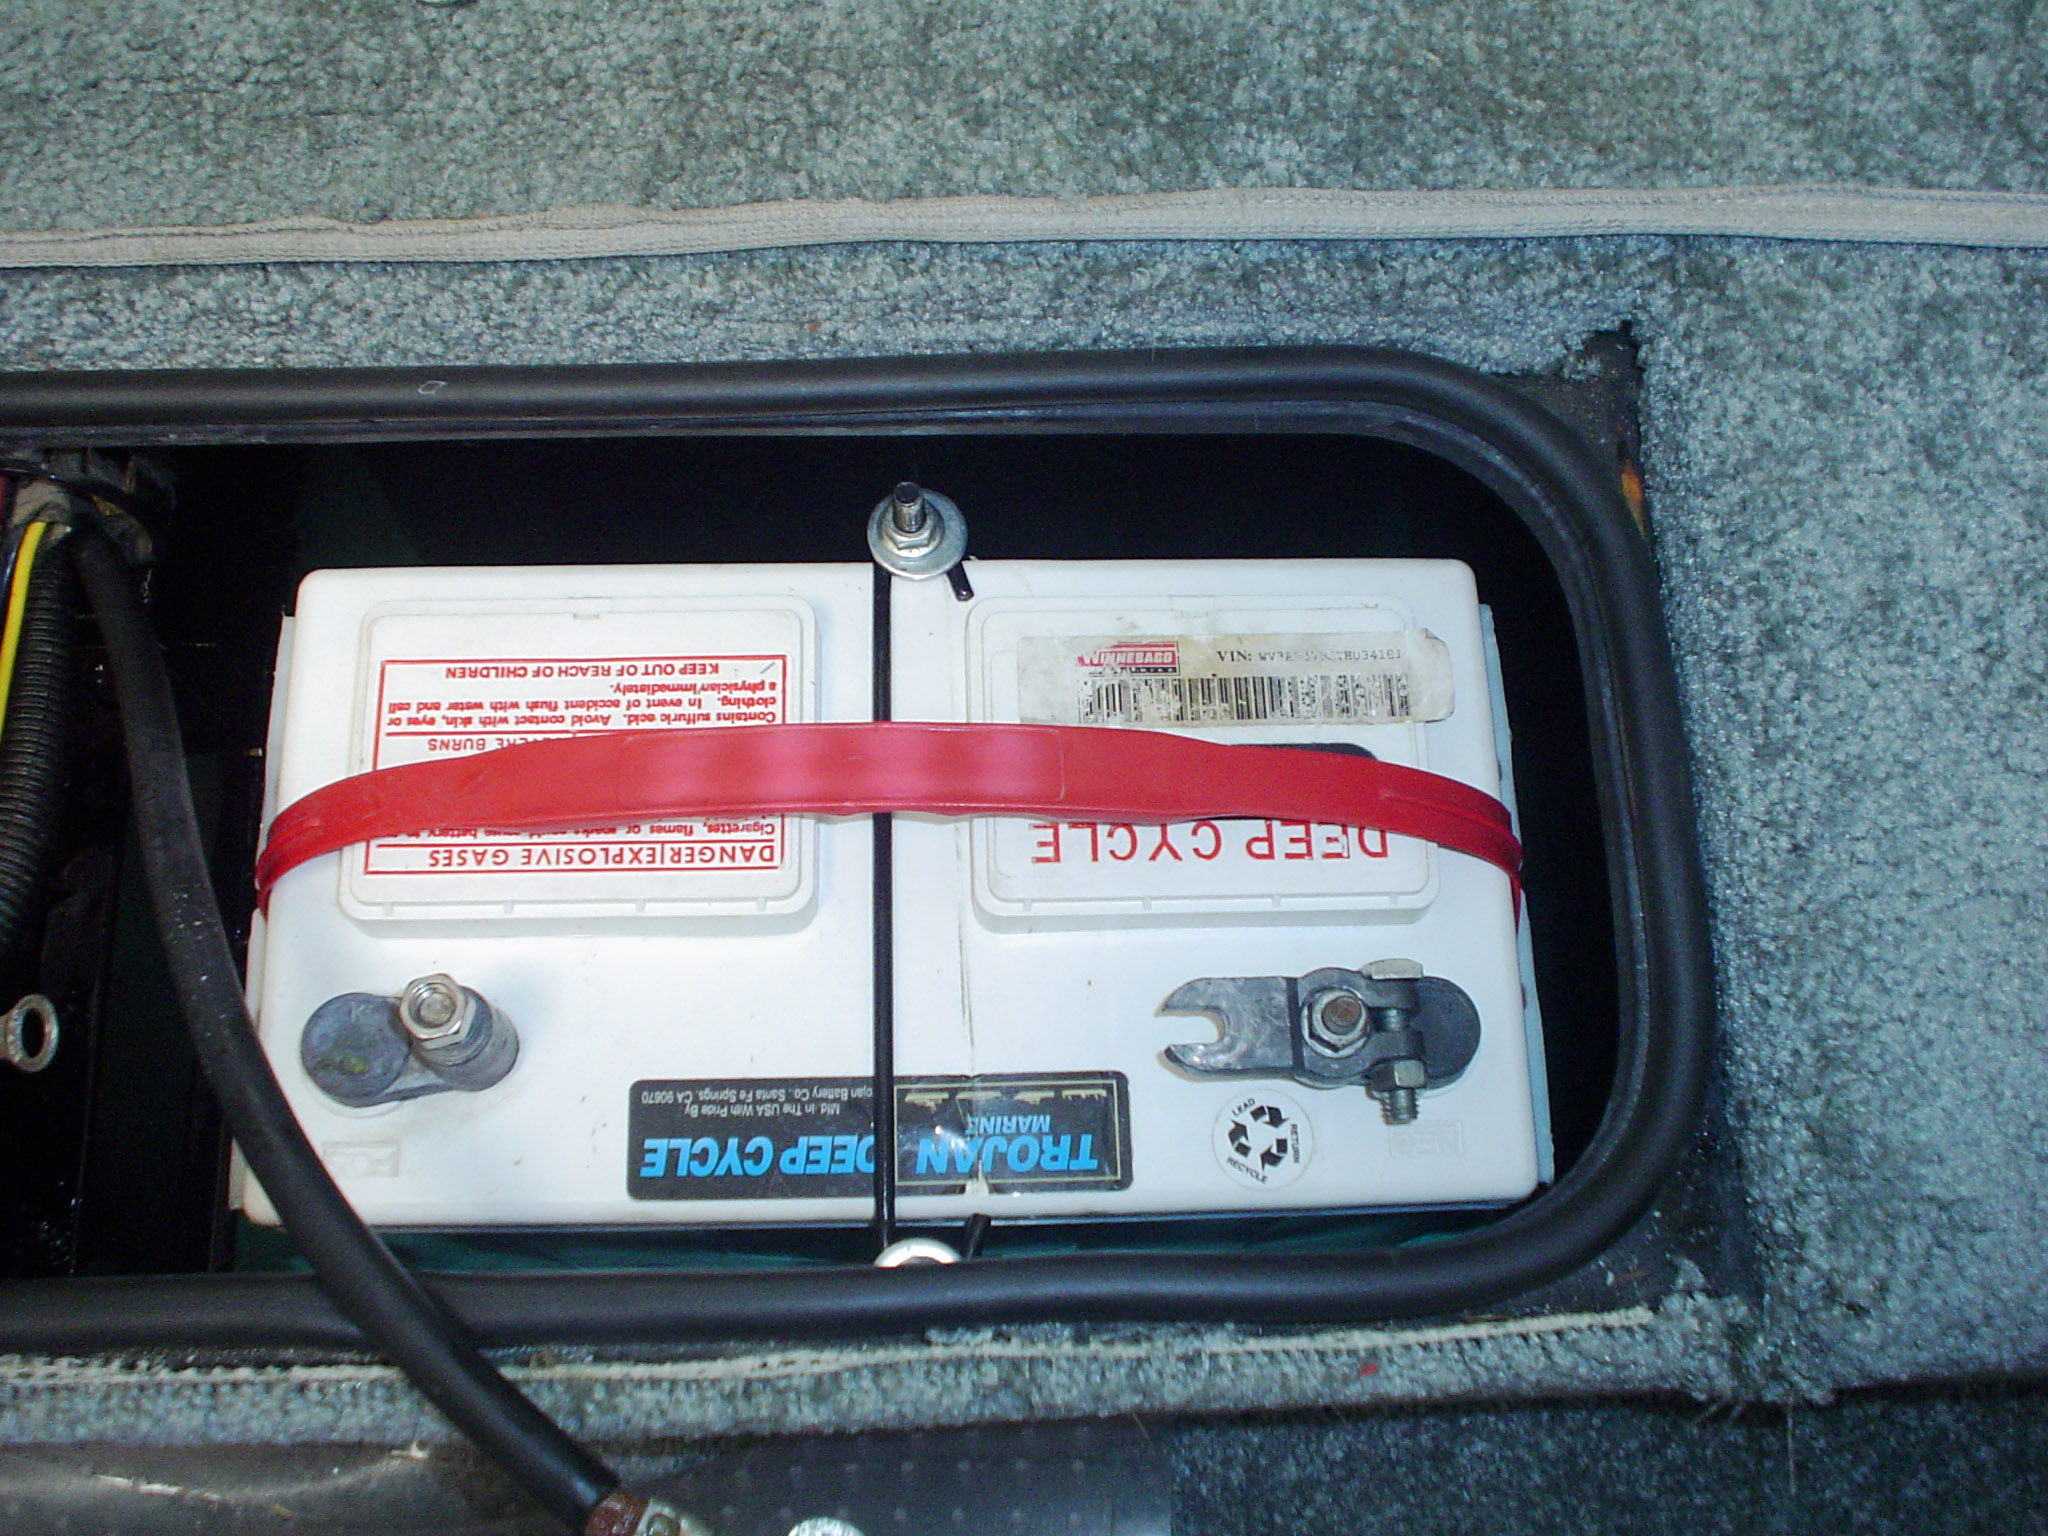
One more thing about the size of the battery. The BCI size
number is "Group 27" but be aware that the exact size between various brands may
change to a slight degree. For some unknown reason, Winnebago has chosen to keep
the left side compartment very tight for installing a Group 27 battery. Its the
length of the battery that causes problems in this left side area. But the Trojan
measuring 12-3/4" long will fit if you know how to accomplish the task. Most people
try to remove the right side of the battery first which is the easiest and that
is when they run into trouble because with the right side lifted clear, the left
side of the battery just won't clear past the top of the opening. If you remove
the left side first by keeping the battery all the way to right (towards the middle
of the compartment), then tip the battery slightly so that the left side comes
out first, you'll find that is just clears the opening and then the right side
will follow. Its almost opposite of what you'd logically think the sequence would
be but the battery compartment will fit two size 27 batteries. Re-installation
must follow the same sequence: tip the battery so that the right side is in position
and then slowly drop the left side which will just clear the top of the opening.
If you purchase any other brand of a Group 27 battery, carefully
measure the length of the battery. If it is longer than 12-3/4", you may need
to carefully cut off some un-needed plastic on one end of the battery in order
to get it to fit into the left compartment of the battery box.
BCI Group Size
Chart
How Lead Acid
Batteries Work
Exide
Application Guide 2002
Exide
Battery Specifications (April 2003)
[ return to top ]
Coach Battery Maintenance
Periodic maintenance of the coach batteries is necessary and
the tasks generally fall into one of two categories: maintaining the level of
the electrolyte or cleaning cables and connectors.
You must insure that the electrolyte level never drops to a
level where the plates are exposed to air. Normally that isn't a problem because
these deep cycle batteries have a huge level of electrolyte and can go for a long
time without the need of adding water to bring the level up to spec. You can easily
check the levels with the batteries installed in position but a flashlight might
be needed to see. Use only distilled or de-ionized water to bring the level up
to about 1/8" below the fill well of each cell.
Cleaning the battery and cables is a little more intensive
task but if you really want to keep things in tip-top shape then this extra step
is worthwhile. If you see corrosion on any of the battery cables or terminals,
or any on the hold down metal straps, then some extra work is going to be needed.
The metal hold down straps are particularly vulnerable because they sit right
on top of the battery where any acid that is prevalent in that area will attack
the steel and cause the corrosion.
 I
suggest that each battery be completely removed so that you can hose down the
battery with a garden hose to insure that you rinse off any debris or acid on
the exterior surfaces of the battery. At the same time, you can clean off the
metal hold down straps by sanding the corrosion off and repainting as necessary.
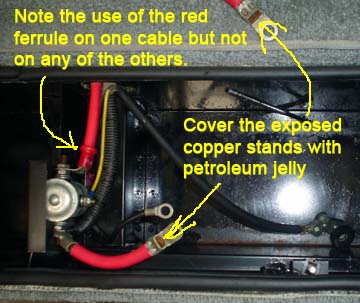
Before you re-install the batteries, check and clean the cable terminals until
you see bright shiny metal. On the areas where the copper stands of the cable
are crimped into the connector, a small dap of petroleum jelly will protect the
exposed copper. As long as the batteries are out, you may wish to take a good
look at the battery box maintenance. I
suggest that each battery be completely removed so that you can hose down the
battery with a garden hose to insure that you rinse off any debris or acid on
the exterior surfaces of the battery. At the same time, you can clean off the
metal hold down straps by sanding the corrosion off and repainting as necessary.
Before you re-install the batteries, check and clean the cable terminals until
you see bright shiny metal. On the areas where the copper stands of the cable
are crimped into the connector, a small dap of petroleum jelly will protect the
exposed copper. As long as the batteries are out, you may wish to take a good
look at the battery box maintenance.
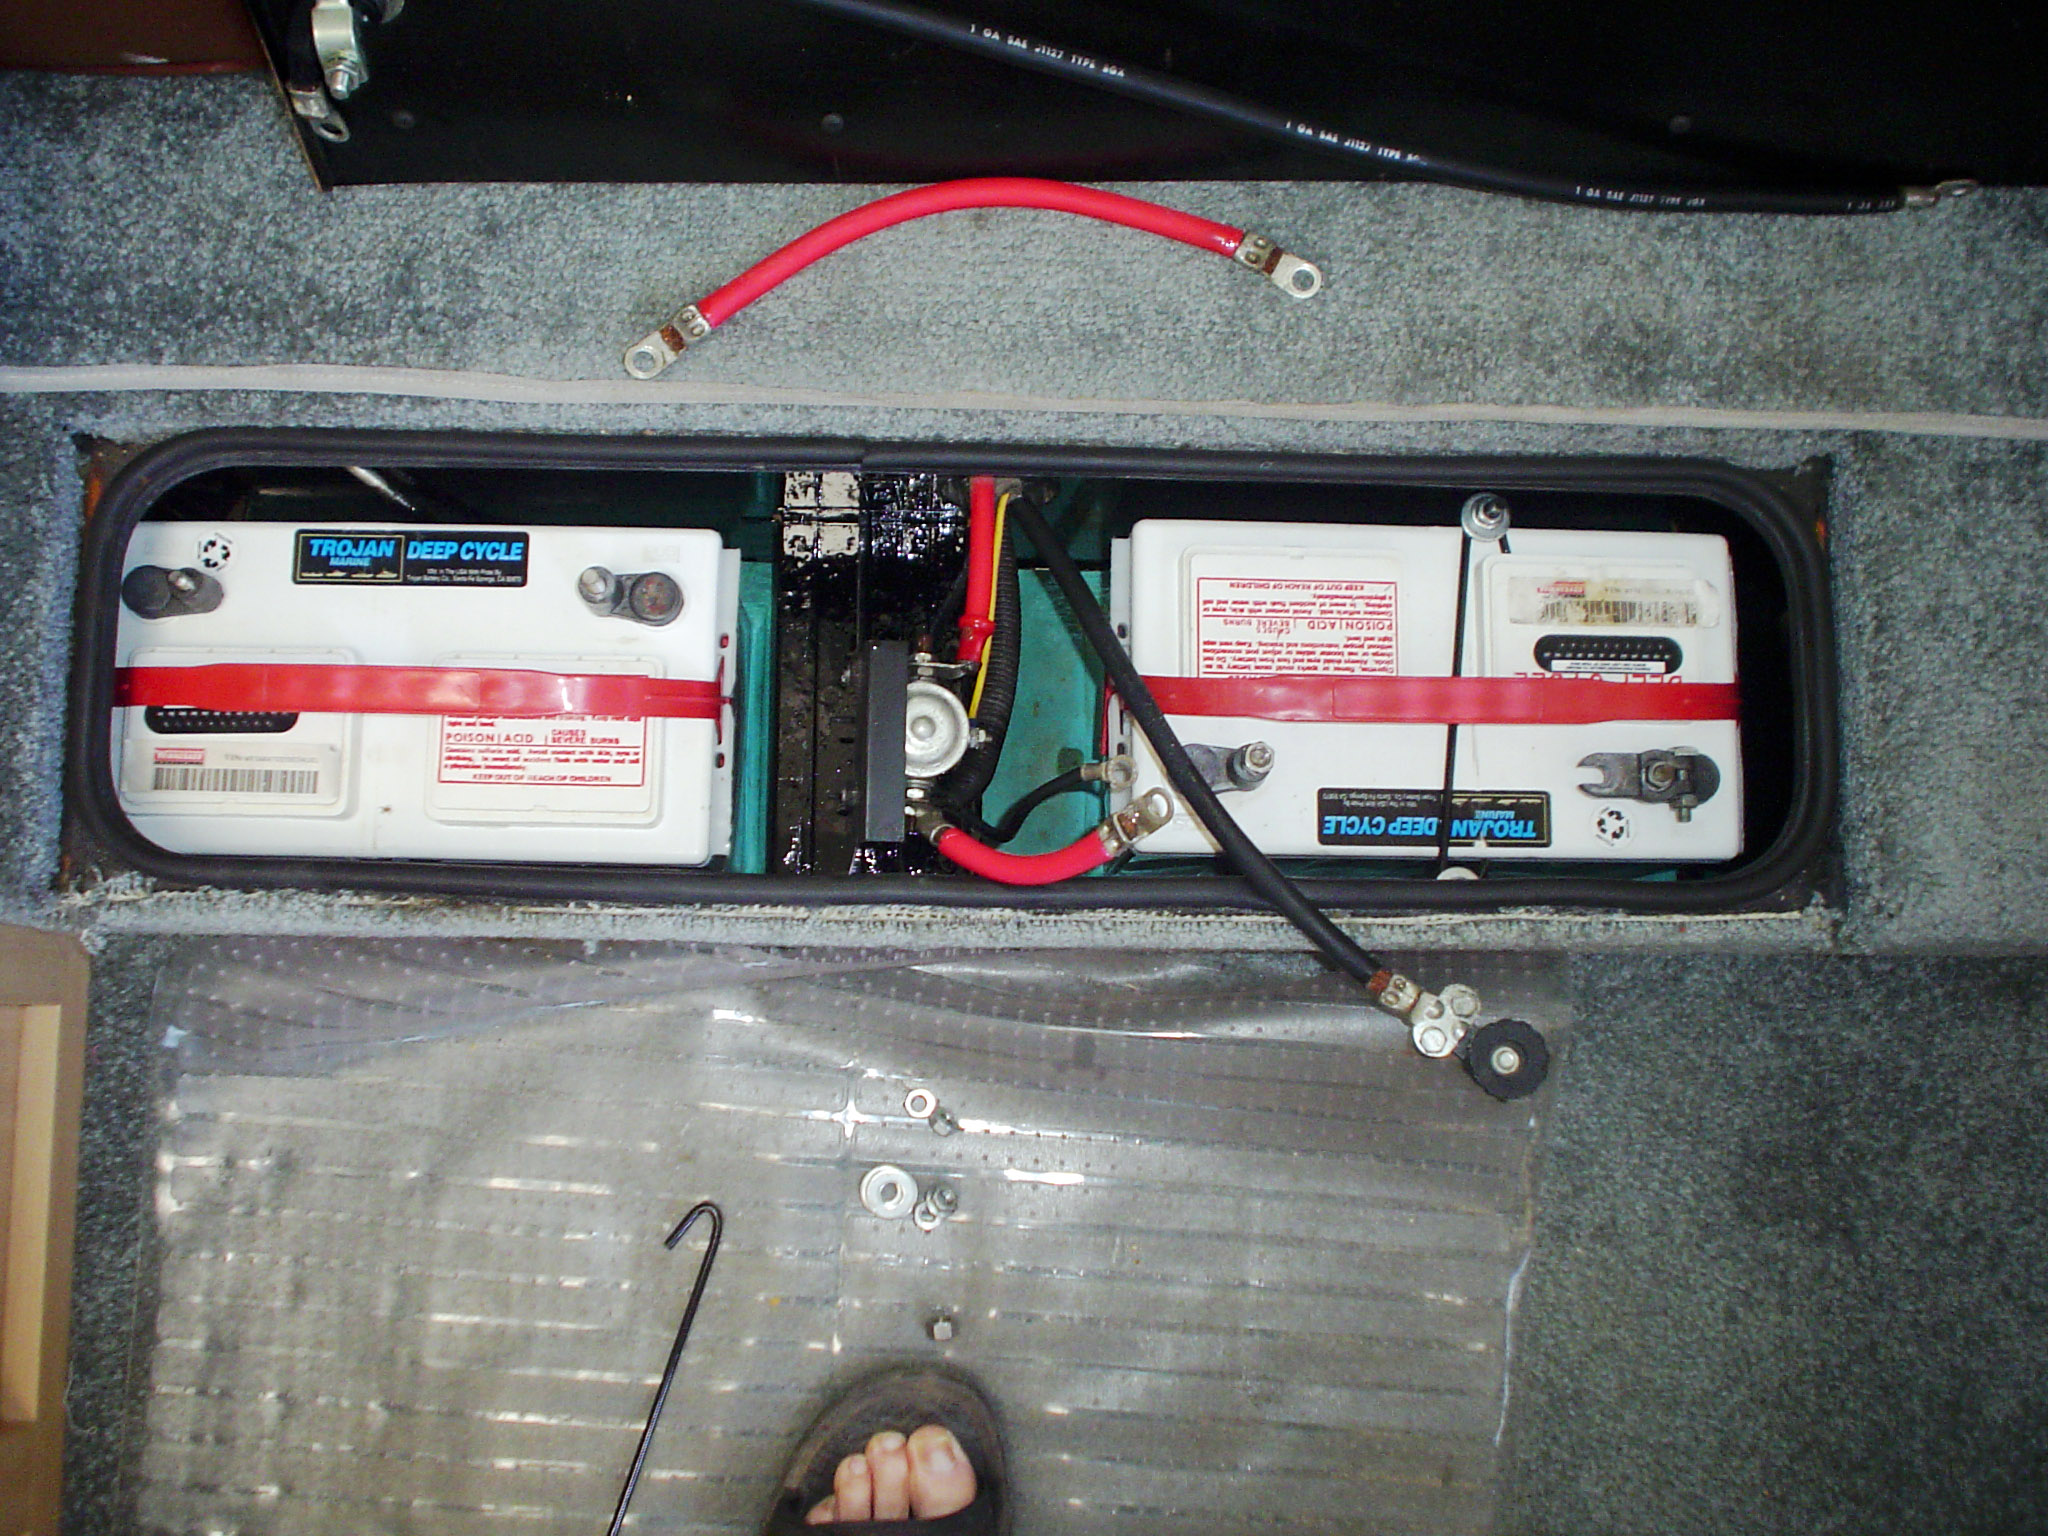
All of the battery cables in this area are "custom" sizes and
were made by Winnebago. If you have a cable that needs replacement, take the old
cable to a large, well-stocked auto supply store and see if they can match it
to a stock item that is very close in size. An exact match is not necessary and
you can easily accommodate a cable that is an inch or two longer but avoid getting
a replacement cable that is shorter than the original.
The Trojan Battery Company has an informative brochure about
Deep Cycle
Battery Maintenance in PDF format (467K) that you should download and read
thoroughly.
[ return to top ]
Battery Box Maintenance
Whenever performing some specialized maintenance on the batteries
that may require you to temporarily remove the batteries, this would be
the best time for some observations to be made and maintenance of the battery
box area to be accomplished.
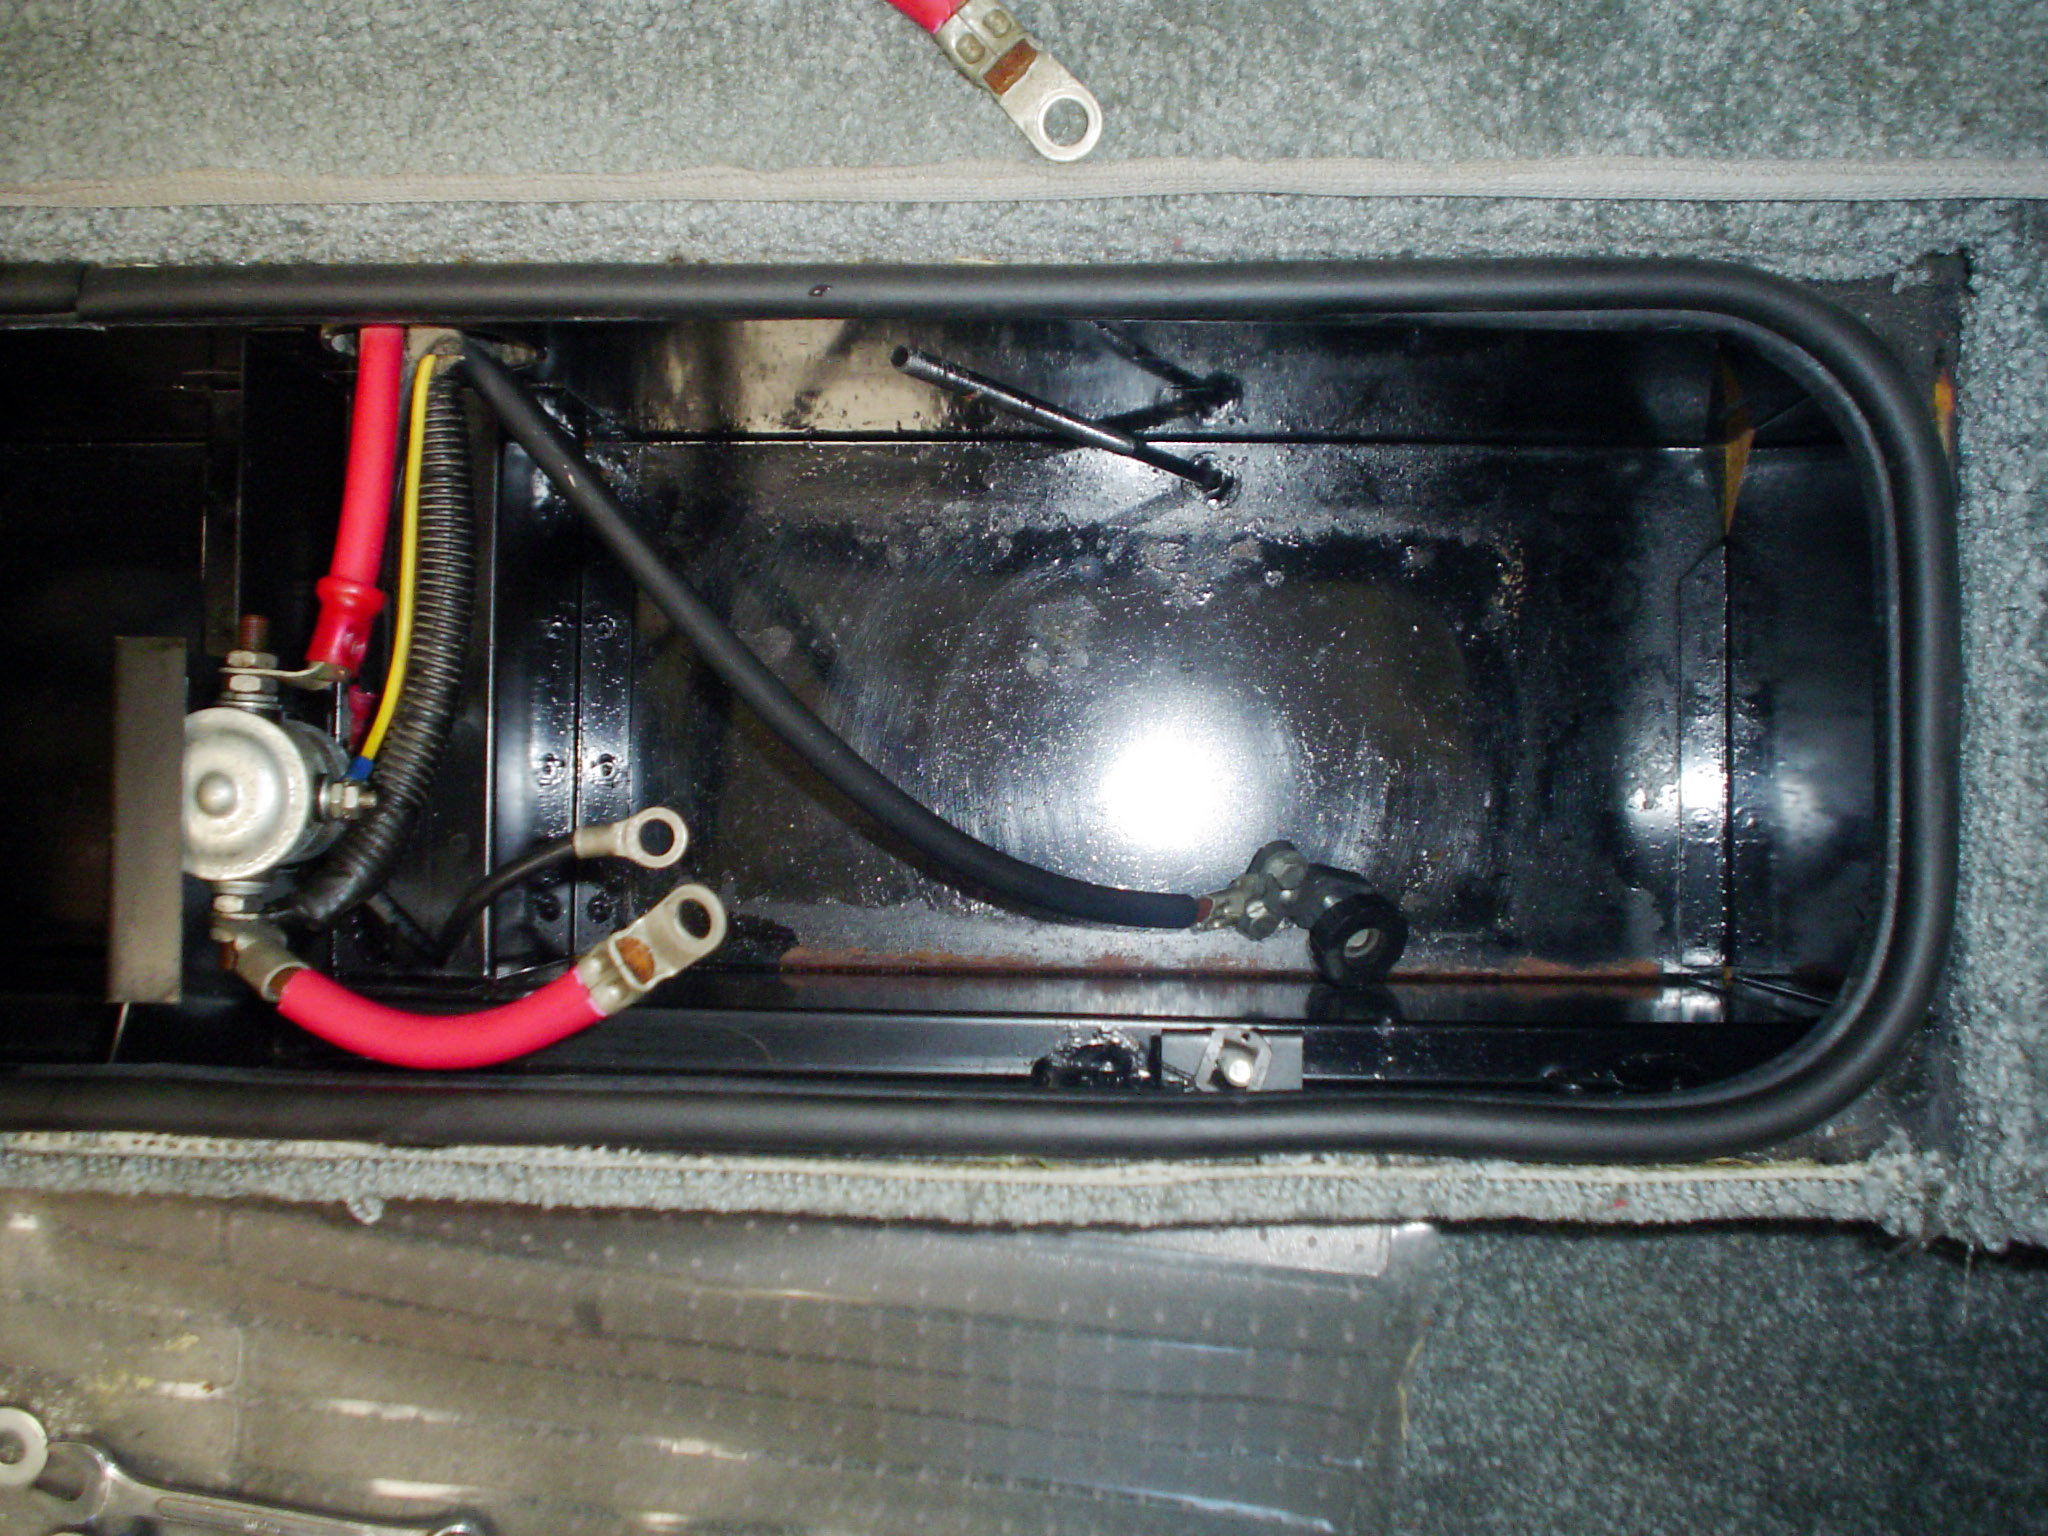
 With
both batteries removed, you will probably find some rust and corrosion occurring
in the black sheet metal. You will also note some vent holes or notches in the
lower corners of the box along with some un-used large cable holes in the upper
sides (perhaps used for air vents.) All of these openings mean one thing: the
battery box is directly exposed to outside elements such as water, slush, and
salt in winter driving areas. All of these elements will eventually cause rust
of the sheet metal battery box. You may also note areas along the sides of the
box near where the top of the battery would be that have corrosion on those areas.
This is probably due to out-gassing from the battery which is a normal process
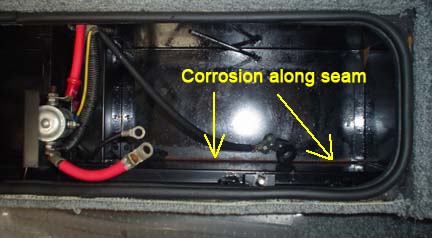
but it severely corrodes the sheet metal. With
both batteries removed, you will probably find some rust and corrosion occurring
in the black sheet metal. You will also note some vent holes or notches in the
lower corners of the box along with some un-used large cable holes in the upper
sides (perhaps used for air vents.) All of these openings mean one thing: the
battery box is directly exposed to outside elements such as water, slush, and
salt in winter driving areas. All of these elements will eventually cause rust
of the sheet metal battery box. You may also note areas along the sides of the
box near where the top of the battery would be that have corrosion on those areas.
This is probably due to out-gassing from the battery which is a normal process
but it severely corrodes the sheet metal.
I suggest taking a garden hose into the inside of the coach
and first thoroughly rising out the battery box. You may want to cover the solenoid
with a plastic baggy temporarily. After rinsing, dump baking soda all over the
bottom of the box and especially on any areas that are corroded. Allow this powder
to soak up a little water to become a paste and then use a stiff brush to scrub
the paste mixture into any corroded areas. I suggest the use of an old toothbrush.
Pay particular attention to the bottom of the box where there are sheet metal
seams. Add a little more water to the paste mixture to insure that it soaks into
the seams where it will neutralize any acid on the surface of the metal. Now use
the garden hose to thoroughly rinse all traces of the baking soda mixture out
through the bottom holes.
Allow the water in the battery box to dry thoroughly. Note
that it may take several hours or overnight for water trapped in the sheet metal
seams to dry so remember this if you will be re-painting as hidden areas that
are still moist will not receive any paint. Use a wire brush or emery cloth to
grind or scrape away all traces of the corrosion until you see bright shiny metal.
Use a spray paint primer on these shiny metal areas. When the primer is dry, use
a black spray enamel to match the original paint. One can should be enough to
completely repaint the battery box. Pay particular attention to the sheet metal
seams at the bottom and any other areas of corrosion. It is difficult to spray
the sides of the box since it is so narrow but several light coats are much better
than one heavy coat which will end up running and sagging. It might be a good
idea to set up some drop cloths around the carpet and seats otherwise the black
overspray will remodel your interior!
In spite of your best efforts, every few years this battery box will be corroded
again and you'll need to repeat the entire procedure. :-(
[ return to top ]
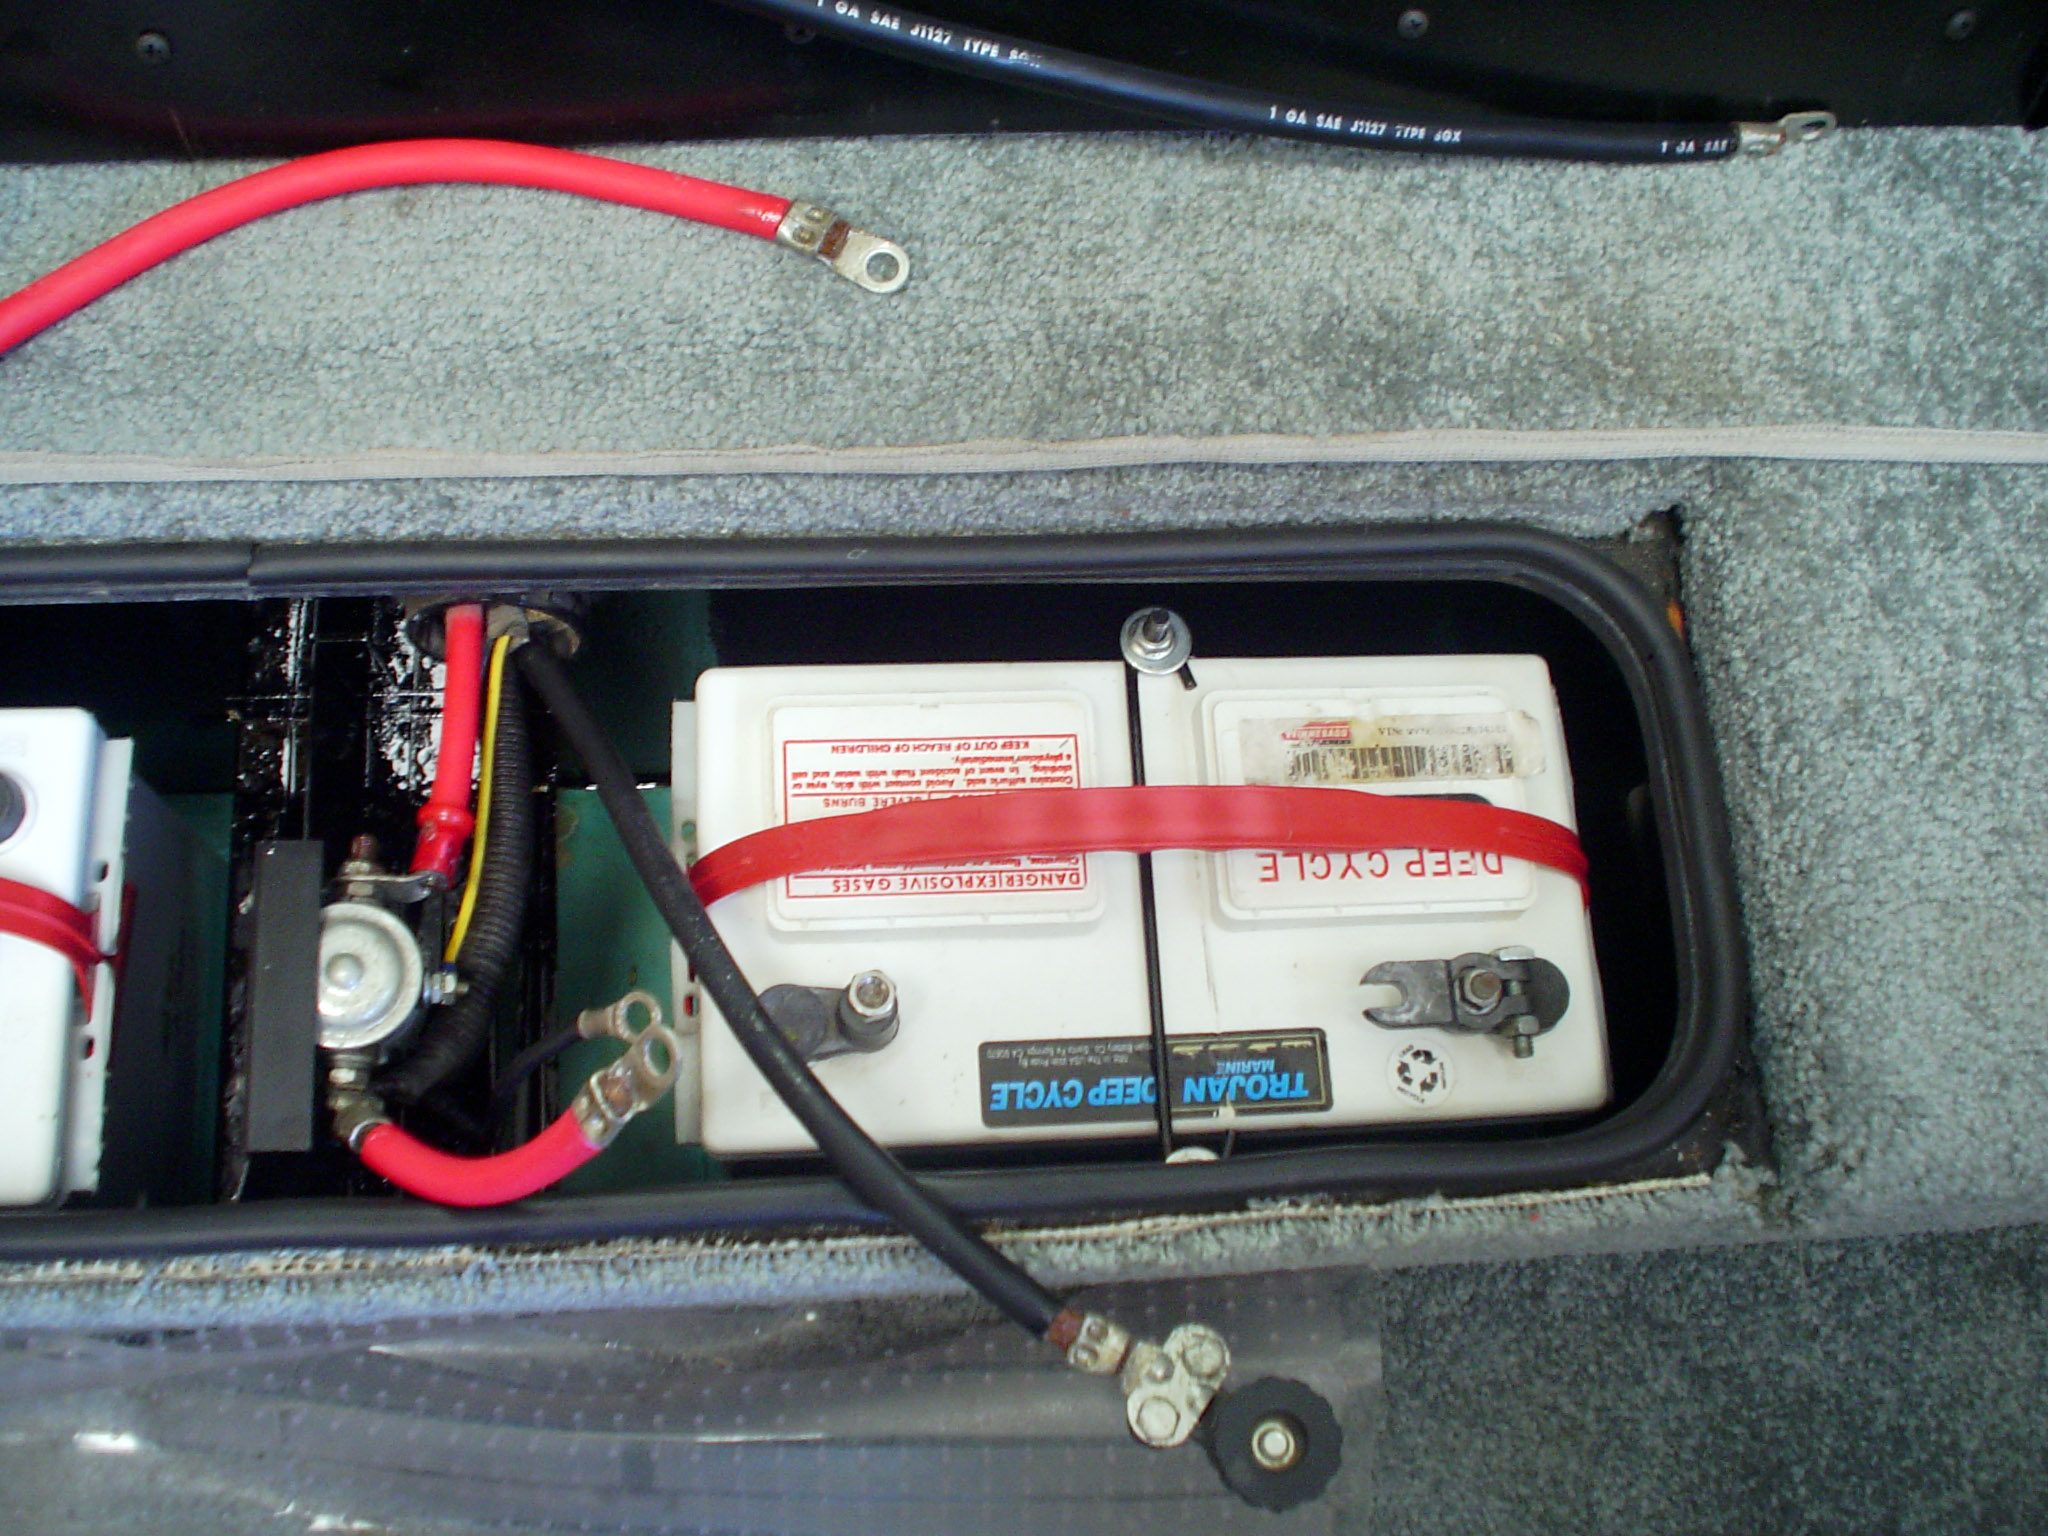
Coach Battery Isolation Solenoid
If you find yourself in the middle of a trip with coach batteries
that aren't getting charged while you drive all day, the problem may be the isolation
solenoid which is found in the coach battery box. A simple fix to try is to tap
it lightly with a solid object such as a hammer after the engine is running. This
might be enough shock to close the contacts so the batteries will get charged.
The function of this device is to make sure the coach batteries
are isolated from the engine battery while you are camped without the engine running.
When the engine is running, this device closes contacts and enables the engine alternator
to charge the coach batteries.
 When
the ignition key is turned to the on position, a relay is activated by the vehicle
battery and sends 12 volts to the solenoid coil. If you listen carefully you
can hear the solenoid click. Now, all three batteries, the vehicle battery and
the two coach batteries are connected together. This scenario happens each the time the key
is operated when the vehicle battery is good. When the vehicle battery is down
to the point where it will not engage the solenoid or run the starter, pressing
the overhead auxiliary start switch will power the solenoid from the coach batteries
once again connecting all three batteries in parallel,
assuming a reasonably good charge on the coach batteries. When
the ignition key is turned to the on position, a relay is activated by the vehicle
battery and sends 12 volts to the solenoid coil. If you listen carefully you
can hear the solenoid click. Now, all three batteries, the vehicle battery and
the two coach batteries are connected together. This scenario happens each the time the key
is operated when the vehicle battery is good. When the vehicle battery is down
to the point where it will not engage the solenoid or run the starter, pressing
the overhead auxiliary start switch will power the solenoid from the coach batteries
once again connecting all three batteries in parallel,
assuming a reasonably good charge on the coach batteries.
Even with a vehicle battery that does not
have enough charge to run the starter, the solenoid might still be heard clicking
when the key is turned to the on position. The reason for this is that the Camdec
solenoid (Winnebago OEM solenoid) has only an 8.0 volt pull in voltage and a
2.5 volt hold voltage. If this is the case, the auxiliary start switch may never
come into play. This is one of the evils of such a system. You may never know
that your vehicle battery has discharged partially to the point of not being
able to run the starter but having enough charge to operate the solenoid. The wiring is
such that the solenoid will operate when the key is in the on position so
that the alternator will charge the coach battery when the engine was running.
But, when the key is turned to the start position, the solenoid will drop
out.
Another thought. Even though the solenoid
can be heard to click, it does not necessarily mean that the main contacts are
conducting current. Crud buildup on the contacts may preclude current flow.
Most solenoid failures are due to failure of the main contacts not the operating
coil. I taken apart a failed solenoid and the contacts where quite dirtied up
with carbon. I cleaned them up and reassembled it and it worked. Of course,
I had no way of resealing the unit so I tossed it.
I hope this helps. Any questions, give a yell.
Richard Cox
There have been some problems reported with this solenoid and
apparently the internal contacts get burned or badly pitted enough that the current
flow from the alternator to the coach batteries gets interrupted. The solenoid
is sealed and can not be repaired. Such conditions call for a replacement. Installation
is very simple but remember you are working around the positive cables of the
battery so you should first disconnect the negative cable at the battery. By doing
so, you'll avoid the shower of sparks that could occur if you allow the red cable
or your wrench to touch ground. A shower of sparks in close proximity to batteries
is not a good thing especially if there is an accumulation of hydrogen gas!
Electrical Troubleshooting:
-
With the engine running use a V-Ohm meter to read the voltage
on either side of the solenoid. If it is 13-14 VDC on the engine side and 12-13
volts on the battery side, the alternator is not charging the house batteries.
-
Now turn off the engine and plug in to shore power. You should
read 13-14 VDC on the coach battery side and 12-13 VDC on the engine side. This
indicates that the coach batteries are being charged from shore power and the engine battery is isolated.
-
Start the engine and read from terminal to terminal across
the solenoid. If everything is working properly you should read less than .1
VDC. If you read between .1 -1 VDC the solenoid is bad.
Specifications: Must be "continuous duty", single pole, single
throw, normally open contacts, 3-terminal, 80-110 Amps, 12 VDC. Typical costs
start at $30.
The original Winnebago part number is 008-188-01-000 and they
used either a Camdec (discontinued) or Trombetta (www.trombetta.com)
brand solenoid.
Another that many prefer is the Cole-Hersee 24213, with contacts rated at 200 amps continuous.
They seem to hold up very well (mine has been in use for over 8 years.)
These require you to run a wire from one of the small terminals to ground. Most connect it to one of the mounting bolts.
Most large auto parts stores should have something in stock that meet the specifications, just be sure it's rated for continuous duty.
Another source but a somewhat pricey one would be any RV dealership.
[ return to top ]
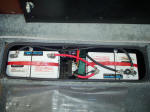
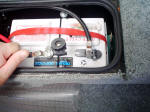
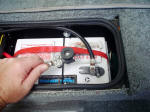
Additional Photos
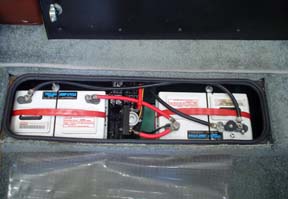
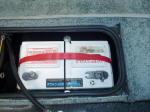
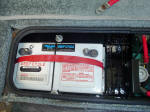
Note- All of the following photos depict certain actions while
changing or maintaining the coach batteries. Some are taken only to provide documentation
of hose and wire hookups so that re-assembly can be done without guesswork. All
photos are in high resolution which means your web browser may automatically resize
the image so that it fits your screen resolution. If it does resize the photo,
you can click the resize gadget to instruct your browser to view it in full resolution.


[ return to top ]
|