|
[
HOME
]
|
|
Model Information
|
|
|
|
VW Service
|
|
|
|
Winnebago Service
|
|
|
|
Tours & Pictures
|
|
|
|
►
Related
Links
|
| |
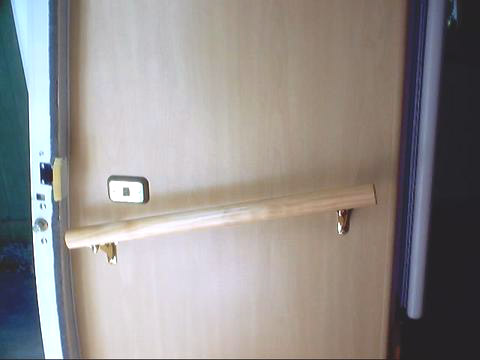
This seemingly non-descript modification was one of the best I had seen. I think
the person who did it probably thought it only provided a handrail to assist elderly
and frail people up and down the entry steps of the Rialta. However, after I thought
about it for a while, it occurred to me that it also solves one of the most annoying
things about the Rialta: the projecting latch pin for the door lock and it tendency
to rip apart shirts and pants of those unknowingly allowing their body to get close
to that side of the entryway. The addition of the handrail along the way of the
Model HD provides a buffer or barrier and helps keep garments and clothing articles
from catching on the projecting door latch. This one gets the Baldy Top Award
For Excellence!
Please note that this can only be done on the Model HD with the refrigerator
wall right next to the entry. In addition, at least one of the brackets will require
additional wood backing in order to get a strong support. This will require removing
the refrigerator in order to install the additional backing for the bracket as noted
in the message below.


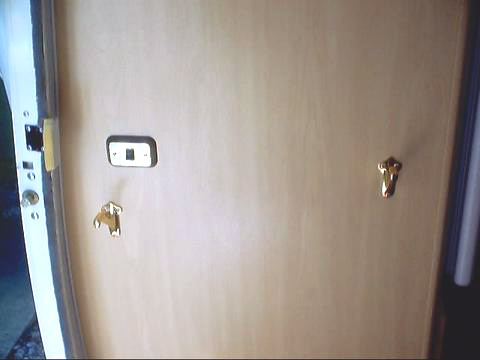
At the request of the senior citizen who rides along with me
in our HD Rialta, I have added a handrail at the coach entry door, mounted on
the side of the refrigerator cabinet. I used standard handrail brackets (solid
brass @ $9.99, 2 each) and stock wood handrail stock ($1.85/ ft; I bought 4' but
used just slightly over 2') from Home Depot. I had to reinforce the side panel
of the refrigerator cabinet because there is no backing behind the paneling in
the front corner. This necessitated completely removing the fridge from the cabinet.
I then glued in a piece of 1" x 6" vertically from the bottom of the cabinet to
the upper corner. This provided sufficient backing for the "inner" bracket. The
area where I mounted the "outer" bracket already had enough thickness of wood
in place. After replacing the refrigerator, I installed the mounting brackets.
I cut the handrail to length and secured it in place. I then removed it to apply
four coats of water based polyurethane varnish, sanding well between coats. The
water-based poly was quick drying (30 minutes between coats) and the whole process
took less than a day. I also rubbed the railing down with automotive polishing
compound (less aggressive than rubbing compound) and applied a coat of wax, buffing
well. I reinstalled the railing to complete the job. The handrail is quite sturdy
and looks good as well. It will make entering and exiting the coach easier.
Richard Cox
2002HD
Additional Modifications:
|
